3D Scope I, II and LC - How to find the IP Address assigned
Table of Contents
Overview
The purpose of this article is to provide troubleshooting steps for a user attempting to access the 3DScope I, II or LC through a web browser. However they cannot as either they do not know the IP address of the counter on their store's local network.
Problem Description
Cannot find the units IP address
Solution
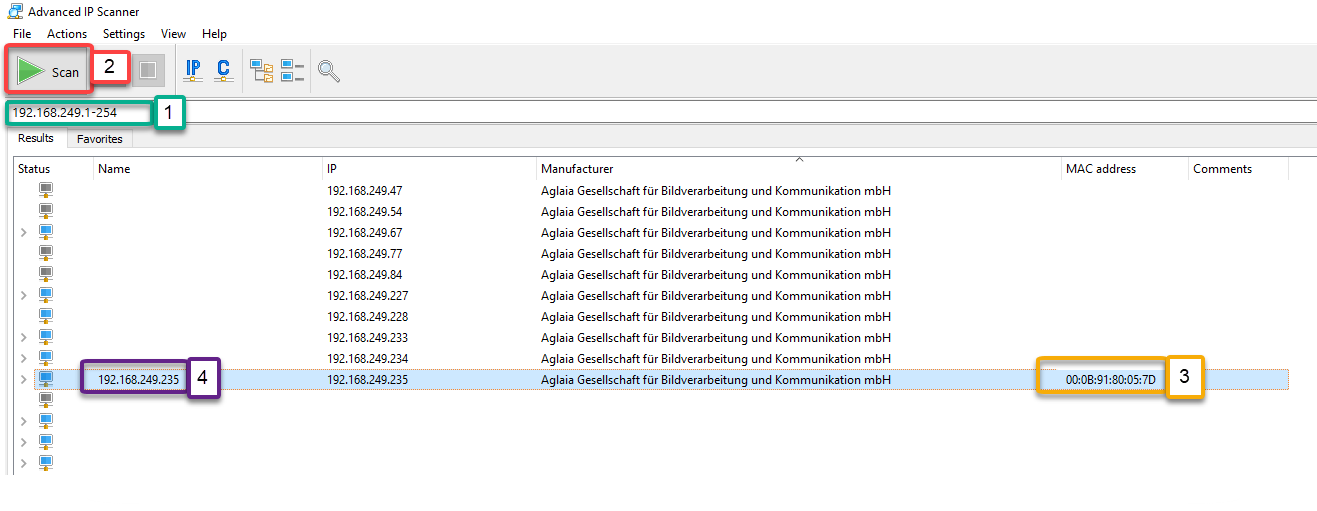
Simple Network Scan
- Scan the network for the MAC Address (MAC can be found on the unit’s label)
** You can use Advance IP Scanner by clicking here, free download tool.
1) Enter the IP range of the network
2) Click Scan
3) Locate the MAC Address
4) Take note of the IP Address
5) Follow the standard device login with the IP found in step 4
You can now resume login into the device.
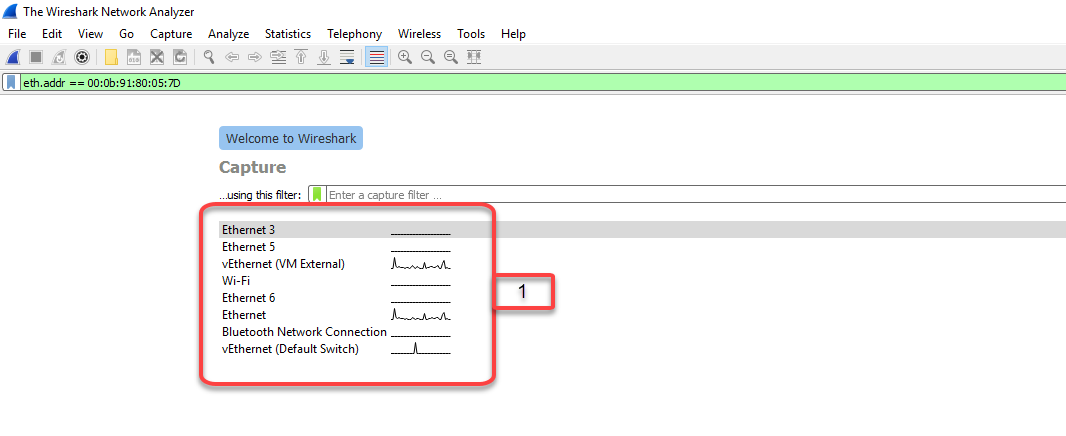
Advance Network Scan
- If a simple network scan from the step above doesn’t work you can use a more advance scan option
** You can use Wireshark by clicking here, free download tool.
- Select your NIC (Network interface card) that is connected to the proper network
2. Enter (with out quotes) “eth.addr == MACAddress” and hit enter
- Mac Address Example is: 00:0B:91:89:09:7D
3. Click on the line, where the mac address is showing the last 6 digits
4. Expand the Internet Protocol Version 4
5. Take note of the Source and destination IP, as one will be your pc and the other will be the units.
You can now resume login into the device.
** Please note that the networking tools are only intended to help find the required information and are not supported by SMS.
Connecting to the unit:
All SMS unit ship, unless otherwise specified with the following default IP
- Default IP: 192.168.100.10
Cannot find the IP address
If the unit cannot be access via the default or provided IP a unit reset and recalibration will have to be performed.