3DScope - How to switch from Polling mode to Push mode
Changing the Device communication method
Table of Contents
Overview
Note* This applies only to 1st Generation 3DScope counters as the 3DScope II does NOT use Polling mode.
This article details the process on how to update the 3DScope (1st Gen) settings to use the PUSH service. Also how to properly update the equipment inventory in TMSE or T.M.A.S. so that the device can properly communicate traffic.
Additional Information about 3DScope (1st Gen) communication with SMS Software
-
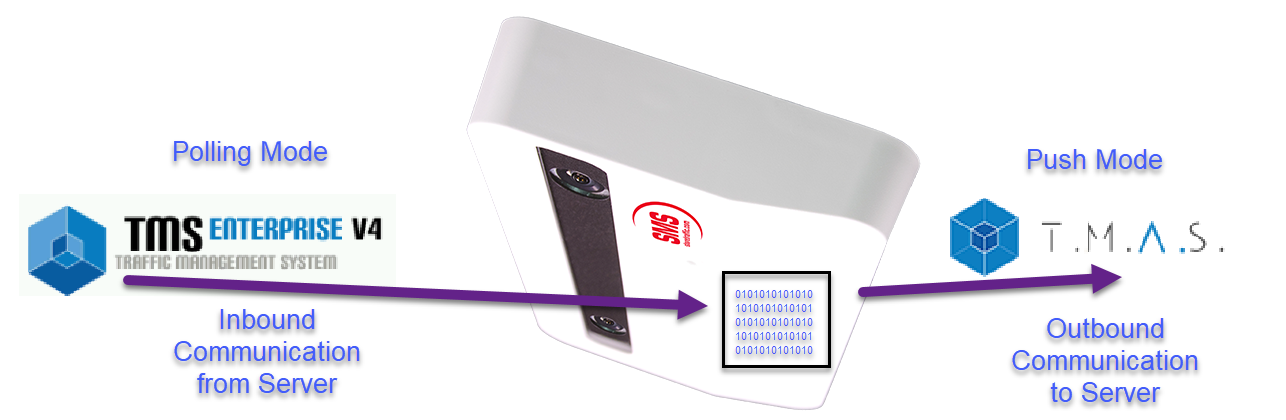
Polling Mode
- How it works - Software downloads count log from counter for import - protocol SSH
- Requires ports to be open form TMSE server to Counter location on the network
- 10072, 10073, 22, 80
- Heavy communication usage depending on count log size 15kb to 500kb per 15 min interval
-
Push Mode
- How it works - sends a SOAP notification to Software - protocol HTTPS or HTTP
- Requires ports to be open from location to TMSE or T.M.A.S. application
- 443 (Or 80 if On-Premise)
- Light network usage during communication - 15kb per 15 min interval
Why Switch Modes?
Polling mode is heavy on network / software resources. In rare occasions due to a prolonged device network outage and existing network latency the count log is bottlenecked and cannot be deleted at the end of the day by the software.
This causes the count log to grow in size until it cannot be completely downloaded in a single session by the software polling driver. This would prevent traffic from appearing in the software in a timely manner or NOT at all. Thus requiring the count log to be exported / imported manually from the counter and then deleted so that traffic can start appearing again promptly.
This may correct the issue temporarily but for repeat counter locations which continually require their counter count log to be manually export/import/delete SMS recommends to switch modes.
Switching from Polling mode to Push mode can prevent this from happening and avoiding having to connect to a counter whose count log has snowballed and manually need to export/import/delete.
How to Identify if a 3DScope (1st Gen) is in polling mode
TMS Enterprise Steps

- Login to TMSE
- Select a location
- Click Advanced
-
Click Equipment Inventory - Polling device would be indicated as follow
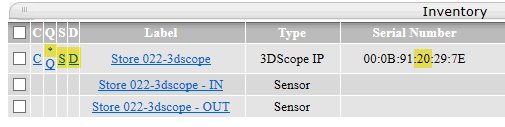
- Has C,Q,S,D buttons
- 3DScope 1st Gen has 20 in 1st pair of the device ID of the mac address.
T.M.A.S. Steps

- Login to T.M.A.S.
- Select a Location
- Expand Administration
-
Click Equipment Inventory - Polling device would be indicated as follow

- Has C,Q,S,D buttons
- 3DScope 1st Gen has 20 in 1st pair of the device ID of the mac address.
How to Switch from Poll mode to Push mode
Note* DO NOT REMOVE THE DEVICE
Recommend performing the following steps outside business hours of the location as it may result in traffic loss during the switch.
PART 1 - Setting the current Poll Device communication to Other
Makes device available for assignment in PUSH mode
TMSE and T.M.A.S Steps
- Click Device Label
- Click Comm.
- Check box Reset To Other
- Click Submit
- Close Window
- Refresh Equipment Inventory
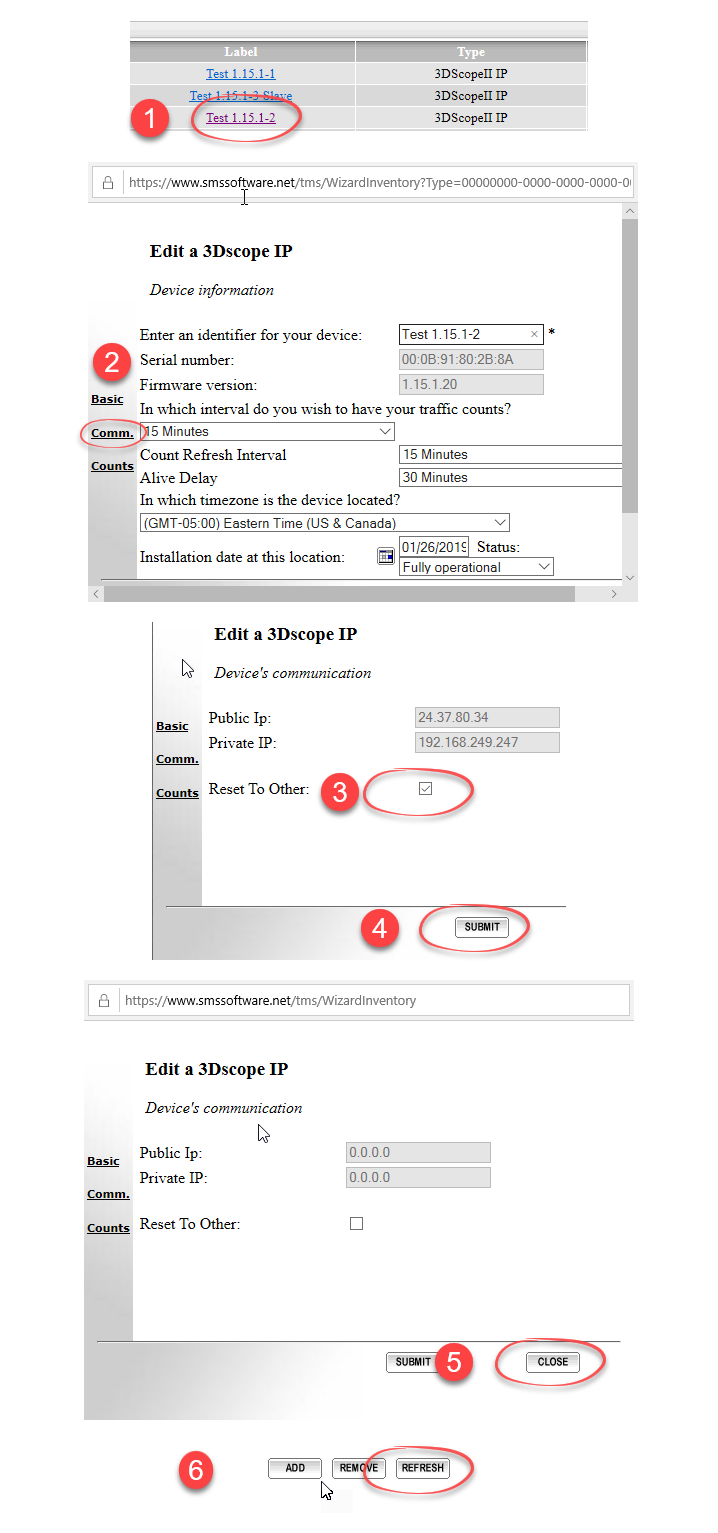
7. Optional - (Rename the device to indicate OLD or DO NOT REMOVE) Removing the device will result in the traffic no longer available for reporting.
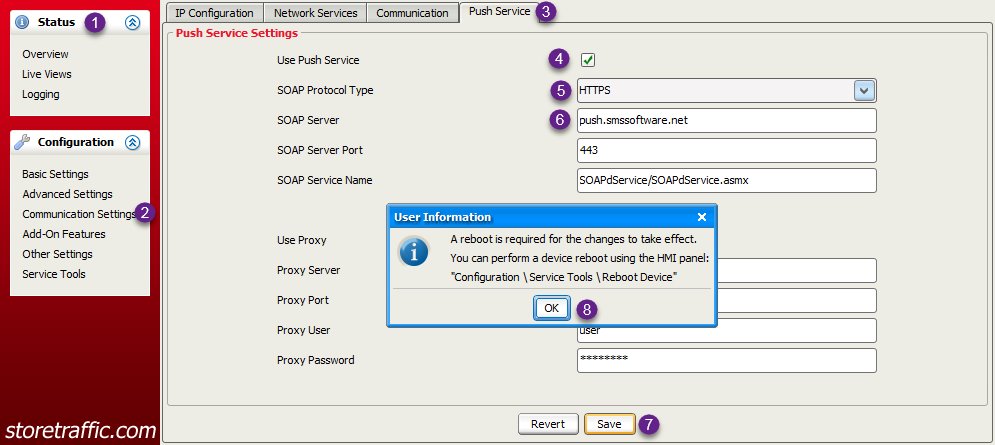
Part 2 - Verify the traffic counter PUSH settings are correct
*Note - Windows PC will need to have 32 Bit Java installed and enabled in the browser in-order to access the traffic counter*
Note - For Step 5/6 - If using On-Premise Software solution, indicate settings for your TMSE server SOAP port and SOAP server address.
- Login to the 3DScope
- Select Communication Settings
- Select Push Service Tab
- Check off Use Push Service
- Select HTTPS from SOAP Protocol Type
- Input push.smssoftware.net for SOAP server
- Click Save
-
Press OK to following reboot message
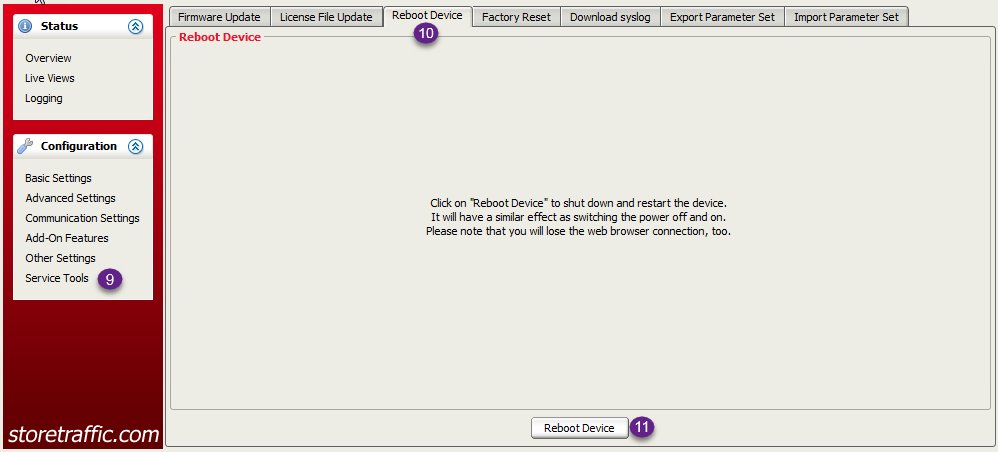
- Click Service Tools
- Select Reboot Device Tab
-
Click Reboot Device
Part 3 - Assigning the device in PUSH mode
Follow the normal process on how to assign 3DScope cameras to TMSE or T.M.A.S. (Same process as with the 3DScope II counters).
T.M.A.S. Steps
- Login to T.M.A.S.
- Select a Location
- Expand Administration
- Click Equipment Inventory
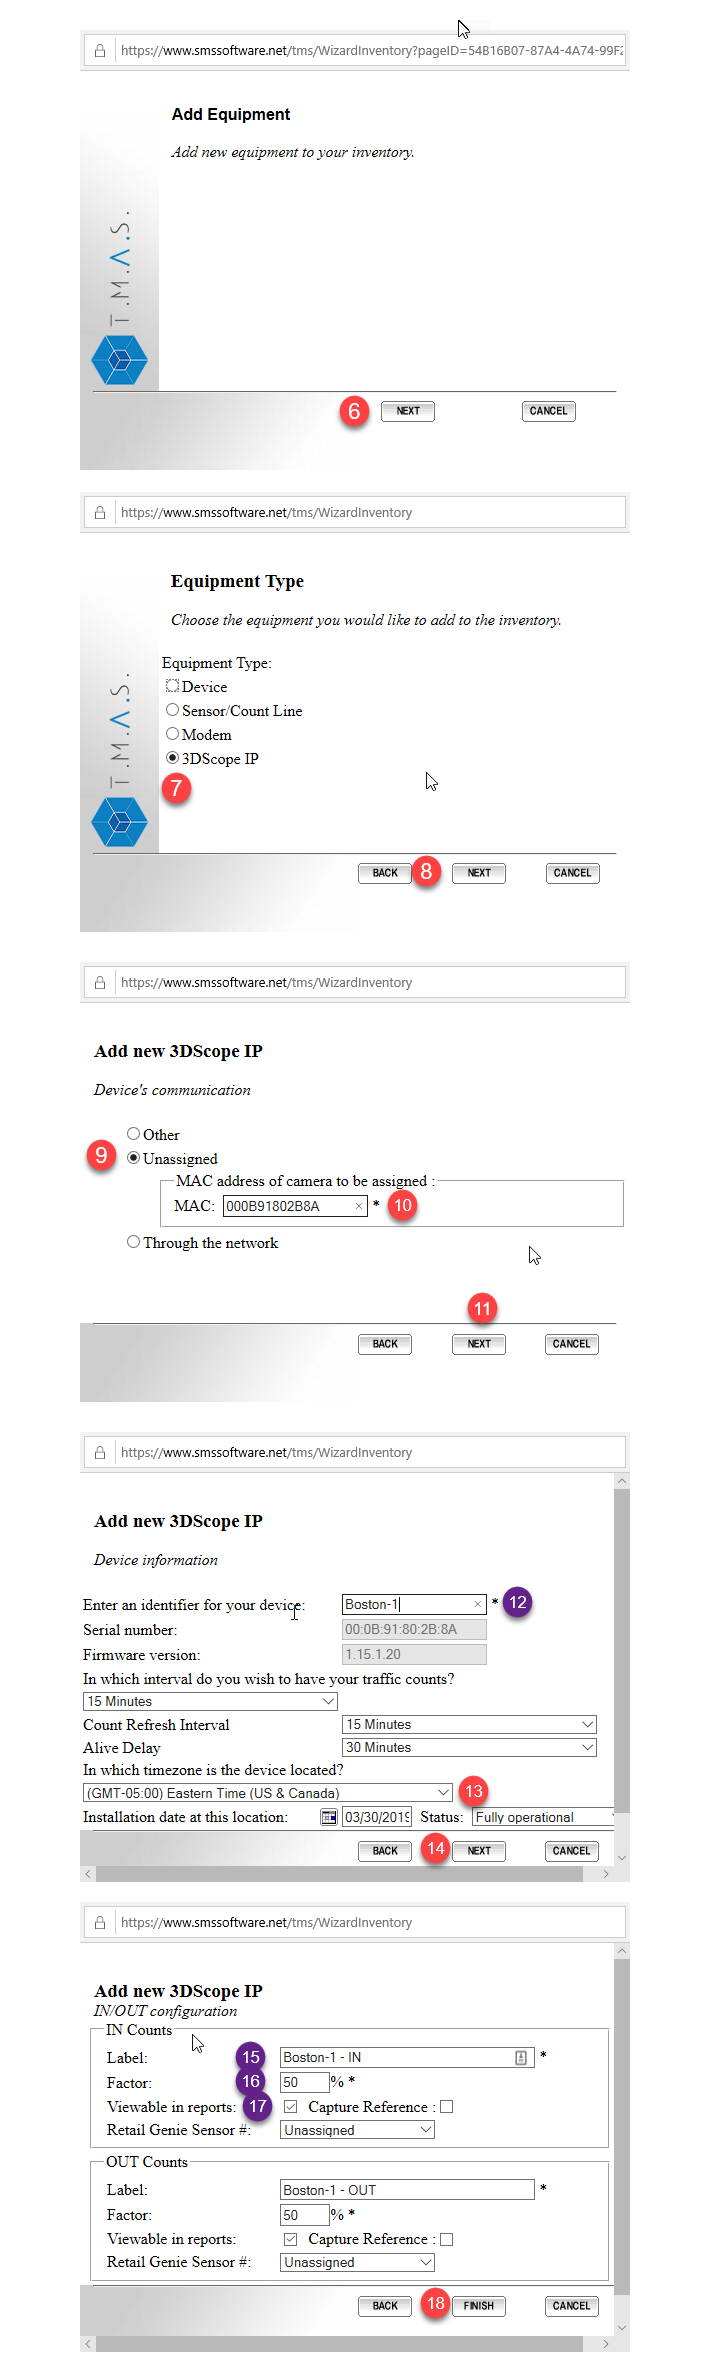
- Click Add
- Click Next
- Bullet 3DScope IP
- Click Next
- Bullet Unassigned
- Input MAC address of the 3DScope counter (Found in overview page of device interface)
- Click Next
- (Optional) Edit Label for counter device
- Select Time Zone of location where device is installed
- Click Next
- (Optional) Edit Sensor labels
- (Optional) Edit Sensor factors
- (Optional) Edit Viewable in reports
- Click Finish
- Reboot counter so that it will pickup PUSH commands from software and start to report traffic within the next 15mins.
TMS Enterprise Steps
- Login to TMSE
- Select a location
- Click Advanced
- Click Equipment Inventory
- Follow normal process to assign a 3DScope Device and indicate your settings as if it was a 3DScope II.