Importar ventas y datos de personal en T.M.A.S.
T.M.A.S. / Administración / Configurar / Administrar ubicaciones / Importar datos
Table of Contents
Overview
This article describes the sales files format needed for correct importation of the sales, number of items, transaction and staff data into a TMAS system.
Files Description
Our system is based on the importation of a coma-delimited or semi-colon .txt / .csv formated file. Every "field" is delimited by a coma (,) or semi-colon (;).
Each row contains the following attributes
- Location ID
- Date
- Hour
- Sales
- Transactions
- Items
- Staff
Location ID
This store identifier needs to match RefID put in when creating the store. The RefID is usually a 4 digit store number. T.M.A.S. software can also apply a “mask” from the beginning of the RefID of the store, as long as it is uniform across all locations. For example, if the ID name is SB0007, this field could contain the complete ID name or simply the last 3 or 4 digits which is the store number (ex: 007 or 0007)
Date
Date for which the data is provided. Date must be in one of the following accepted formats.
Time
The time (in hour) for which the sales information are provided. This needs to be 2 digits, military format. The number represents the start of the interval. So for sales for 13:00 to 14:00 the number would be 13.
- 00 represents sales/transaction from midnight to 1:00am
Sales
This field needs to contain the value of the sale for the specified hour. No minimum of digit is required. The number must also contain cents and the cents needs to be delimited by a “.”, as this is a fixed decimal value. For example: 600.76. Do not use commas to represent values in thousands.
- If there is no sale for this hour the value needs to be 0.00.
- If the total sale for the hour is negative, a minus “–“ must be added before the sales amount. Example: -88.67
Transactions
Number of invoices generated. This is an integer value. This field contains the number of transaction for the specified hour. No minimum of digits is required. Example, for 6 transactions, we would simply put “6” there. Also:
- If there is no transaction for this hour the value needs to be 0.
- If you want to deduce credit, just subtract credits/returns from the transaction number.
- If the total amount of transaction (invoices minus credit) for this hour is negative, a minus sign “–“ must be added before the transaction amount. If only 2 credits were made during an hour, we would put “-2” in this field for that hour.
Items
This field contains the total number of items for all transactions for the hour.
- If there are no transactions for this hour indicate it as 0.
Staff
Number of employees on the sale floor for the specific hour. This can be a real value or integer. A decimal value would be generated when a staff is only present on the sales floor for a part of the hour. If there are 10 employees on the floor then we would put “10” as value for this field for the hour. 0 is accepted in this field if there really is not one on the floor for this hour.
- It accepts decimal. But these will not be shown in the report, they will be rounded up.
- An employee is considered to be a staff when he is actually on the sales floor and ready to answer or assist a customer.
- A manager can be counted here if he is actually working on the floor and assisting customers. If he is doing work in the back store we would recommend not counting him in this statistic.
- 0 is accepted in this field if there really is no one working on the sales floor.
FAQ about Data: Important Points
- During business hours: the file should contain an entry for each hour even if the sales or transaction value is 0 as there is always staff on the sales floor even if no transaction or sales take place.
- The file should NOT be limited to business hours only as some sales take place just after or before opening. Also, entries for non-business hours are preferable as it will ensure accurate data for any special events that takes place.
- Other type of transaction like gift cards, are irrelevant to SMS hosted software. It needs to be decided by the customer/POS provider when this transaction is applied. In any case a gift card should only applied once, either when it is used or when it is purchased, as it would corrupt the data to include it twice.
- If Sales and Staff information comes from 2 different systems, it can be split in 2 files. Simply send a Sales & Transaction file without column #6, and a staff file without column #4 and #5 (column #6 becomes column #4)
- T.M.A.S. software imports the data located in the file, it will not matter if the file name does not contain the date, as SMS hosted software will read the date off each line in the file.
- T.M.A.S. software always use the last data received. If you have duplicate entry (same store, same date and time), the last data imported will be used, the other will be overwritten, not appended or added.
- A file could be updated hourly with the latest completed hour, and sent to T.M.A.S. software. This will result in up to the last hour statistic. Because new values will delete old entries, in this case you can re-use the same file only with the last hour appended to it.
- There is no minimum or maximum delay between each file transfer and T.M.A.S. software (Less than 50 files per import scheduled). Check the import job schedules.
- 1 file for all locations or 1 file per location is accepted (for 50+ locations 1 file is recommended not to cause an import delay.)
How to Add an Import
This section allows for the creation, setup and defining of parameters for importing sales and staff data into T.M.A.S.

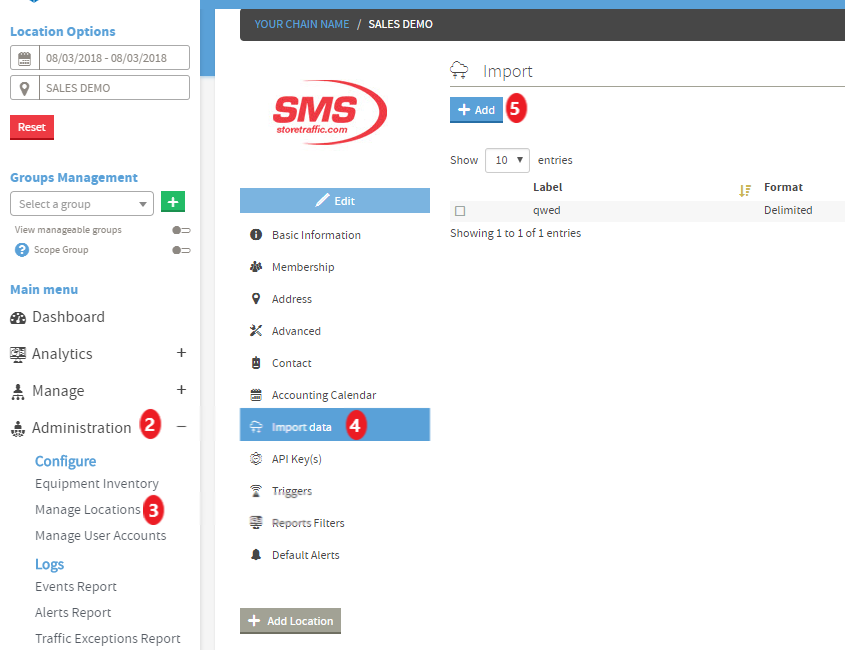
Accessing the Feature
- Login to TMAS
- Select Configure
- Select Manage Locations
- Select Import / Export data
-
Select Add
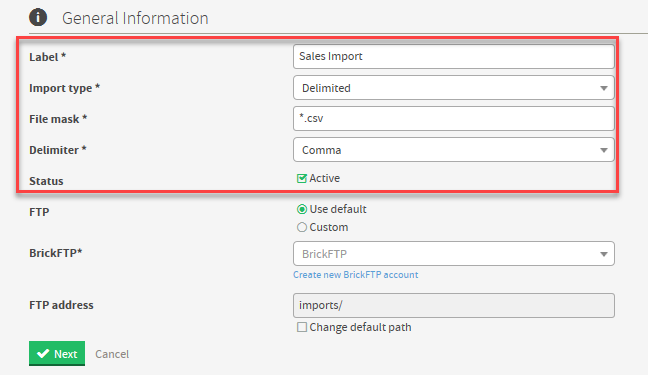
Complete The General Information
- Indicate Label (Name to be given to import job)
-
Indicate Import Type
- Fixed Width - Rarely Used
- Delimited - Most Common
- STC File - Used to import traffic data from another source into T.M.A.S.
- Indicate file mask (*.csv or *.txt)
- (Optional) Indicate delimiter (Comma, or Semi-Colon;) if Delimiter import type was selected
-
Status Active as default
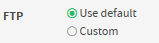
Input the FTP Settings
The user has the ability to use the default integrated SMS FTP provider or indicate their own private FTP account by bulleting the following option.
- Use Default
- Custom
FTP USE DEFAULT - (SMS BRICK FTP)
- Bullet Use Default - For SMS Provided FTP site
-
Indicate an Existing FTP User or create a NEW FTP user for the SMS FTP Site
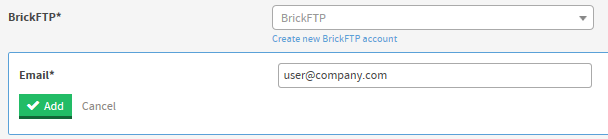
- To "Create new Brick FTP Account" do the following
- Click the link to Create new BrickFTP Account
- Input the e-mail address you want associated to the account
-
Click Add
- The e-mail address will receive 2 e-mail (1st from Noreply@BrickFTP.com with the user name account setup and a link to verify the account, and a 2nd from NOREPLY@smssoftware.net with the accounts password)
- The e-mail address will receive 2 e-mail (1st from Noreply@BrickFTP.com with the user name account setup and a link to verify the account, and a 2nd from NOREPLY@smssoftware.net with the accounts password)
- To "Create new Brick FTP Account" do the following
- Verify / Update - FTP address path points to the Import folder or root by default. (Optional) check off change default path and indicate a new path if other folders were created in the SMS FTP site. Note* This process will not create folders on the FTP, you would need to login separately to create this.
- Click Next
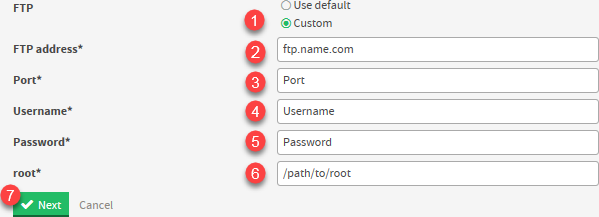
FTP CUSTOM - (USING YOUR OWN PRIVATE FTP)
- Bullet Custom for FTP
- Input the URL of the FTP address
- Indicate a port (Common ports are FTP=21, FTP/SSL(aka FTPS)=21 or 990, SFTP=22)
- Input username
- Input password
- Indicate file path
-
Click Next
NOTE* - A connection test will be performed at the end of the add import setup wizard - if the connection test fails, an error message will be displayed and the import job will NOt be added.
SETTING A SCHEDULE
Indicate a Schedule for when and how often a file will be uploaded to the FTP. TMAS Application will take into consideration your current time zone. Best to schedule the import job for 5 minutes after your file to uploads to the FTP server.
- Select schedule type (Daily or Hourly)
- Set Hour to Start Import
-
Click Next

COLUMNS INFORMATION
Location Variables:
- Location Mask: Depending on the Store ID selected for your locations the store # may be padded with Characters indicating your company. If this is not present you would need to indicate a mask for the Store ID column so that the TMAS application can match it to a location. If the Store ID is present in your file and exactly as indicated in the location ID of the location, leave this empty.
-
Date Format: Selection MUST match the date column of the imported file. Available options are indicated in the dropdown menu.
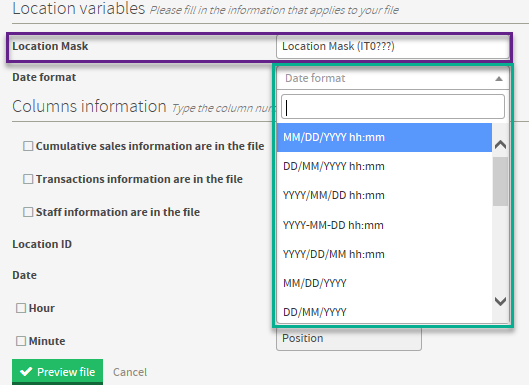
Columns Information:
The most common option to use would be Cumulative sales information as checked. (Optional) - Transaction information and Staff Information options are typically used when Transactional or Staff info cannot be combined in the Sales file for import and requires additional import jobs to be defined. Also traffic files from other devices which export a comma delimited file can be imported as well as from SMS STC devices.

- Check Off & Indicate Column # of the Location ID - the Store ID is present in your file and exactly as indicated in the location ID of the location
- Check Off & Indicate Column # of the Date - Day you would like to import for
- Check Off & Indicate Column # of the Hour - Hour you would like to import for
- Check Off & Indicate Column # any other columns such as Sales, Transactions and items - Value you would like to post
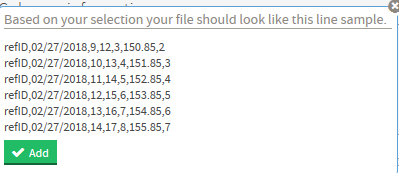
Example: 
Then click Preview file and Match the example to what you will be uploading to the FTP
Preview Example for Selections above: Click ADD when it matches and you are satisfied with the selections
How to Edit or Delete an Import
- Expand Configure
- Select Manage Locations
- Click Import/Export data
- Check off the desired import
- Click the Pencil Icon to Edit or Trash Icon to Delete
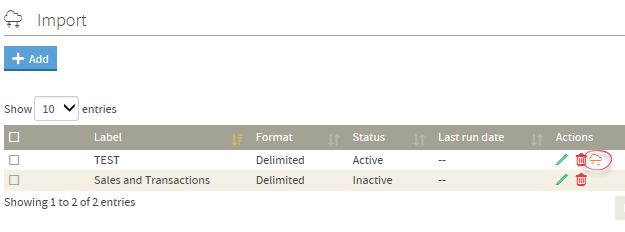
Running an Import on Demand
Use the following option when you would like files to import quicker than the scheduled time (Daily or Hourly) has indicated
Click the Cloud and arrow icon to run - a message will be displayed indicating it has ran