Cómo asignar un modo 3DScope PUSH a una ubicación
Cómo agregar el dispositivo al inventario de equipos.
Table of Contents
Overview
Once a new 3DScope has been installed in a location the device needs to be setup with the SOAP server information and assigned in the TMAS software in-order for it to receive instructions to starts reporting counts.
3DScope 1st Generation - Setup communication and Assign in TMAS Software
Set up the 3DScope to communicate with TMAS (SMS Hosted SaaS)
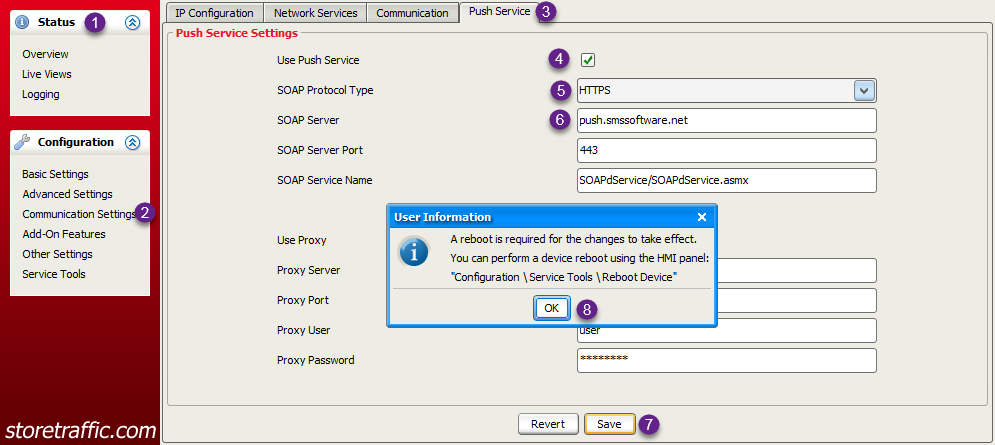
- Login to the 3DScope
- Select Communication Settings
- Select Push Service Tab
- Check off Use Push Service
- Select HTTPS from SOAP Protocol Type
- Input push.smssoftware.net for SOAP server
- Click Save
-
Press OK to following reboot message
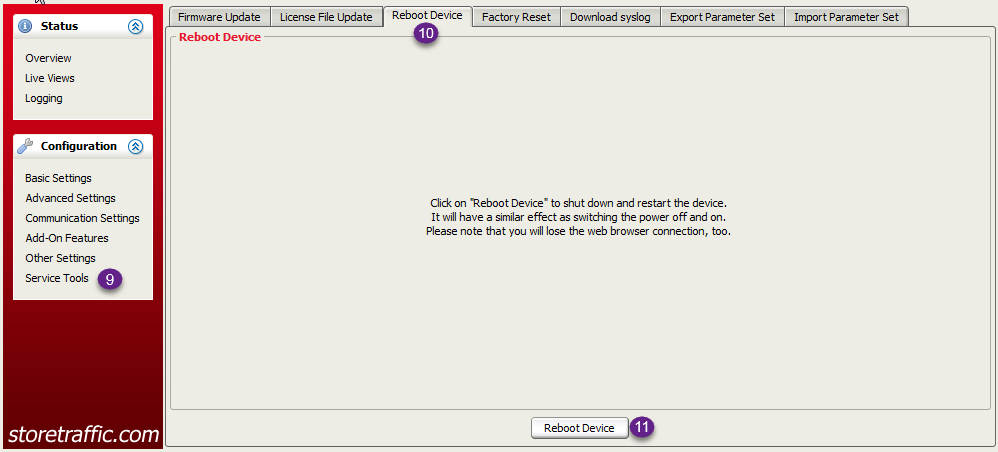
- Click Service Tools
- Select Reboot Device Tab
-
Click Reboot Device
Assigning the 3DScope in Equipment Inventory
- Login to TMAS
- Select Store location to add the equipment
- Expand Configure from the Main Menu on left
- Select Equipment Inventory
- Click Add
- Select 3DScope
- Bullet unassigned
- Input MAC address
- Edit an identifier for your device if desired
- Select Interval 15min
- Select Count Refresh Interval 15min
- Select Alive Delay 30min
- Select Time Zone for location *VERY IMPORTANT THIS IS ACCURATE*
- Click Next
-
Indicate the Following
- Sensor Labels (Name of sensor, best to include direction)
- Sensor Factor (Default 50%, Can be 100% or a Negative for advanced filtering)
- Viewable in reports (If Unchecked traffic from this sensor will ONLY appear in the sensor traffic report)
- Capture Reference (Used for Store Front counting Pass By Traffic and not for Door Counting)
- Retail Genie Sensor #
- Click Finish