TMAS - Marketing Campaigns
How to use reporting options
Table of Contents
Overview:
The Marketing campaign feature allows users to create special periods for reporting directly related to their companies marketing efforts. TMAS uses data provided by the user such as location, Campaign Start and End Date, $ Investment, Media type for reporting purposes.
Managing Marketing Campaigns
Locating the Feature
- From the Main Menu expand Manage
- Select Marketing Campaigns to open the Manage window

Navigating the List of Marketing Campaigns

-
Add, Edit, Delete Buttons
- Edit and Delete only appear if a campaign is checked.
-
Location Filter Dropdown
- Use to filter marketing campaigns by Chain, District, Region or Single Location.
- Select Box
-
List Sort Button
- Available on all columns, sort by ascending / descending.
- Display # of Entries
Adding a Campaign
- Click Add
-
Fill out the following required Information

- Name
- Start Date - Date/Time of Current Campaign
- End Date - Date/Time of Current Campaign
- Investment - (Marketing $Dollars$ Spent on Campaign)
- Status
- Media - (Type of Media used for advertising)
- Tags - (Grouping option which can be used to categorize similar campaigns together)
- Start Date of preceding recurrence (Used for Comparison)
- End Date of preceding recurrence (Used for Comparison
-
Select Advanced Options

- Check off the Chain to apply Campaign to all locations or Individual store locations.
- Click Add
- The Newly created campaign should now appear in the list.
Editing a Campaign
- Check off the box of the desired campaign to edit.
- Click Edit
- Deleting a Campaign
Reporting on Marketing Campaigns
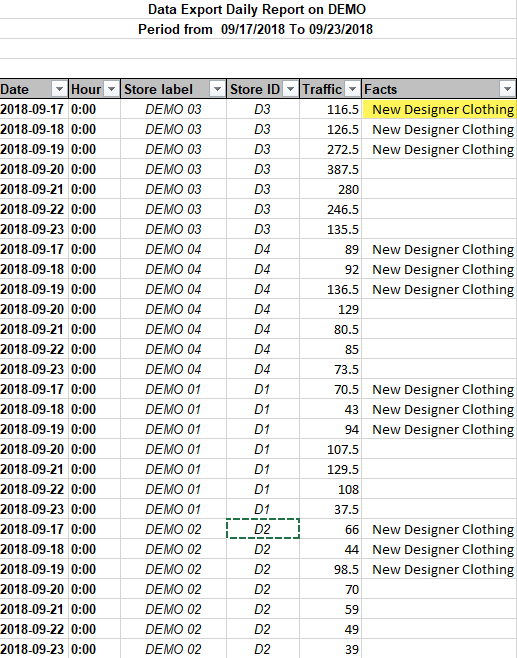
Marketing notes created with this feature will appear in the Data Export report, be sure that you have the facts column checked prior to generation.
