TMAS - Manage User Accounts
Create, Edit and Remove access to TMAS
Table of Contents
Overview
T.M.A.S. access can be controlled directly by application Chain and User Managers (SMS Client Admins) or through Microsoft Azure integration. User permissions are granted depending on the chosen role.
How to access Manage User Accounts
Only T.M.A.S. users with the Chain and Users account type can access options in the Administration section of the application.
| Steps to access | |
 |
|
User List
| Depending on the location selected the user list will display the users that have been added with access to that location. | |
 |
The user list can be manipulated in the following ways.
|
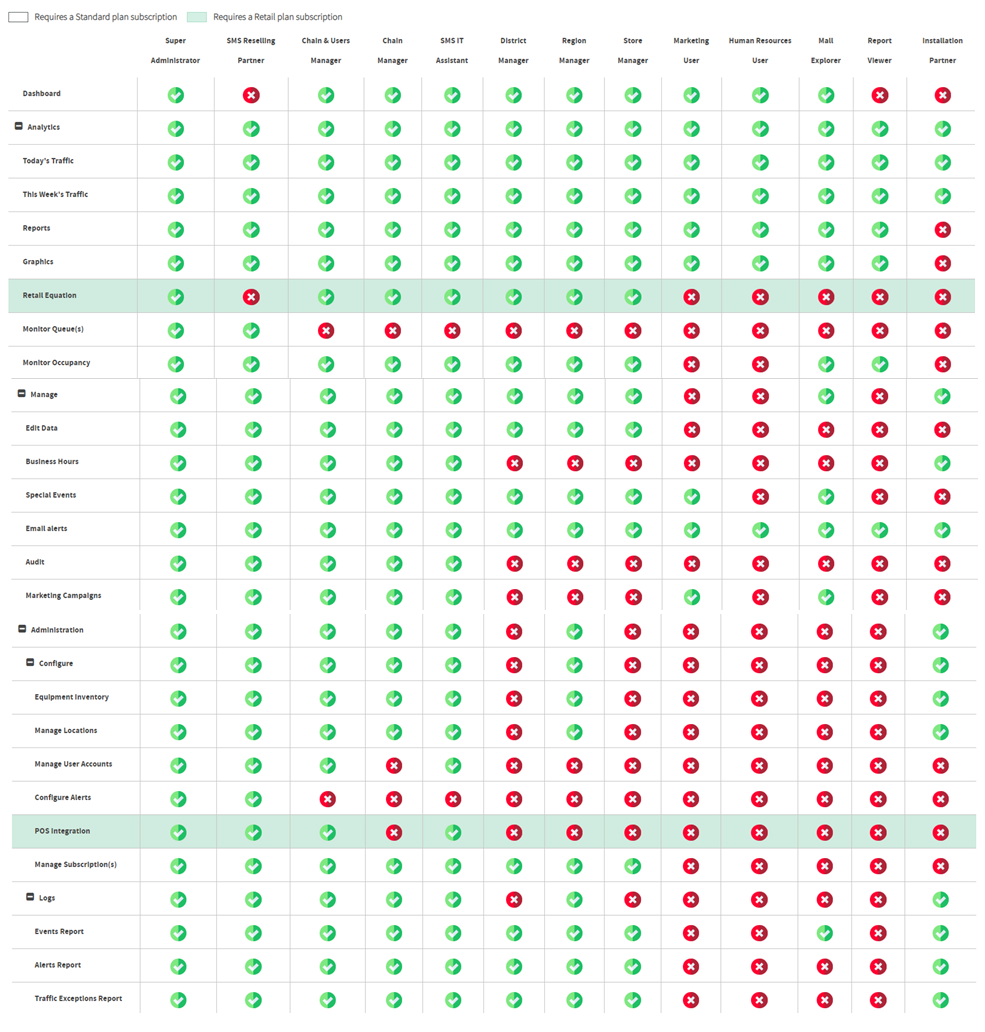
User Permissions
 |
Role-Based Access Control rights and Permissions Matrix can be viewed by clicking on the button found under the membership section when creating a new user or editing an existing T.M.A.S. user. |
|
       | |
|
Expand to view subsections with the +. Retail Equation and POS Integrations rows which are highlighted in green require a Retail Subscription to unlock these features. Note Check mark in the Permissions Matrix indicates that the user type will have this feature as “visible”, however the useability may be determined by other settings found under Manage Locations > Advanced settings. | |
Creating a new user | |
| Locating Manage User Accounts | |
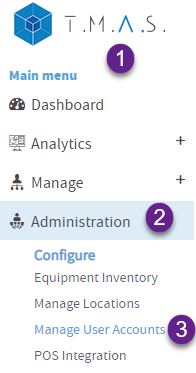 |
1. Login to T.M.A.S. 2. Expand Administration 3. Select Manage User Accounts |
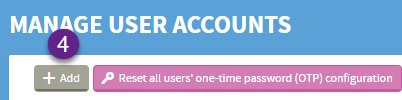 |
4. Select Add |
| Completing Account Information | |
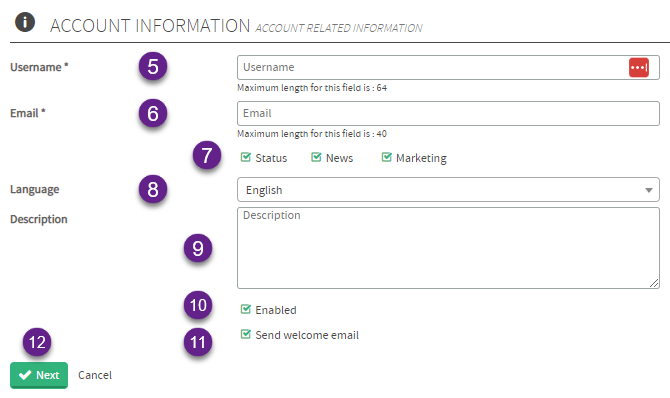 |
5. Input Username (Suggested Use their e-mail address as it is more easily remembered and unique). Note* If using MS Azure Integration - The username needs to match both in T.M.A.S. and Azure. 6. Input e-mail address 7. (Optional) Uncheck any communication types which you would like this user to not receive related to SMS Storetraffic marketing. 8. Select user language (English, French, or Spanish) 9. (Optional) Input a description as to why this user was created if needed. 10. Uncheck if user should be disabled. Otherwise leave checked for account to be active. 11. Uncheck if welcome e-mail to configure a password should not be sent yet. Otherwise leave checked for welcome e-mail to be sent. (Sends 1st time access info to user by e-mail from notice@smssoftware.net) 12. Select Next |
| Completing User Information | |
 |
13. Input first name 14. (Optional) Input last name 15. (Optional) Input Title 16. (Recommended) Input Mobile number (Important if you plan of having users is text based OTP for T.M.A.S. login) 17. select next |
| Membership - Selecting User Root location | |
| User's root location influences which chains, districts, regions or locations they will be able to select for dashboard or reporting purposes. Unlike locations, users can ONLY be members of a single Chain / District / Region or Location. Should a user require access to locations which appear in different Districts or Regions, then they should be provided access higher in the location tree. If a conflict arises where a user needs only access to a couple specific locations as they are supervising these locations, then a region / district should be created in manage locations where these locations are assigned prior to the creation of the user so it can be selected in the membership. | |
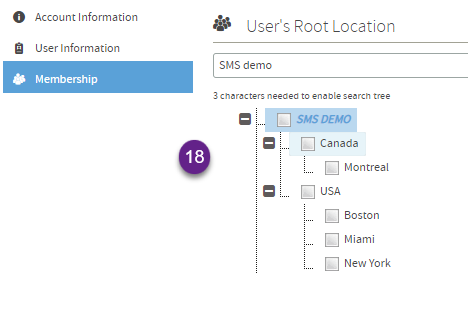 |
18. Search and check off a location where they require access for dashboard and reporting. The higher on the location tree selected will provide access to all sub locations. |
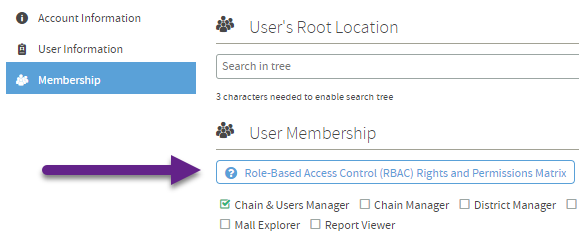
| Membership - Selecting User Membership | |
| User membership is where role-based permissions can be assigned based on the reporting access required. | |
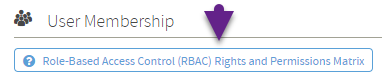 |
The Rights and Permissions Matrix will open a window showing all the levels of access.
  |
 |
19. Check a permission to grant 20. Select Add |
Success Newly created users will appear in the users list. | |
Editing a User | |
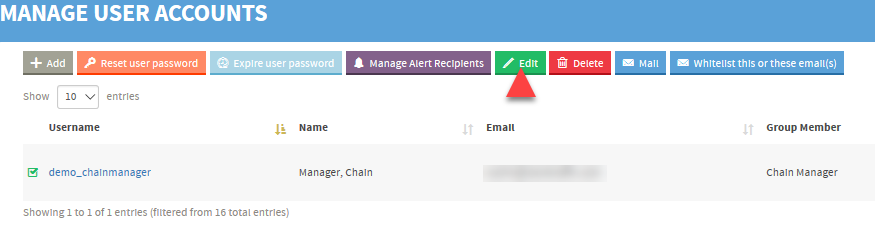 |
|
How to Enable / Disable a User | |
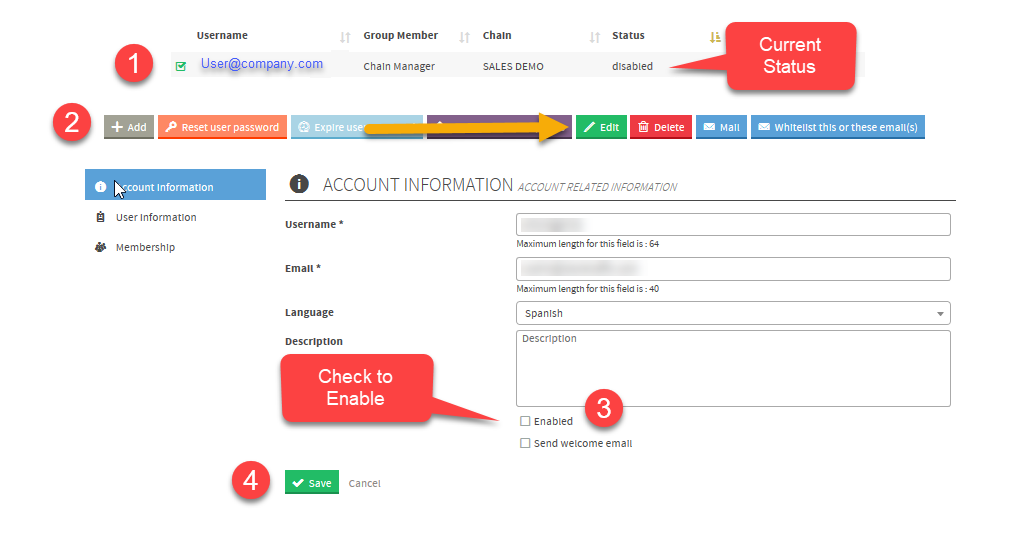 |
Users become disabled after 5 login failures.
|
Removing a User | |
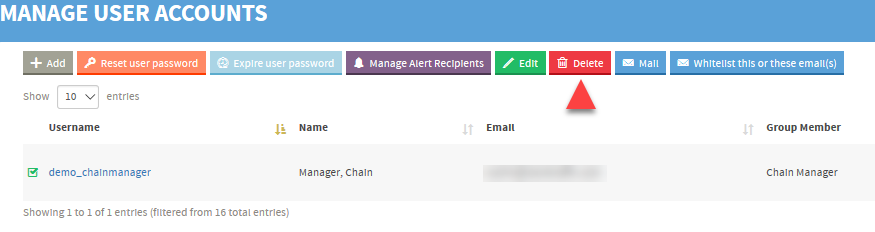 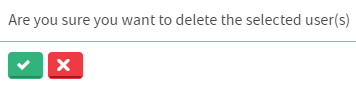 |
|
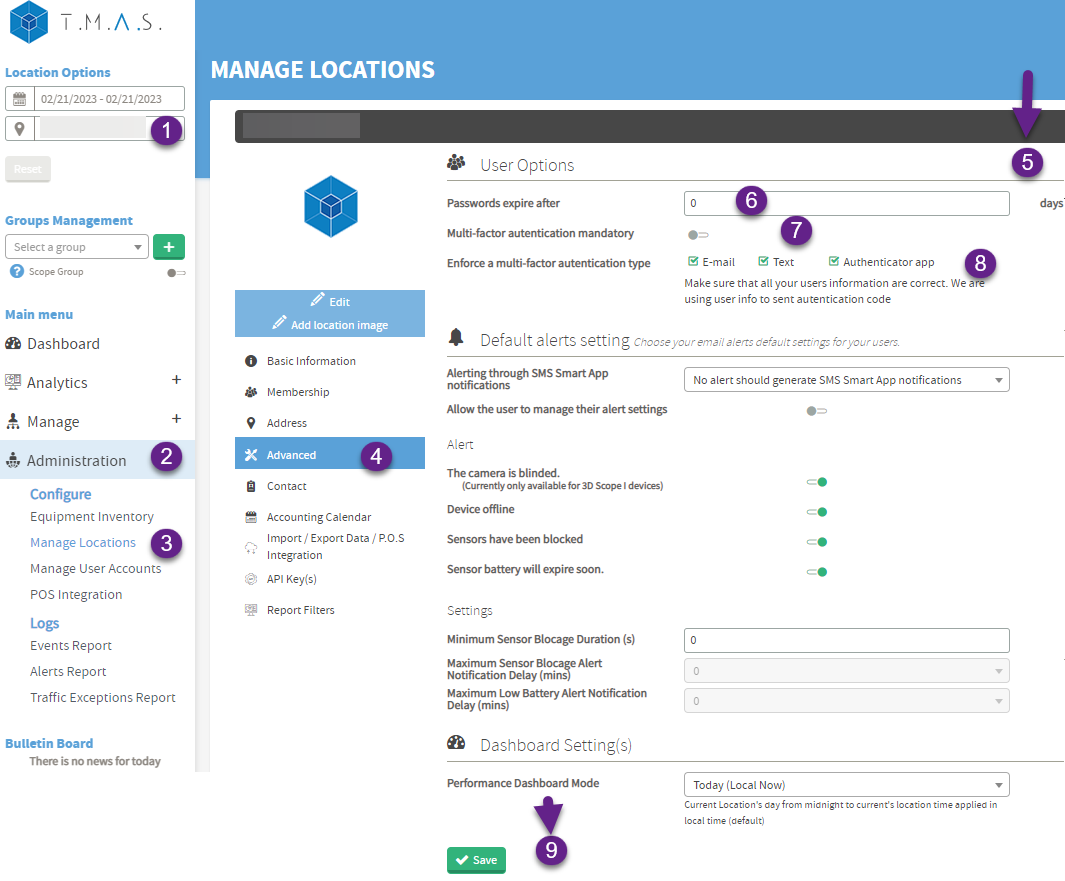
Setting an MFA / password expiration login policies | |
|
T.M.A.S. admin users are able define a period of days to determine when users' passwords will expire and be forces to reset. Also set whether multi-factor authentication should be mandatory as well as which MFA type should be used. For more information about how users can change or reset their passwords and settings, refer to the following MEMBER LOGIN article. | |
| How to define set login policies in T.M.A.S. | |
 |
|
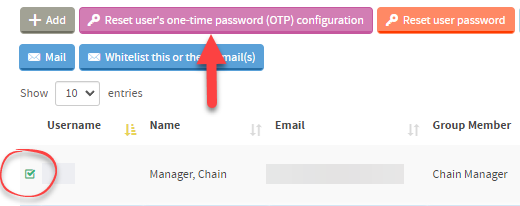
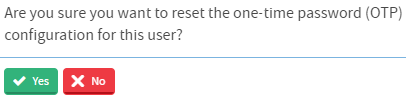
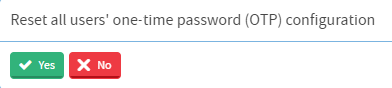
Resetting All User(s) OTP config or a Specific User | |
| Single User | |
  |
|
| All Users | |
  |
|
Resetting All User(s) password(s) or a Specific User | |
| To reset a single users password | |
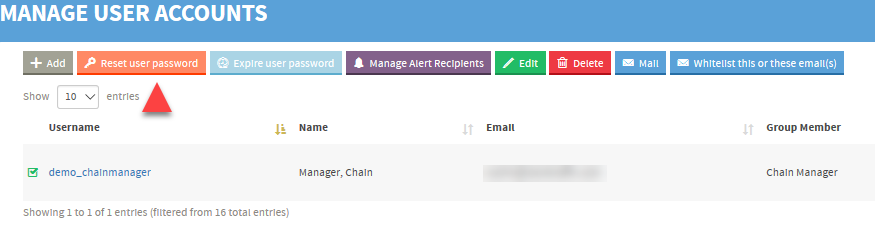  |
|
| To expire or reset ALL USERS passwords | |
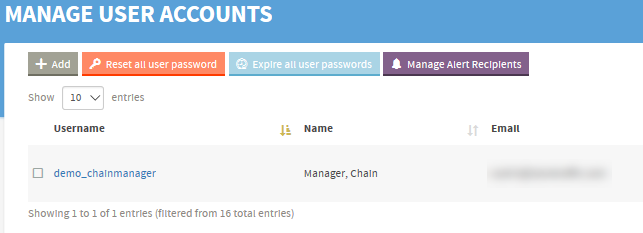 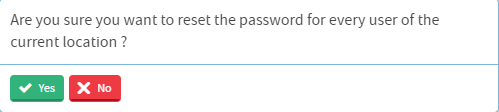 |
|
Mail a User | |
| T.M.A.S. provides the ability to make use you default mail application to send communications to users defined in the application. Selected user(s) e-mail addresses in the TO: field. Selecting multiple users will place the addresses in the BCC: field | |
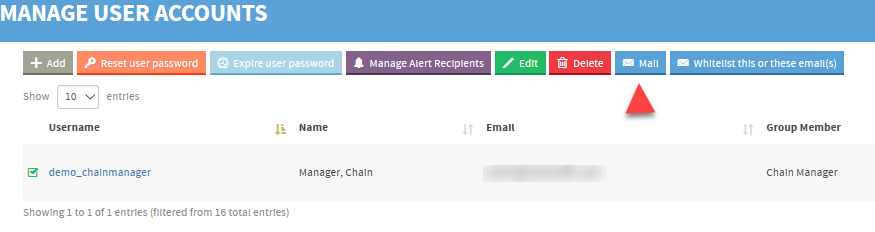 |
|
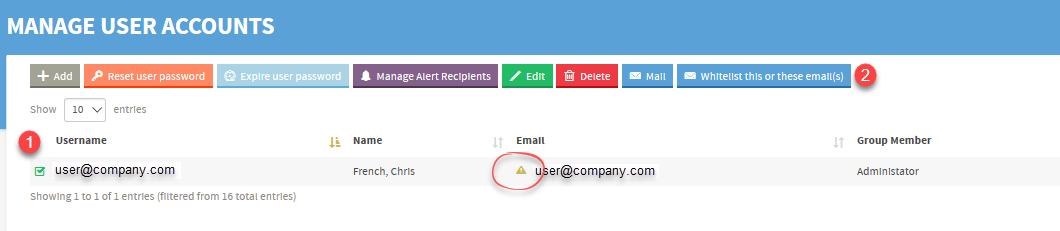
How to clear Invalid e-mail tags on Users | |
|
T.M.A.S. sends user and password information as well as reports by e-mail to it's users. If a user was created with an invalid e-mail address, either by a typo, the address did not exist at the time of the T.M.A.S. user creation or the verification bounced, the user will be flagged. Refer to the following process to clear the flag so that they can start receiving e-mails again from the T.M.A.S. application. | |
| Example of Flagged User | |
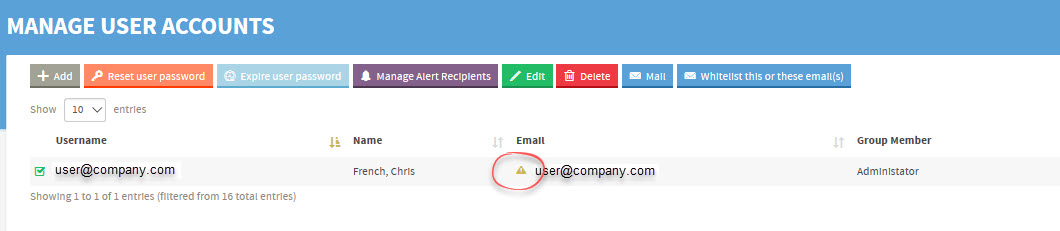 If the user e-mail address is not correct, use the edit function to update the account with the correct e-mail address which will force T.M.A.S. to revalidate. Otherwise if the is correct follow these steps to clear the flag. | |
  |
|
F.A.Q. |
| Q: Does creating new users require additional subscriptions? |
| A: At minimum a single T.M.A.S. standard subscription allows to create additional accesses to your account beyond the initial user with the SMS Storetraffic free mobile app. After that there is no limit to the amount of user accounts which can be created as the T.M.A.S. subscription model is traffic counter device based. |
| Q: How can a user reset their OTP Auth app to a new device? |
| A: Select the user and then select Reset user's OTP config button from the top of the user list. The next time the user attempts to login they will receive the QR code to scan with their preferred Auth App. |
| Q: The user is did not receive any email about his account being created / to create password |
| A: Learn more here |