Exportation d'un fichier de trafic depuis TMAS
Administration TMAS / Configurer / Gérer les emplacements / Importer - Exporter
Table of Contents
REMARQUE : Seuls les utilisateurs ayant accès à la section « Administration » de TMAS pourront accéder aux configurations ci-dessous.
À quoi cela sert-il ? | |
 | |
TMAS permet de configurer facilement un fichier plat pour le trafic et de planifier une exportation vers un site FTP fourni par SMS ou vers votre propre site FTP personnalisé . Vous pouvez ainsi intégrer le trafic dans d'autres applications de BI. |
|
Exemples d'applications important des fichiers de trafic depuis TMAS | |
 |
|
 |
 |
Fichiers d'exemple d'exportation | ||
|
Type d'exportation *Les exportations personnalisées sont disponibles sur demande et soumises à des frais supplémentaires qui seront indiqués. |
Disposition des colonnes *Veuillez consulter TMAS pour connaître la disponibilité des autres formats. |
Exemple de fichier par intervalle *Disponible également par intervalle de 30 minutes et par jour, cliquez sur l'intervalle pour télécharger ci-dessous. |
TRAFIC_QUOTIDIEN |
ID du magasin, Étiquette, Date (AAAA-MM-JJ), Heure (HH:MM:SS.SSS), Trafic |
|
TRAFIC_DES_CAPTEURS |
Date (JJ-MM-AAAA), Jour ou semaine (lundi-dimanche), Heure (HH:MM), ID du magasin, Étiquette de l'appareil, Étiquette du capteur, Trafic |
|
Comment créer une exportation | |||
| Administration > Gérer les emplacements > Importer/Exporter des données > Ajouter | |||
|


|
|
||
| Informations générales | |||
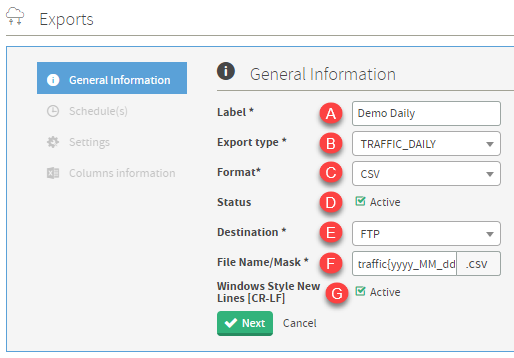 |
6. Informations générales complètes
7. Cliquez sur Suivant |
||
| Programme(s) | |||
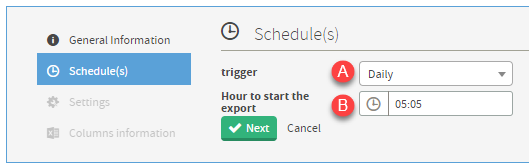 |
8. Établir un planning
9. Cliquez sur Suivant |
||
| Paramètres | |||
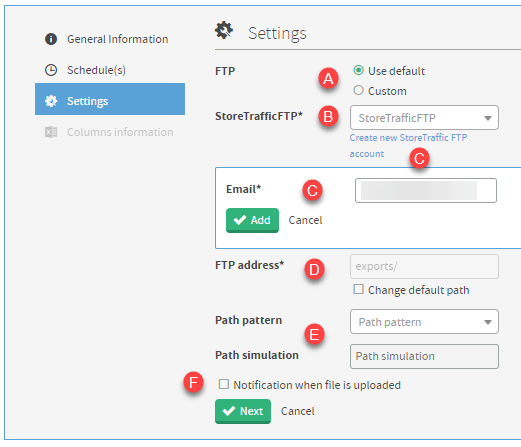 |
10. Configurer les paramètres
|
||
| FTP : utilisation par défaut ou personnalisée | |||
création de compte FTPPortail : https://files.smssoftware.net URL : files.smssoftware.net Utilisateur : Adresse e-mail utilisée pour la création du compte Mot de passe : Envoyé par courriel depuis NOTICE@smssoftware.net lors de la création du compte. |
FTP UTILISER LA VALEUR PAR DÉFAUT - (SMS CERBERUS)
|
||
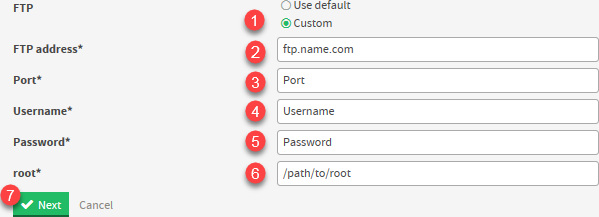
Contactez l'assistance technique par SMSLes clients qui souhaitent utiliser leur propre serveur FTP personnalisé pour télécharger et téléverser des fichiers d'exportation de trafic doivent contacter techsupport@storetraffic.com pour demander l'ajout de l'URL FTP à la liste blanche pour des raisons de sécurité avant de procéder aux étapes suivantes. *Si un port personnalisé est également nécessaire car les normes ne sont pas utilisées ou sont bloquées, des frais supplémentaires peuvent s'appliquer.
|
FTP PERSONNALISÉ - (UTILISATION DE VOTRE PROPRE FTP PRIVÉ)
 |
||
| Informations sur les colonnes | |||
 |
|
||
NoteSi cette option est activée avant l'enregistrement, un test de connexion sera effectué à la fin de l'assistant de configuration « Ajouter une exportation ». En cas d'échec, un message d'erreur s'affichera et la tâche d'exportation ne sera pas enregistrée. Désactivez la tâche pour ignorer le test de connexion et enregistrer les paramètres. | |||


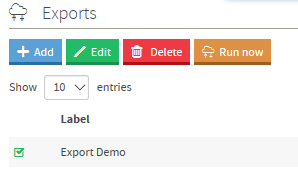
Comment modifier, supprimer ou exécuter une exportation à la demande
 |
|
Autres méthodes d'exportation des données de trafic
SMS permet de personnaliser les exportations, qui ne seront configurées que sur demande à Techsupport@storetraffic.com
Des frais supplémentaires peuvent s'appliquer en fonction de la complexité de la demande, facturés à un taux horaire indiqué.
FAQ
Q : Les ventes et les transactions peuvent-elles également être exportées ?
A : Cette fonction d'exportation concerne uniquement le trafic. Pour générer un rapport au format Excel contenant les données de ventes, de transactions, d'effectifs et de trafic, utilisez le rapport d'exportation de données. Cliquez ici pour plus d'informations .
Q : Comment puis-je exporter plus d'une journée de données ?
A : L'exportation boursière par défaut renvoie exclusivement les données d'hier.
Pour obtenir plus de données, vous pouvez :
-
Planifiez un rapport – de nombreuses options sont proposées, comme le rapport d'exportation de données.
-
L'utilisation de notre API Web offre une bien plus grande flexibilité.
- Demande de personnalisation de votre exportation actuelle
Q : Pourquoi un magasin peut-il apparaître deux fois dans mon exportation de données de trafic ?
A : Dans certains cas, un magasin peut apparaître plus d'une fois dans une exportation de données de trafic s'il est affecté à plusieurs emplacements parents dans la hiérarchie des emplacements .
Il est préférable d' éviter de lier le même magasin à plusieurs niveaux hiérarchiques (par exemple, à la fois à la chaîne et au district).
Plus d'informations ici