3D Scope II Mounting Bracket (LC & HC)
Table of Contents
Overview
This article provides information about the installation and usage of the SMS approved counter bracketing hardware.
Where to Purchase
Update on Bracket Availability
As brackets have become widely accessible and competitively priced, SMS Storetraffic will no longer keep them in stock. Instead, we’re providing guidance to help customers purchase them directly from trusted suppliers.
Our team is always here to support you—please don’t hesitate to reach out if you have any questions or need assistance.
See below for more information, and feel free to contact us for further details.
 |
Amazon offers 18-inch mounting brackets in both white and black finishes. You can find them at the following links: If you require a 54-inch mounting solution, you can achieve this by purchasing three 18-inch brackets and joining their arms to span the desired length. |
 |
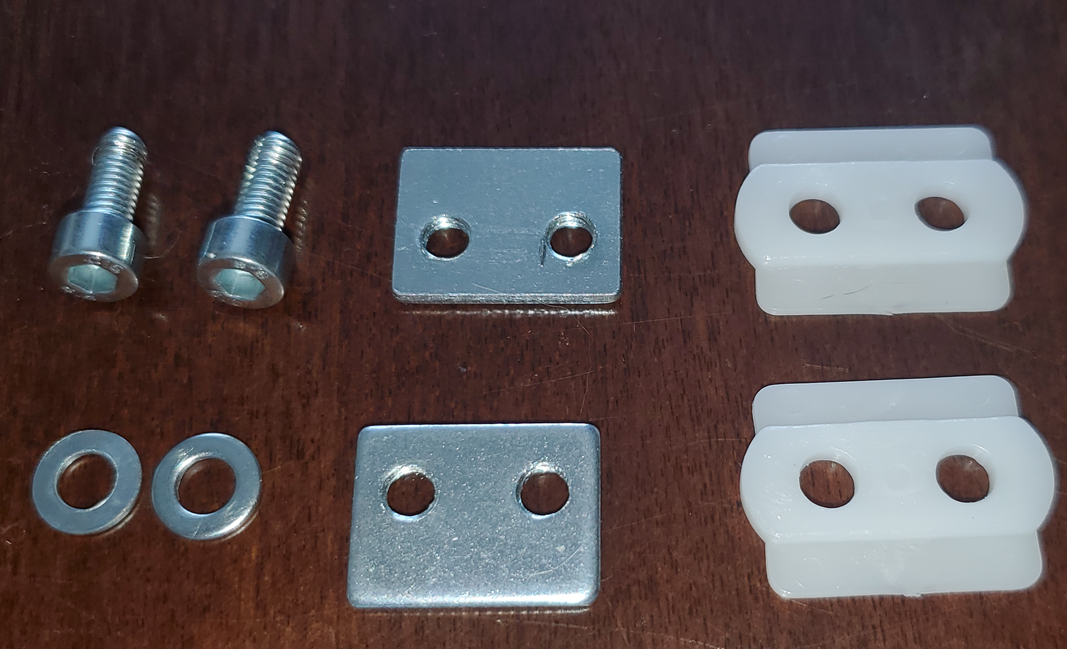
Required Fasteners Please note that the following fasteners are not included with the mounting brackets above and must be purchased separately:
|
Tools and Materials Required
Mounting Bracket (Black or White) with assembly screws
*Note: Additional mounting hardware may be required depending on the ceiling type.

How to assemble and mount the bracket
How to assemble 18" bracket
1. Assemble the Arm Mount with the U shape bracket
Parts Needed

2. Mounting the U shape bracket to the arm mount 
- The Arm mount should now resemble the following

3. Assemble the Arm mount and the camera bracket
Parts needed

4. Mounting the Camera bracket to the arm mount

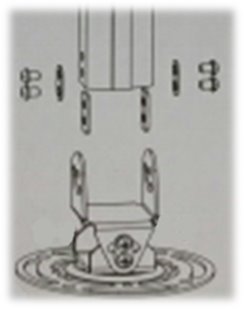
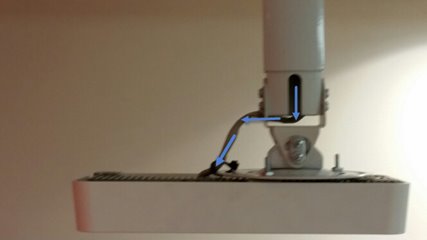
5. Mounting the 3D Camera mount to the Bracket
Parts needed

Installation
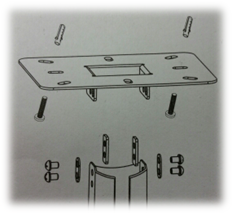
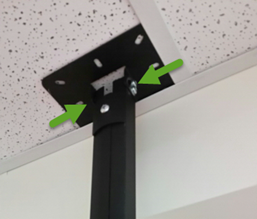
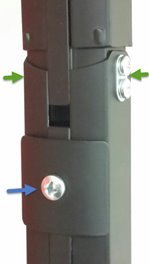
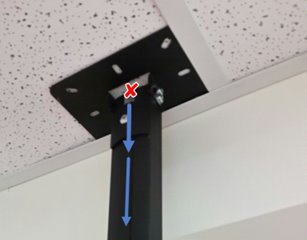
A. Loosen the 4 screws to allow the bracket arm to be easily adjustable to the 3D frame

B. Align the bracket arm with the 3D Frame and mounting together using the screws, washer and nuts. (Doing one arm at a time might be easier)
Inside View

Top View

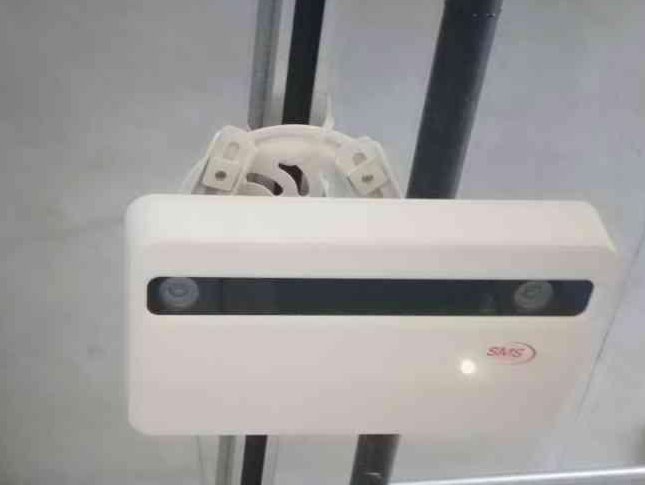
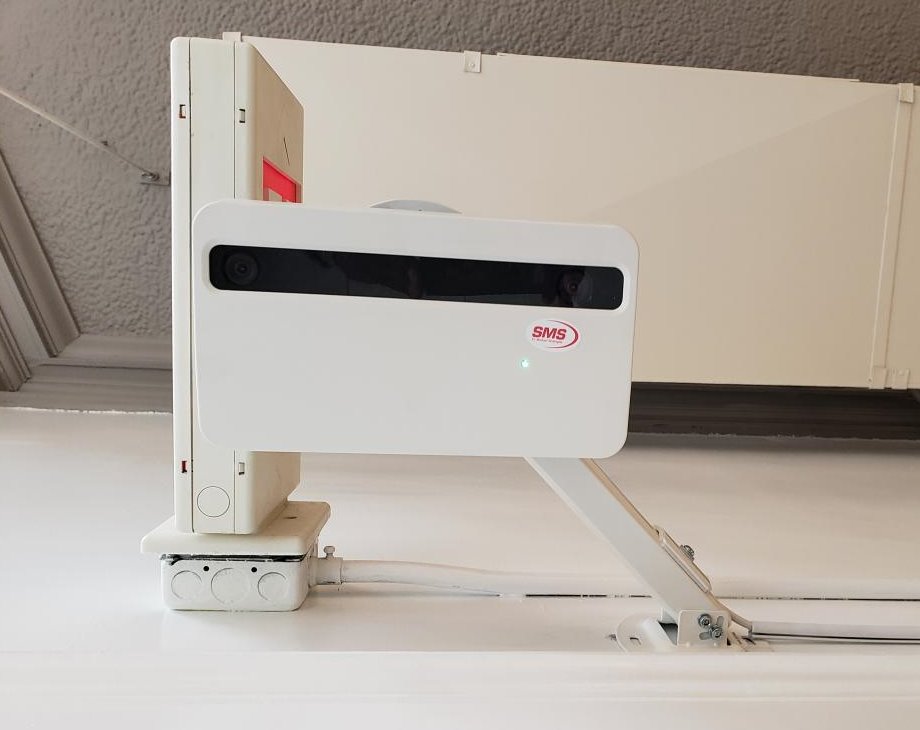
4. Mounting Bracket is now completed
Assembly Without the 3D Camera

Assembly with the 3D Camera

- Select an appropriate location for the ceiling plate. Typically where the cable will be run.*Note: Minimum 2 holes are required to secure the bracket.
- Mount and Secure the plate. *Note: For a closed ceiling the cable hole would typically be in the middle of the plate
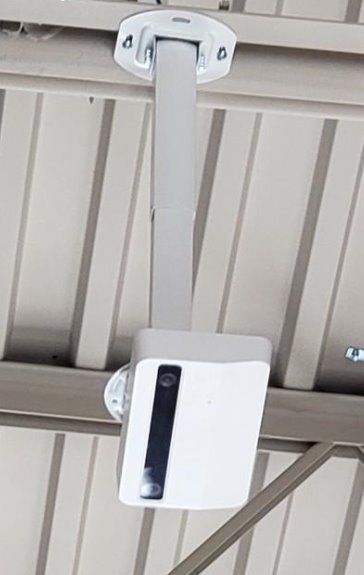
- Fasten Extension Pipe to Ceiling Plate (Optional) Can be mounted directly to Ceiling Plate without extension pipe. Always verify scope of work or counter installation manual to determine at what height the device should be mounted for accurate counting.
Click to Zoom |
Click to Zoom |
- Connect and secure the extension pipe (Optional) Additional Extension Pipe may be used. MAX LOAD total of 3 pipes. Can be interconnected and Fastened.
Click to Zoom |
Click to Zoom |
Click to Zoom
|
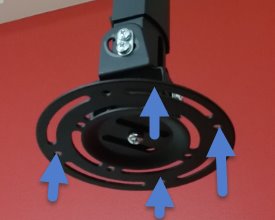
- Connect the Mounting Plate to the Extension Pipe
Click to Zoom
|
Click to Zoom
|
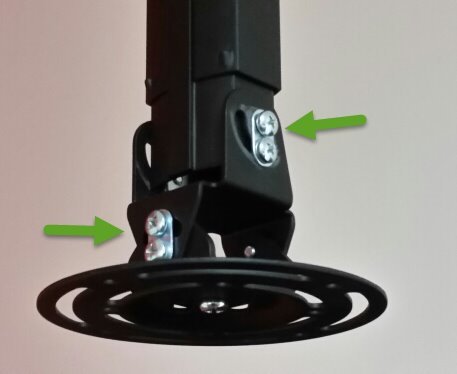
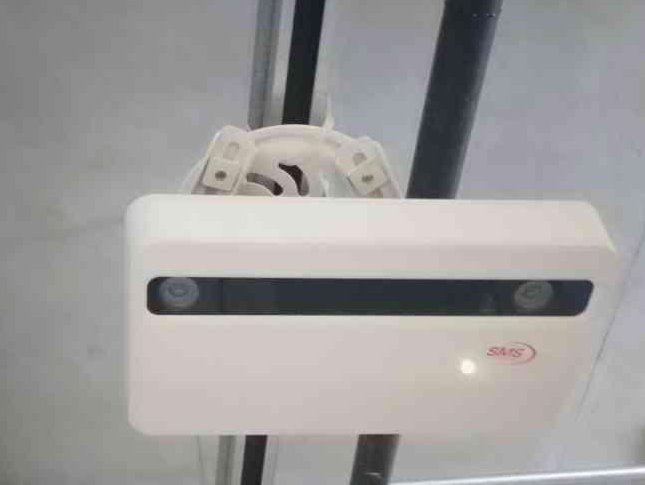
- Connect the counter to the mounting plate
Click to Zoom
|
Click to Zoom
|
Click to Zoom
|
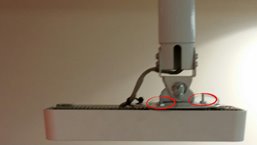
- Route cable though the interior of the pipe and tie wrap any loose to the mounting plate.
Click to Zoom
|
Click to Zoom
|
| Open Deck Ceiling Type | No Extension pole |
Click to Zoom
|
Click to Zoom
|
Complex off wall / out of scope ceiling - Made easy with Bracket
Click to Zoom
|
Click to Zoom
|
Bracket in Black for Incognito
Click to Zoom
|
Click |
- Select an appropriate location for the ceiling plate. Typically where the cable will be run.*Note: Minimum 2 holes are required to secure the bracket.
- Mount and Secure the plate. *Note: For a closed ceiling the cable hole would typically be in the middle of the plate
- Fasten Extension Pipe to Ceiling Plate (Optional) Can be mounted directly to Ceiling Plate without extension pipe. Always verify scope of work or counter installation manual to determine at what height the device should be mounted for accurate counting.
 |
 |
- Connect and secure the extension pipe (Optional) Additional Extension Pipe may be used. MAX LOAD total of 3 pipes. Can be interconnected and Fastened.
 |
 |
 |
- Connect the Mounting Plate to the Extension Pipe
 |
 |
- Connect the counter to the mounting plate
 |
 |
 |
- Route cable though the interior of the pipe and tie wrap any loose to the mounting plate.
 |
 |
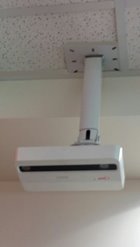
Installation Examples
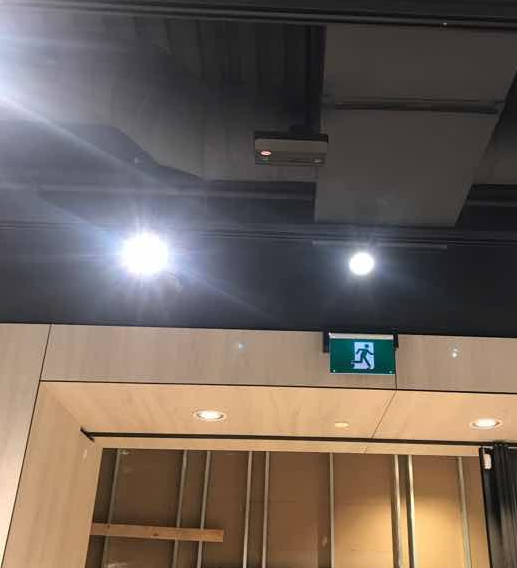
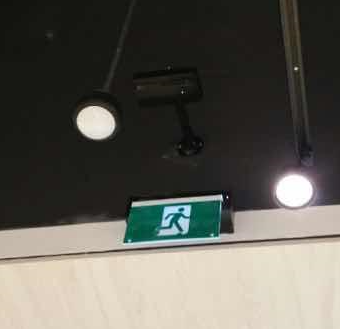
Open Deck Ceiling Type
| No Extension pole | |
 |
 |
Complex off wall / out of scope ceiling - Made easy with Bracket
 |
 |
Bracket in Black for Incognito
 |
 |
FAQ
Q: Where can I order a bracket?
A: Amazon offers SMS approved 18-inch mounting brackets in both white and black finishes. You can find them at the following links:
Amazon link for U.S.: [White] | [Black]
Amazon link for Canada: [White] | [Black]
If you require a 54-inch mounting solution, you can achieve this by purchasing three 18-inch brackets and joining their arms to span the desired length.
Q: Do other brackets work?
A: We know that some customers are sourcing their own systems. One high end brand which seems to have accommodate some context can be found here - https://www.peerless-av.com/collections/projector-mounts - SMS offers no support on this self-serve option.
Q: Does the counter always require a bracket?
A: It is not required when there is a ceiling available for the counter to be mounted on which is obstruction free and within the height limitations of the device. For more information, refer to the following knowledge article: https://help.storetraffic.com/3diilc-coverage-chart