How To - Pre-Cable for an IP Traffic counter installation
How To
Table of Contents
Overview

The purpose of this article is to describe how a store or other location should be cabled for a traffic counter installation. When electing to run the cable for your traffic counter, certain criteria MUST be met in order to ensure a successful install on the first visit by an SMS technician. Following these guidelines will lead to a less costly installation and help ensure you are counting on day one.
Planning the cable run
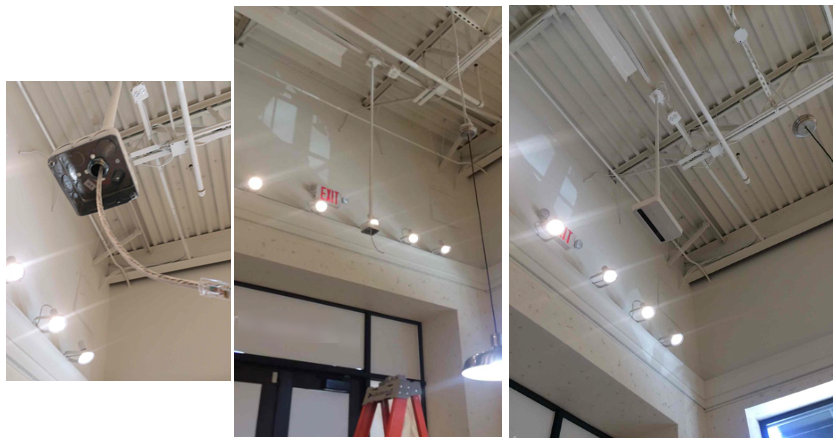
Perform a survey of your location identifying each entrance / point of interest that you would like to be covered by a traffic counter. Obtain pictures take note of the following.
Width of the entrance or opening
Height from the floor to ceiling surface where the traffic counter can be mounted (Consult the installation manual for typical mounting height)
The traffic counter has a MAX and MINIMUM height — consult the counter’s mounting height chart
The traffic counter has a MAX and MINIMUM distance it can be mounted away from an entrance — consult the coverage depth in the mounting chart
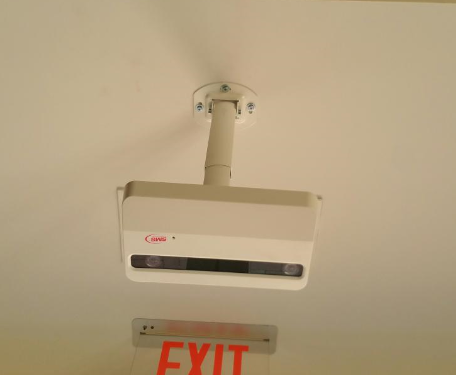
Mounting surface should be free of obstructions such as lights, exit signs, ducts, or any hanging objects that may block the camera
For ceilings higher than acceptable limits, a bracket or pole solution (pendant mount) must be used
Should the ceiling be HIGHER than the acceptable limits for the traffic counter, a bracketing or pole solution (pendant mount) would need to be purchased and installed or constructed.
To reduce cost, for ceilings above 12 feet, you will be required to provide a drop down pole to mount the camera on, with the CAT5 cable ran into it, to ensure the technician does not need to rent a lift or a tall ladder when going on-site. Examples follow:
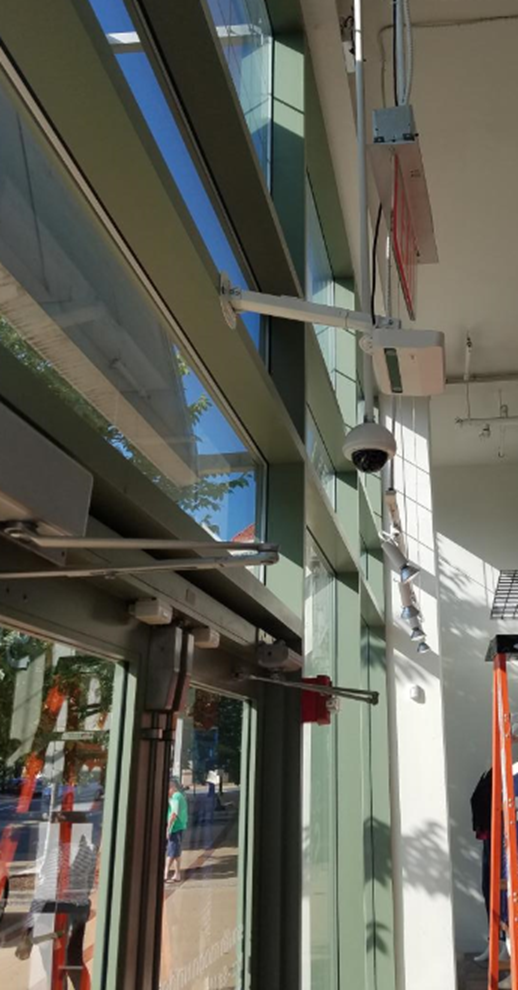
For an SMS-approved bracket solution (White/Black), refer to: https://help.storetraffic.com/mounting-bracket
If unsure about placement after reviewing documentation, contact installation@storetraffic.com with the above information and entrance photos.
Running the cable
Maximum cable length requirement:
➡️ The total cable run from the network point to the entrance must not exceed 300 ft.
If a longer distance is required, a network switch placed along the path can act as a repeater.
Point A (network): Ethernet (PoE) spot which is usually in the back store (recommended) or at the POS counter. Leave 10 feet of loose cable. Mark the cable: “For Traffic Counter to entrance #__”. There must a free network port and a free power outlet at this location.
-
Point B (entrance): Run the cable up to the entrance, 2 feet from the door, centered. Leave 10 feet of loose cable. Mark the cable the same way as above.
Closed ceiling: Leave cable accessible via nearby access panels; reachable with a 10 ft A-frame ladder
Open ceiling: Ensure the technician can retrieve the coiled cable with a 10 ft A-frame ladder
Identifying the end points
Mark both ends: “For Traffic Counter to entrance #__”.
Testing the cable and ensuring you are ready for the counter installation
-
Technician tasks:
Retrieve the cable through available access panels
Use the 10 ft of slack to position cable where needed
Connect RJ45 to PoE injector → to your network, or directly to PoE switch if used
- If using a PoE switch, advise installation@storetraffic.com which ports are allocated.
FAQ:
Q: What type of cable should be used?
A: Connect up the devices using Cat 5 or Cat 6 cable.
Q: What is the maximum acceptable cable length?
A: Maximum run is 300 ft. If more length is needed, place a network switch along the path to extend the run.
Q: How is the IP camera powered?
A: Via PoE (PoE switch or PoE injector).
The camera needs a power supply, and the easiest method is power over Ethernet (PoE) to supply power through the Cat 5 cable. To do this you need either a PoE enabled switch or a PoE power supply. Make sure the camera is PoE enabled. If you are using a PoE power supply, then it should be placed between the switch and the camera unless the switch is POE enabled. Alternatively, a rack-mounted PoE Midspan device is ideal for powering several cameras.
Q: Does the cable need to be run through conduit?
A: Check mall or landlord policy.
Q: Is a UNION WORKER or ELECTRICIAN REQUIRED to run the cable?
A: Check with the local authority or General Contractor (GC)
Q: Is a LOW VOLTAGE PERMIT required to run the cable?
A: Check with the local authority or General Contractor.
Troubleshooting
- Incorrect wiring or RJ-45 terminations may cause communication failures.
- Excessive cable length can reduce PoE voltage at the camera.
- Digital network testers (e.g., T3 Cable Prowler, Net Prowler, NetChaser) can identify faults, PoE issues, network configuration, and cable routes.
Digital Network Testers
T3 Innovation manufactures a comprehensive range of digital cable testers. These testers can be used to identify cable faults, such as open circuits, shorts or incorrectly wired RJ-45 connectors, and also for work on coaxial cables. One such device is the Cable Prowler, which identifies cable faults and measures PoE voltages as well as identify the cable locations on a hub, switch or router. Other devices, like the Net Prowler can ping and discover IP and MAC addresses, detect VLAN configuration, plus perform numerous other tests. T3's NetChaser also measures the transmission speed of the cable and traces its route from the camera to the router.