Overview
If the PEARL is already connected to your network, but not yet added to your location in T.M.A.S., please follow the instructions below.
Procedure
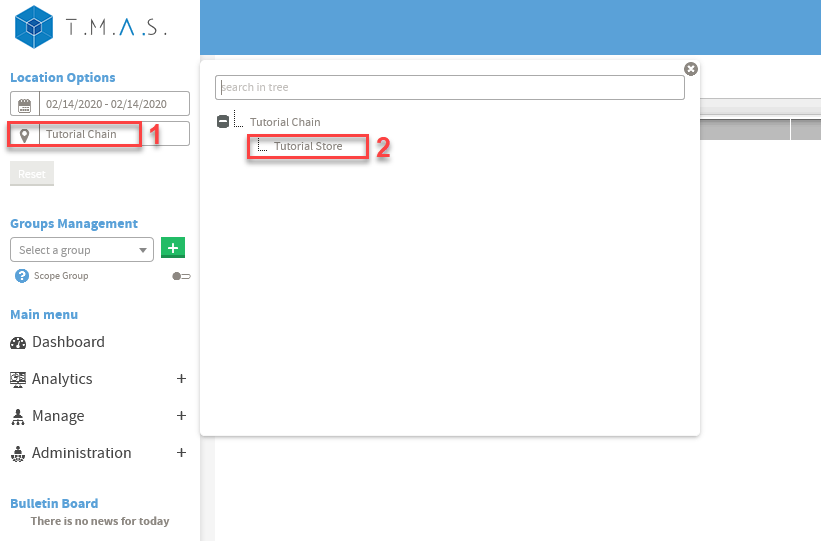
- In T.M.A.S., select the location where the PEARL will be assigned
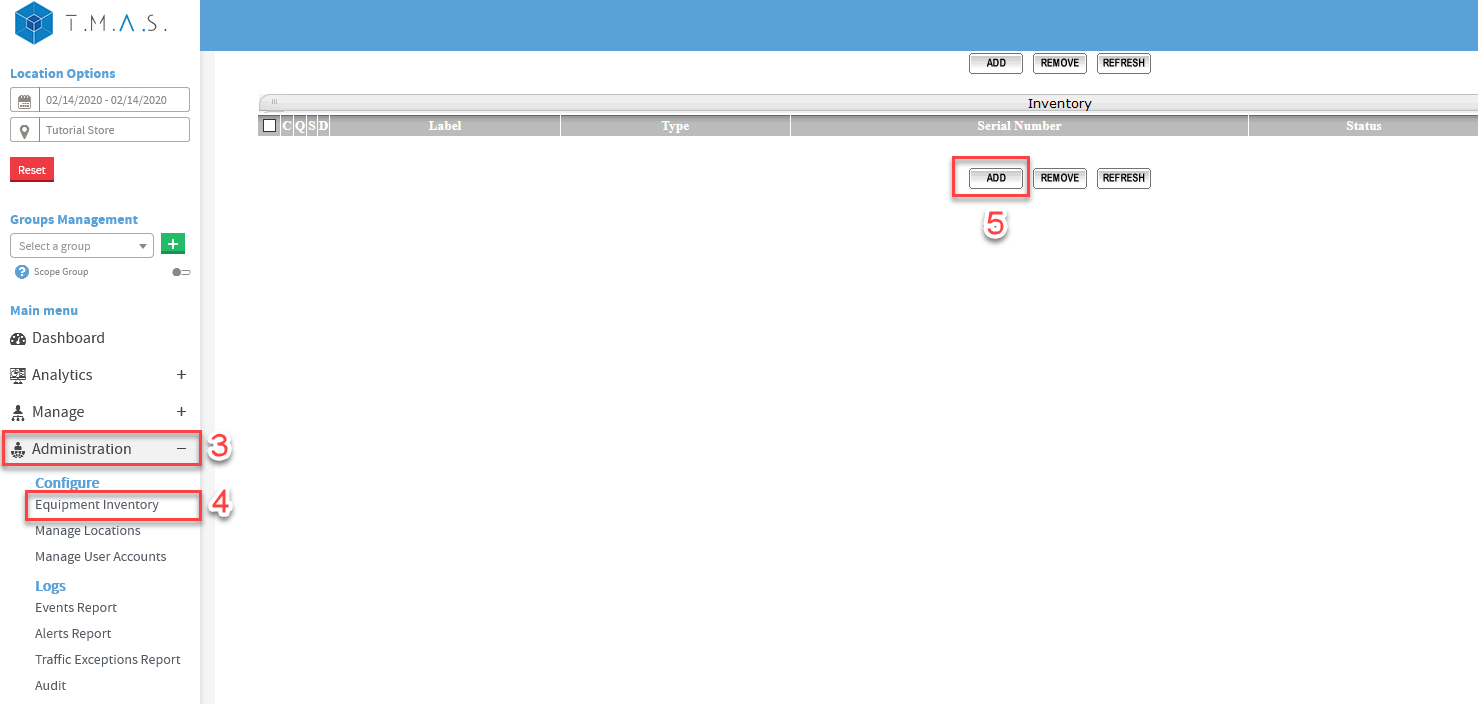
- Select “Equipment Inventory” from the “Adminstration" tab on the left
|
 |
|
3. Click on Administration
4. Click on Equipment Inventory
5. Click on Add
|
 |
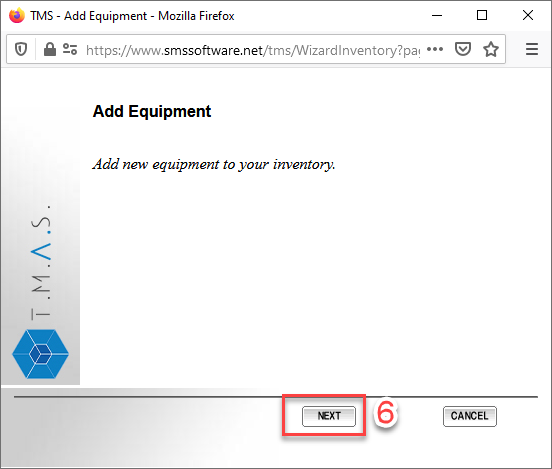
6. Click Next |
 |
|
7. Device should be selected
8. Click on Next
|
 |
|
9. Select “Unassigned”
10. Enter the MAC address of the PEARL (with the colons).
11. Click “NEXT”
|
 |
- Input the Device Label, (Name shown on reports for the particular device)
- Select the local time zone of the device
- Click on Next
|
 |
15. Click “Next” |
 |
16. Click “Close” |
 |
- Click “Refresh”
- You will now see the device assigned in Equipment Inventory
|
 |


