Integrating Lightspeed X-Series POS System, Formerly Vend: A TMAS Guide
Discover the step-by-step process for seamlessly integrating Vend's Lightspeed X-Series Point-of-Sale service with your TMAS system. Enhance your business with efficient, streamlined data analysis and improve operational efficiency
Table of Contents

This article describes the process to setup an API integration with Vend POS (X-Series) with the purpose of downloading Sales, Transactions, Items and Staff data into T.M.A.S. for the purpose of populating reports and the dashboard.
T.M.A.S. allows for the integration of each of your locations Vend accounts so that it can import the following data.
- Sales Data
- Transactional Data
- Items Sold
Click Here to LEARN MORE about SMS Data Privacy Policy
Requirements
- Active T.M.A.S. Retail subscription
- Aligned location ID of T.M.A.S. to match Vend
- Vend account which will be able to authorize T.M.A.S. integration
Setting up the Integration
Verify and or Disable Manual Retail Dashboard editing
It is advisable to disable the manual editing feature if you have automated import or POS sync configured to avoid data conflicts. Verify your permissions, access user settings, and disable the manual editing option for users who no longer need access.
| Finding the integration | |
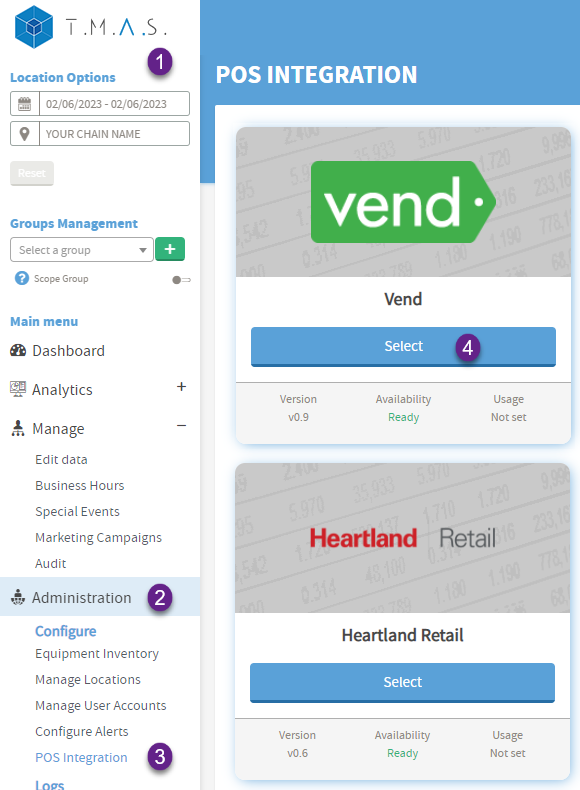 |
1. Login to T.M.A.S 2. Expand Administration 3. Select POS Integration 4. Select Vend |
| Complete General Information | |
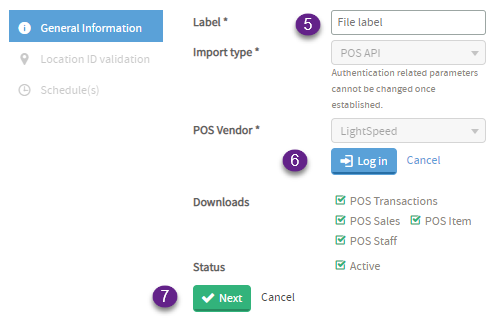 |
5. Input Label (Typically chain name) 6. Select Log in and authenticate to Vend. 7. Select Next |
| Match Location IDs between T.M.A.S and Lightspeed X-Series (Vend) | |
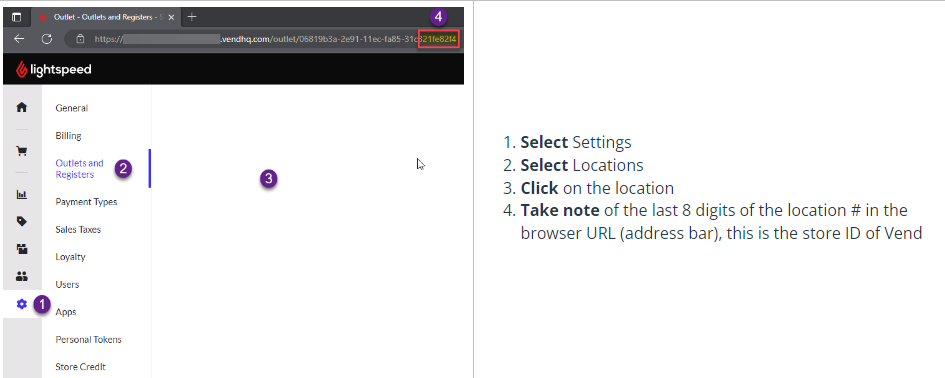
| Obtaining the location ID from Lightspeed X-Series (Vend) | |
 | |
| Update T.M.A.S. Location ID with last 8 digits of location GUID in URL | |
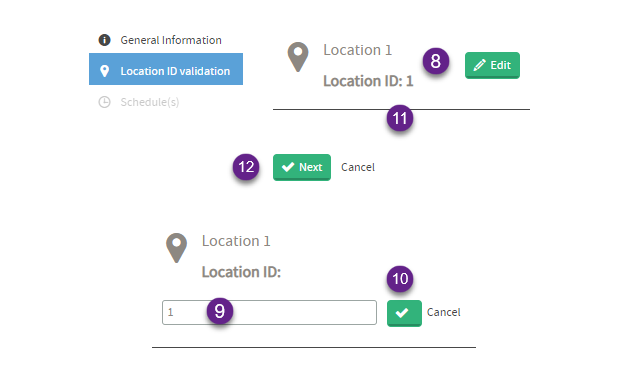 |
8. Select Edit 9. Input ID of location from Vend (last 8 digits of GUID in URL) 10. Click the checkmark 11. (Optional) Update other locations as needed 12. Select Next
WarningYou might encounter an issue loading the "Location ID Validation" during setup.
|
Info If you have more than 1 location, you will need to login to Vend, click on a location and verify the shop ID which flashes in the URL at the top of the browser. Check out the video above for more info on this. | |
| Setting an Import Schedule | |
 |
13. Set Hourly for schedule type 14. Input 00:02 for Start hour 15. Select Finish |
Success Sales, Transactions, Items and staff should now flow into T.M.A.S. The dashboard and reports should be populated within the hour as T.M.A.S. will be downloading data for a few days back. To verify the data, generate a Totaling or Data Export report. | |
How to Disable / Enable or Remove the Integration | |
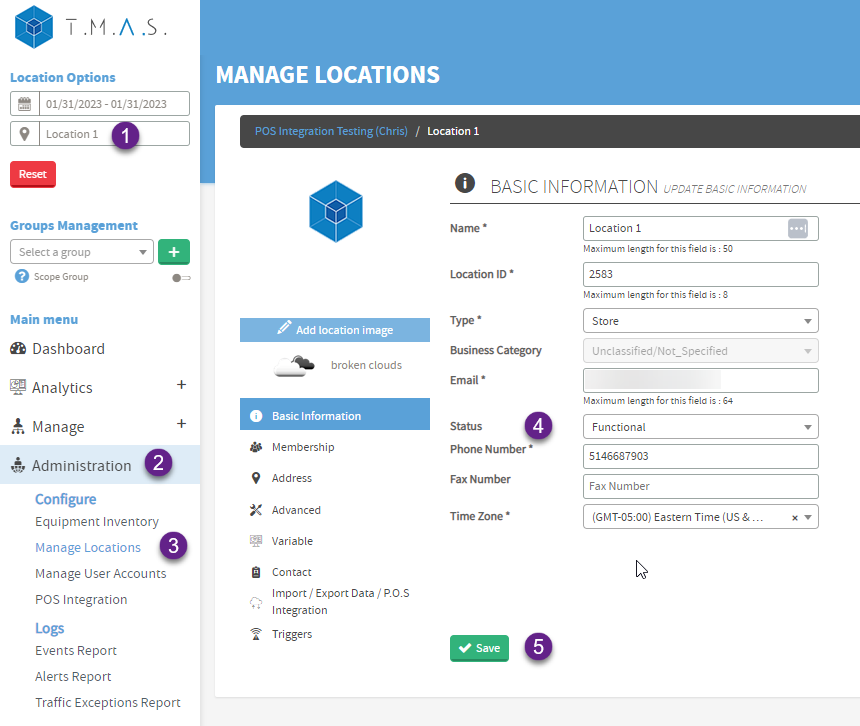
| Disable Single or Multiple locations - Change Location Status | |
 |
|
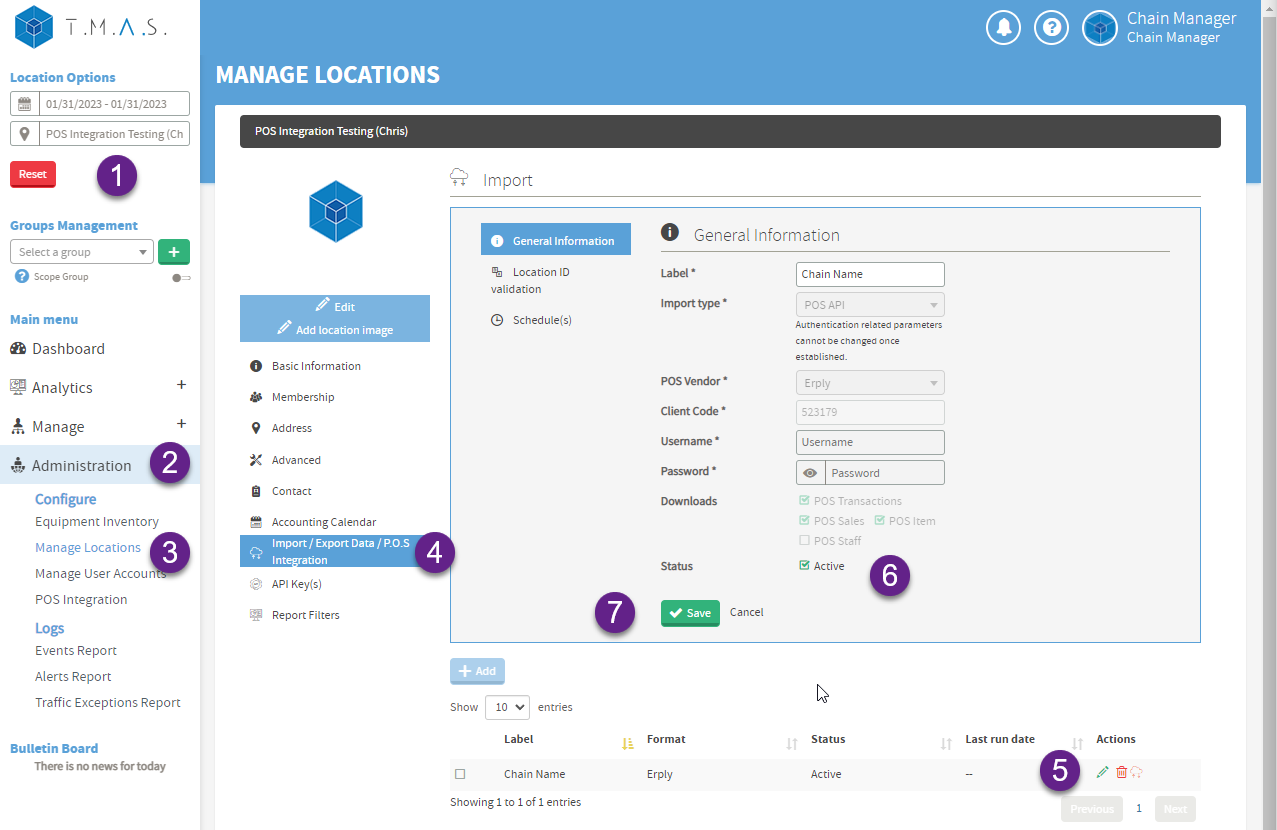
| Disable - All Locations | |
 |
|
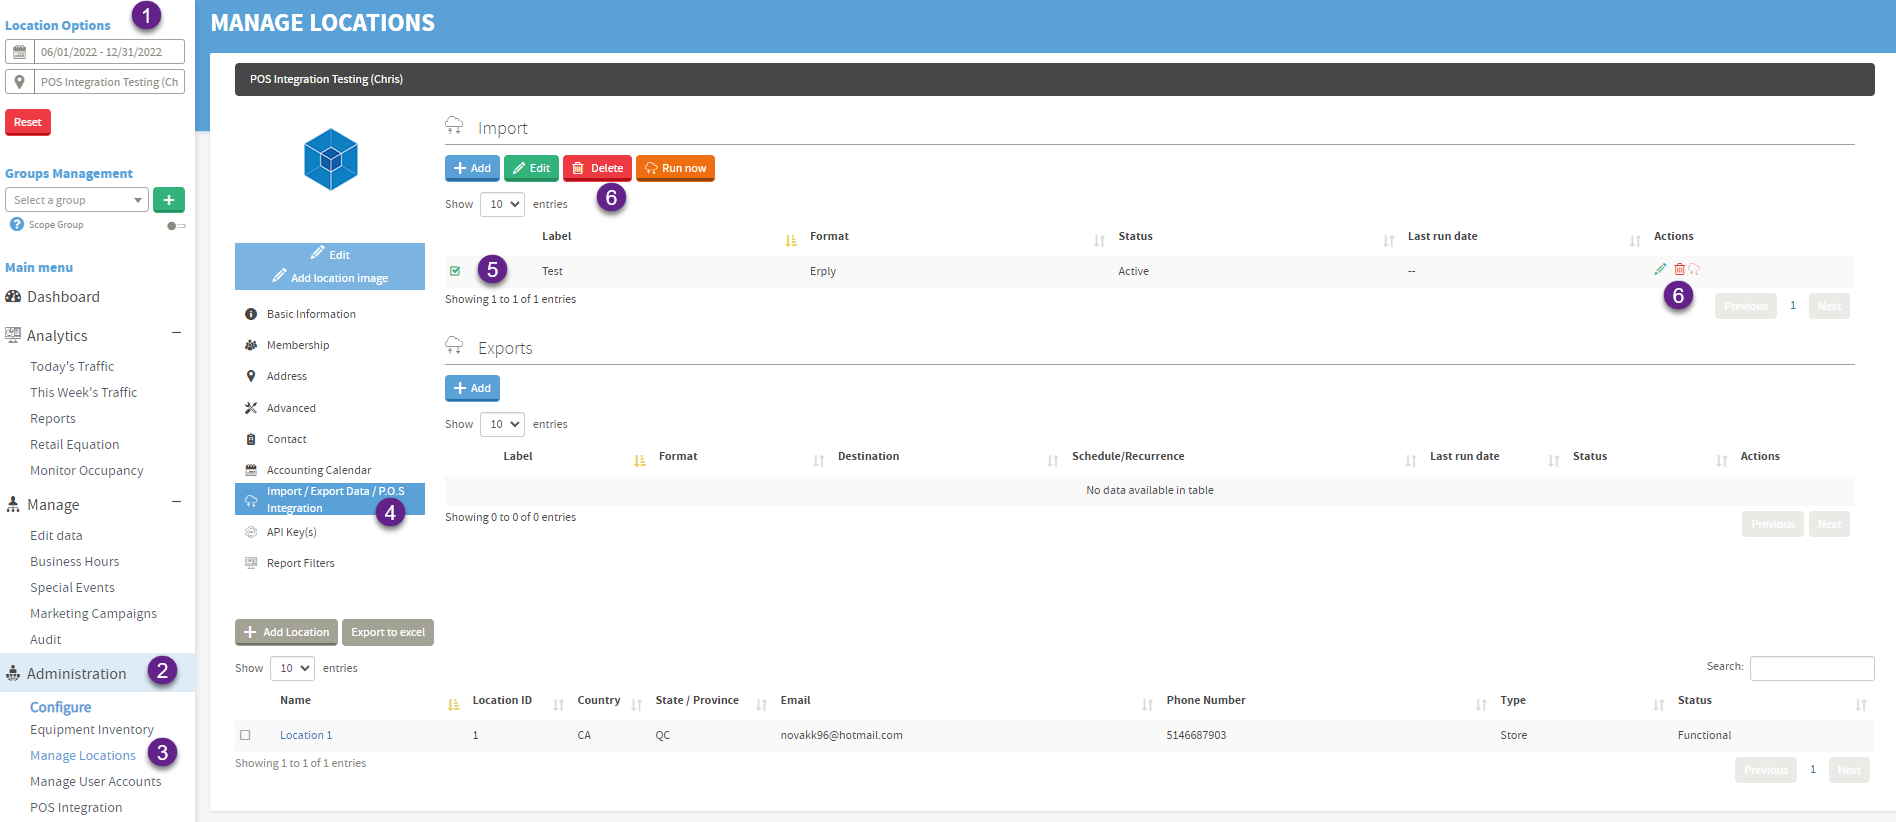
| Removing the Integration | |
 |
|
F.A.Q.
| Q: How often does the Vend Data refresh in T.M.A.S.? |
| A: Data refresh is determined by the schedule set for the integration, Example: If you set Hourly to start at 00:02 as indicated in the steps above the data will refresh at 2 mins past each hour. For more info verify the setting an import schedule in the above steps of this article. |
| Q: How does T.M.A.S. receive staffing data from Vend? |
| A: T.M.A.S. calls employee clockin's endpoint through the Vend API. Which is linked to the Clocking employees in and out – Vend Retail (R-Series) (Vendhq.com) optional module which can be enabled in the Vend application. Ff changes have been made to clock in/out times prior to 24hours ago, this would need to be manually updated in TMAS via Edit Data Function |
| Q: All locations are syncing data expect for 1 or 2 locations. |
| A: Make sure that the location's ID is correct in TMAS and that store status is set to functional. Review parts 2-3 in the of the Vend setup instructions of this article. |
| Q: All locations are no longer syncing with T.M.A.S. . |
| A: The integration relies on the original user who set it up. If the user doesn’t exist anymore, the integration authorization will have been removed, therefore you will need to go through the integration process again. |