Installation du 3D SCOPE II (LC & HC)
Comment installer
Table of Contents
Aperçu
Cet article décrit la procédure d'installation des compteurs de trafic 3DScope II et répertorie les outils, l'équipement et les étapes nécessaires à sa bonne réalisation.
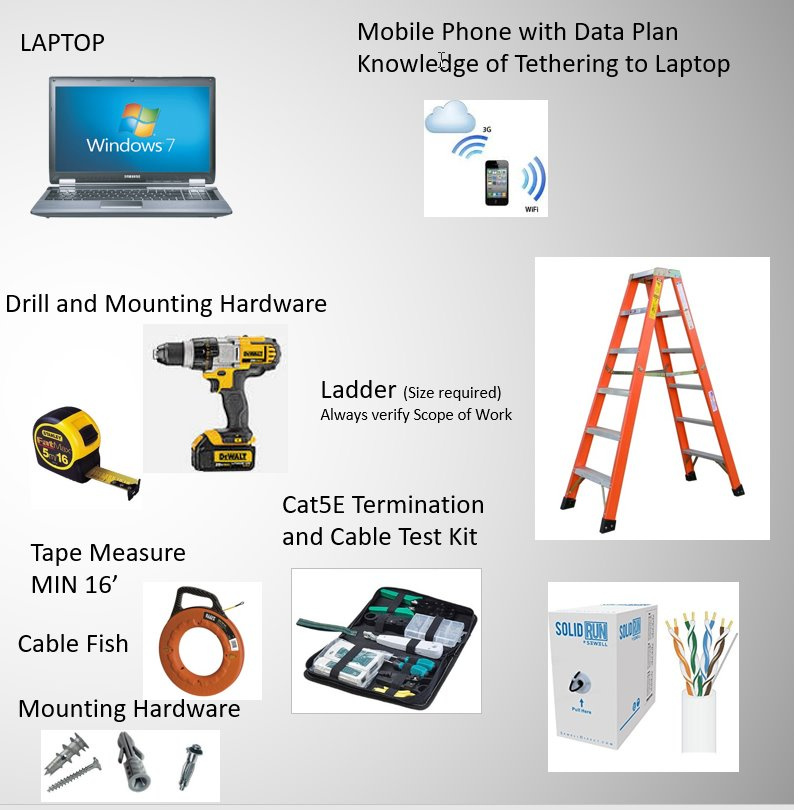
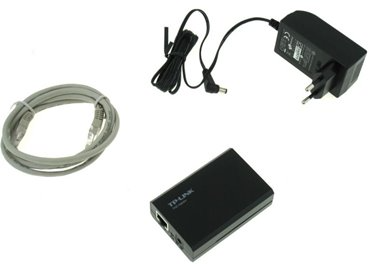
Outils nécessaires
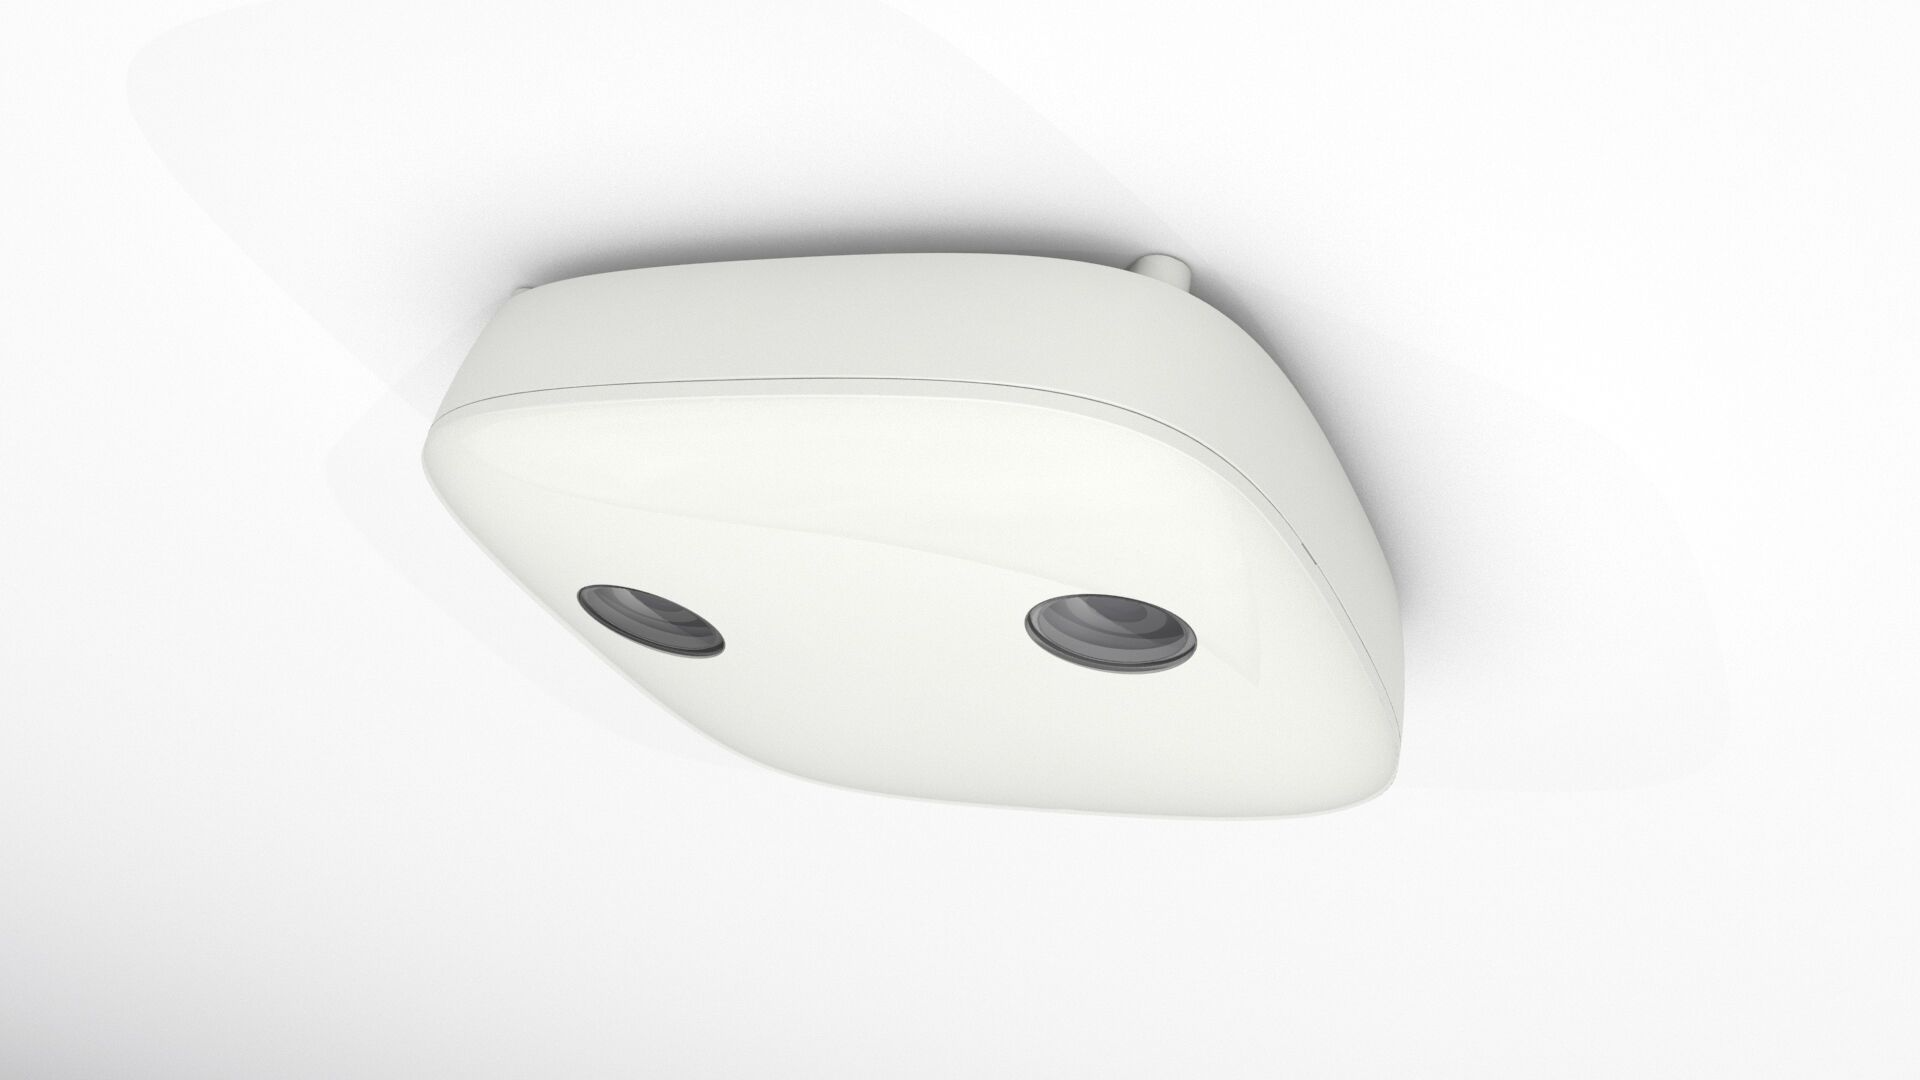
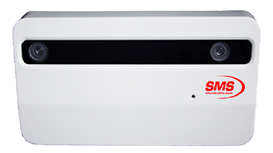
| 3D Scope II LC (plafond bas) | 3D Scope II H C (Haut plafond) |
 |
 |
Remarque : Un téléphone mobile avec forfait de données est requis UNIQUEMENT si un étalonnage à distance du compteur de trafic est nécessaire, lorsque le réseau local ne permet pas d’accéder à Internet. Pour les plafonds d’une hauteur supérieure à 4,9 mètres (16 pieds) ou pour lesquels l’utilisation d’une échelle est jugée dangereuse, l’utilisation d’une nacelle élévatrice peut être nécessaire.
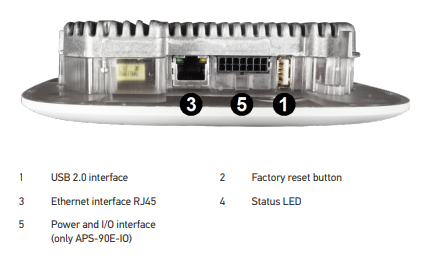
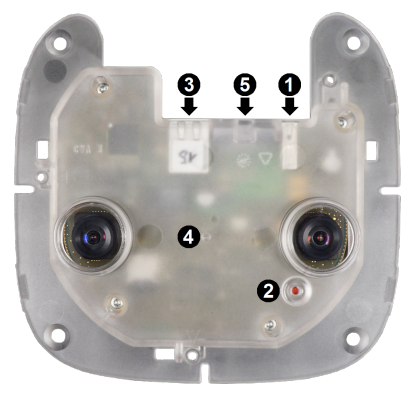
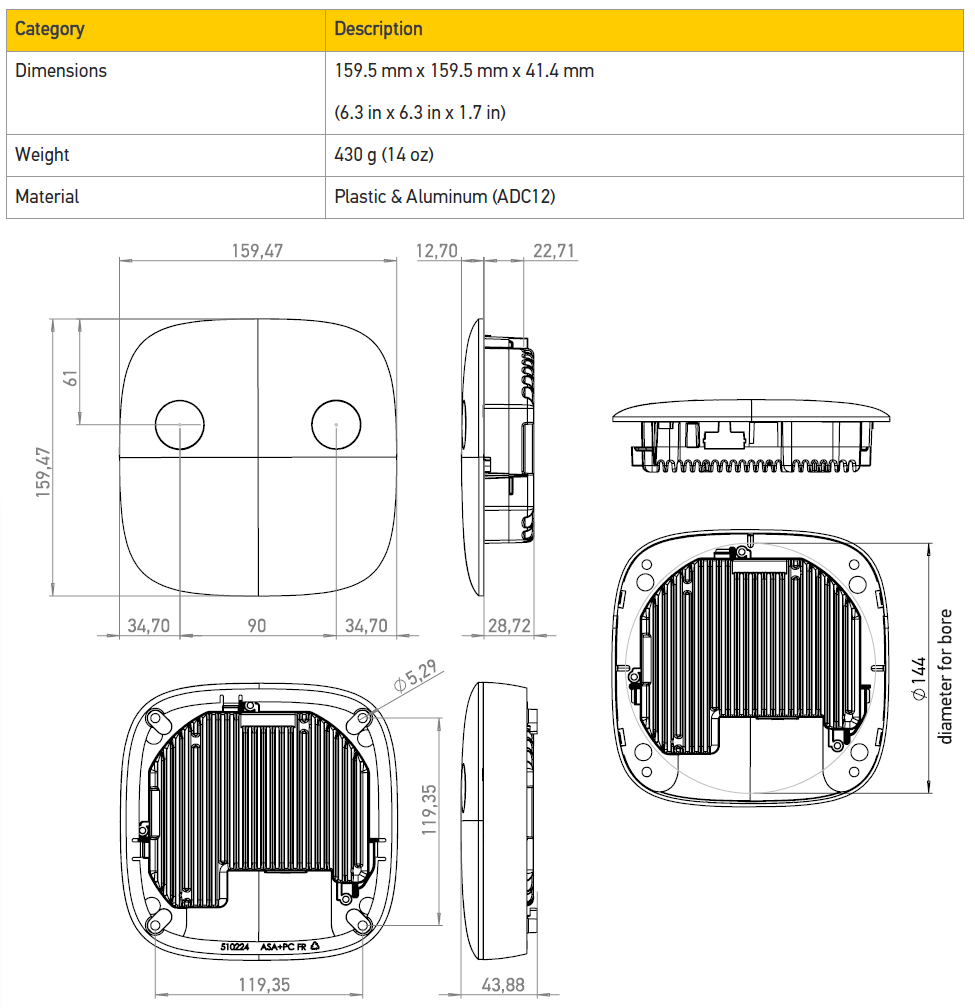
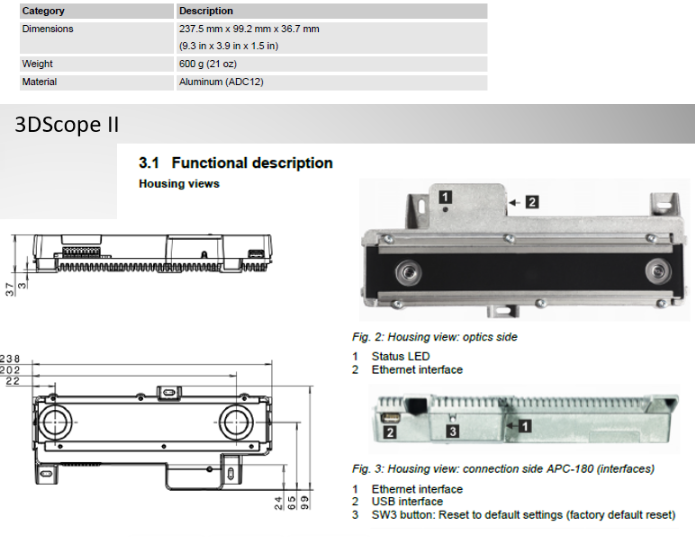
Données techniques / mécaniques
| 3DScope II LC (noir ou blanc) | 3DScope II H C (Noir ou Blanc) |
|
|
- Câble reliant l'entrée ou la zone à surveiller au point de raccordement au réseau assurant l'accès à Internet
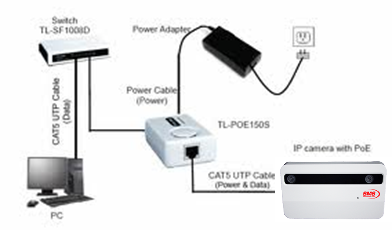
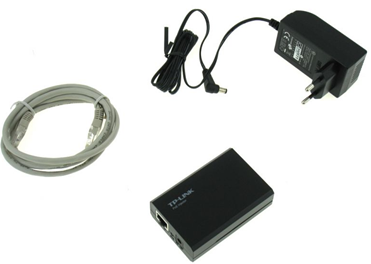
- (Optionnel) Injecteur PoE TP-Link
Étendue des travaux d'installation
- Déterminez l'emplacement de montage du comptoir.
- Mesurer la hauteur et la largeur de l'entrée à surveiller.
- Vérifier la zone de détection pour déterminer si la couverture sera souhaitable.
- Déroulez le câble
- Monter le compteur de trafic
- Installation de l'injecteur PoE (non requis s'il existe un commutateur PoE disponible à cet emplacement avec un port réseau libre)
- Vérifiez que la lunette 3D est en ligne et communique avec TMAS.
- Réservez votre séance d'étalonnage par SMS (peut être effectuée à l'avance).
Considérations relatives au montage
-
La vue du comptoir ne doit en aucun cas être obstruée ou masquéepar les éléments suivants.
- Panneau de sortie
- Luminaires suspendus
- Signalétique (nom du magasin, panneaux de réduction ou numérique)
- Murs, soffites, vitres ou écrans.
- Surfaces réfléchissantes susceptibles de projeter la lumière directement sur la lentille du compteur.
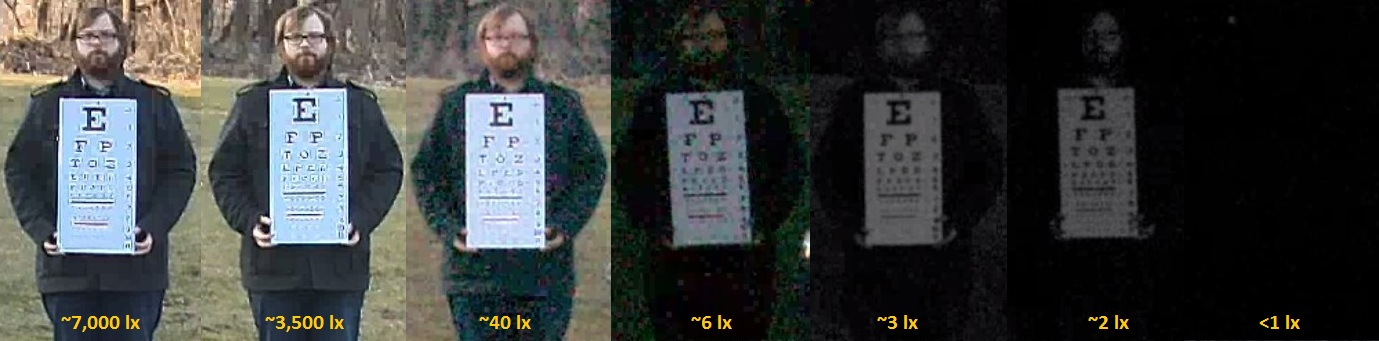
- Éclairement requis : 3 LX
- Décorations suspendues, ballons ou parasols de terrasse
- Plantes / Arbres
-
Type d'entrée
-
La porte s'ouvre vers l'intérieurde l'emplacement
- Le comptoir devra être situé à au moins 30 cm (1 pied) plus loin que la longueur maximale de la porte lorsqu'elle est complètement ouverte.
-
La porte s'ouvre vers l'extérieurde l'emplacement
- Le comptoir sera placé à au moins 30 cm, idéalement à 60 cm, à l'intérieur de l'emplacement centré par rapport à l'entrée.
-
Escaliers
- Installation non recommandée directement sur les marches de l'escalier.
- Recommandé : installation au-dessus du palier, en bas ou en haut de l'escalier.
-
Vestibule
- Installation non recommandée dans le vestibule
- Recommandation : installer du côté magasin des portes du vestibule.
- Porte tournante
- Ascenseur
- Escalator
-
La porte s'ouvre vers l'intérieurde l'emplacement
Mesurer l'entrée et vérifier la zone de couverture
Pour plus d'informations, veuillez consulter les articles suivants :
Tableau de couverture LC/HC du 3D Scope II
Câblage pour le comptoir
Pour plus d'informations, veuillez consulter l'article suivant : En savoir plus >>>
Installation du comptoir
Quel type d'appareil installez-vous ?
Montage en surface
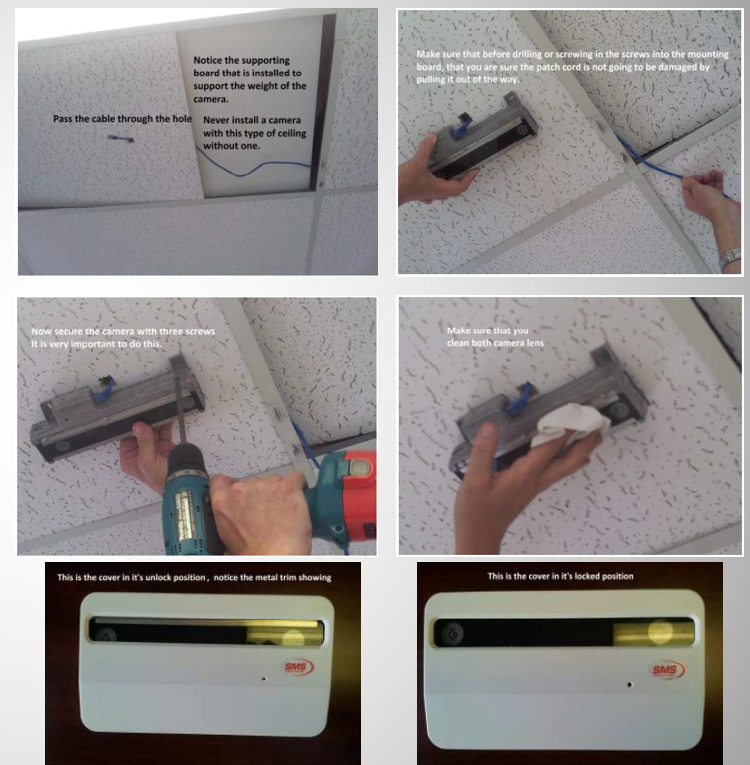
- Fixez le boîtier de montage en surface 3DII-LC au plafond.
- Connectez le câble Ethernet au 3D SCOPE II LC
- Enclenchez la plaque frontale dans le cadre de montage en surface.
Montage encastré
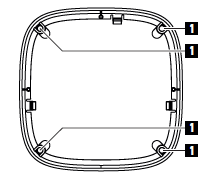
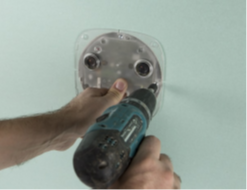
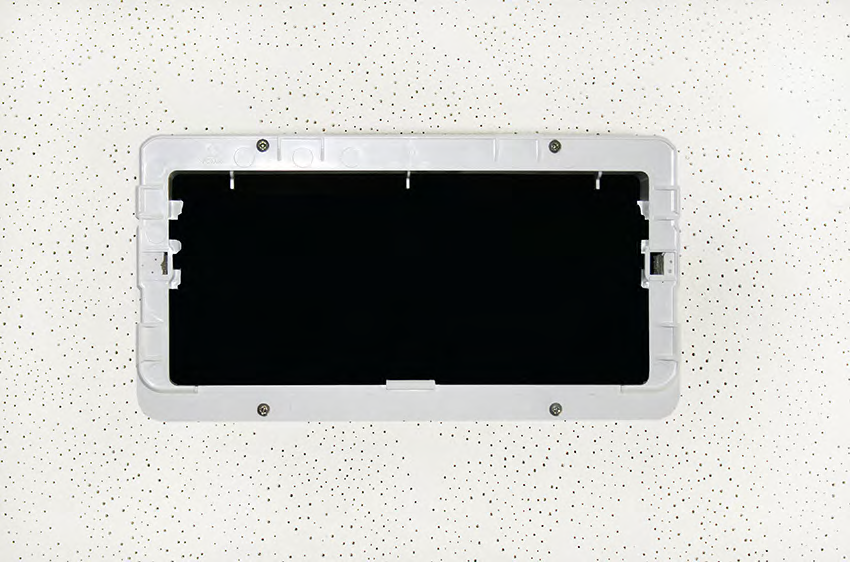
- Percez un trou de 144 à 150 mm (5,6 à 5,9 pouces).
-
Montez les trois vis et les rabats, puis rabattez-les près du capteur.

-
Fixez -le avec les trois vis et les languettes, ou les quatre trous de vis selon le matériau du plafond.
-
Branchez le câble Ethernet au 3DScope II-LC
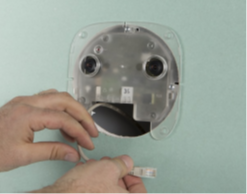
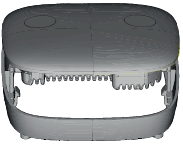
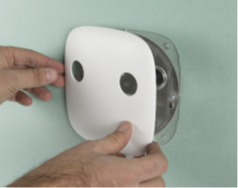
- Monter la plaque frontale
Montage en surface
1. Fixez le 3DScope II au plafond à l'aide du matériel de montage approprié au type de plafond.
2. Branchez le câble Ethernet au 3DScope II.
3. Essuyer la lentille
4. Cliquez sur Couverture
Montage encastré
(Le support de montage et le capot doivent avoir été achetés séparément chez SMS)
-
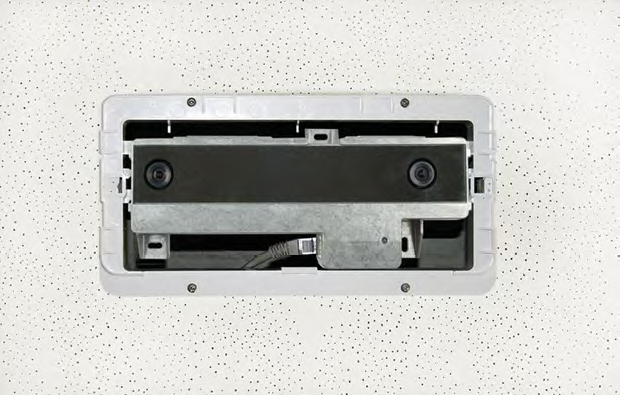
Fixez le support à l'intérieur du plafond.
-
Enclenchez le 3DScope et branchez le câble Ethernet.
-
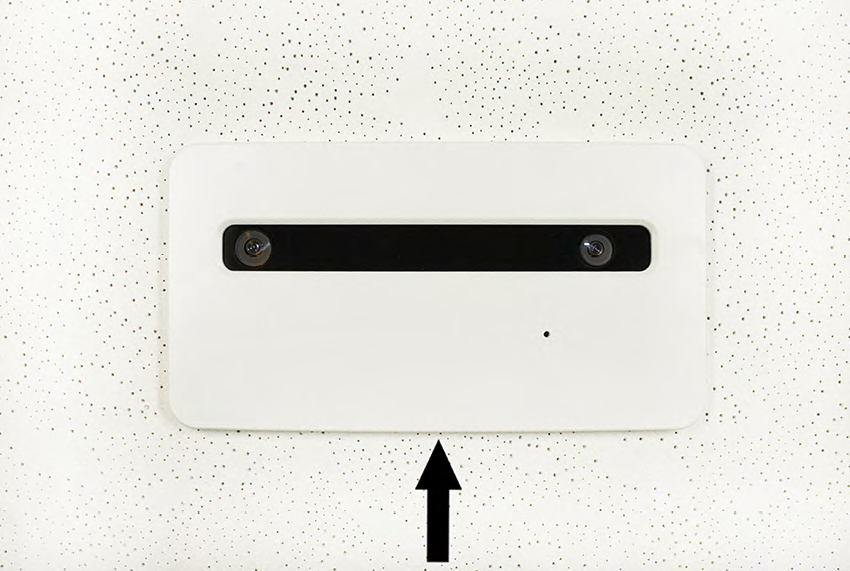
Installez le couvercle en mettant le capot et en le faisant glisser à la main.
Montage sur un support
Pour plus d'informations, veuillez consulter l'article suivant : https://help.storetraffic.com/hardware/mounting-bracket
Montage en passant
|
|
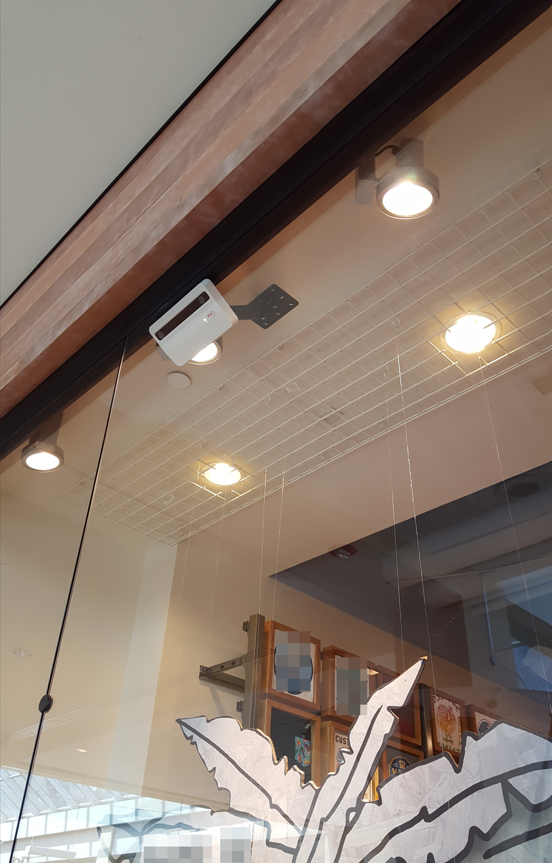
Installation de caméras sur des plafonds inclinés : solutions pratiques
L'installation de caméras sur des plafonds inclinés ou des surfaces angulaires peut présenter quelques difficultés, notamment pour obtenir un alignement parfait et une finition soignée. Heureusement, il existe plusieurs solutions efficaces, adaptées à votre budget, vos préférences esthétiques et la disponibilité des matériaux.
|
1. Adaptateurs pour plafonds inclinés Un adaptateur pour plafond incliné est l'une des solutions les plus simples et les plus esthétiques. Ces adaptateurs sont spécialement conçus pour compenser les surfaces inclinées, permettant ainsi de monter la caméra à l'horizontale malgré la pente. Bien que cette option offre la finition la plus impeccable, sa disponibilité peut être limitée selon votre région. Par exemple, trouver des adaptateurs adaptés au Canada peut s'avérer difficile, ce qui peut nécessiter de s'approvisionner auprès de fournisseurs internationaux ou d'explorer d'autres solutions. |
 |
|
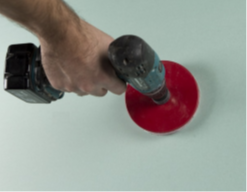
2. Adaptateur pour plafond incliné à faire soi-même Pour une solution économique et personnalisable, un adaptateur à faire soi-même peut s'avérer très efficace. Cela implique généralement :
Cette méthode permet un réglage précis et s'adapte à tous les angles. Bien qu'elle ne soit pas aussi esthétique que les adaptateurs industriels, elle est pratique et largement utilisée. |
 |
|
3. Supports de montage réglables Une autre option envisageable consiste à utiliser un support de montage réglable. Ces supports sont conçus pour offrir une grande flexibilité de positionnement et permettent des installations en angle. Bien que cette solution ne soit pas aussi esthétique qu'un adaptateur dédié, elle a démontré son efficacité dans de nombreuses installations concrètes. Des clients ont utilisé avec succès des supports comme celui-ci : |
 |
Installation de l'injecteur PoE
1. Localisez le commutateur réseau du magasin.
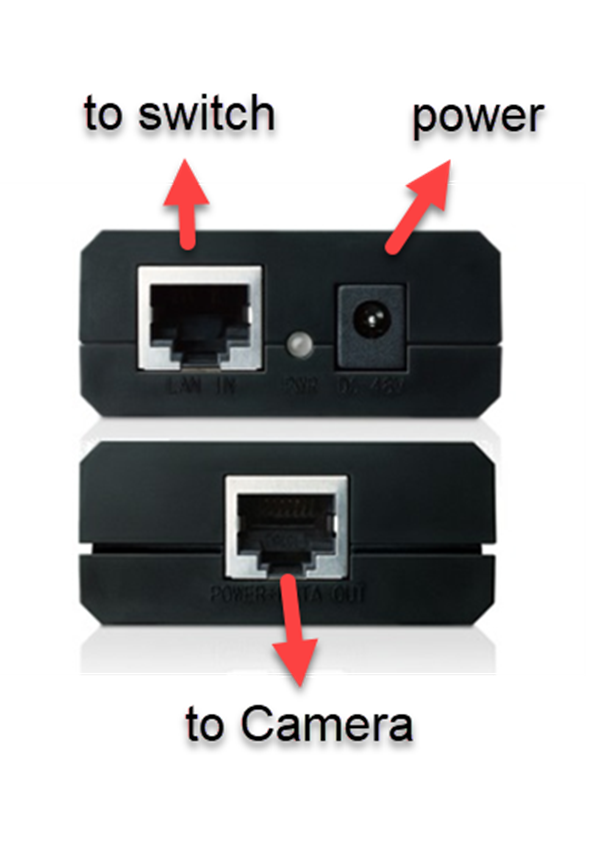
2. Placez l'injecteur PoE entre le câble et le panneau de brassage.
3. Insérez l'extrémité du câble Ethernet du compteur de trafic dans le port de sortie alimentation + données de l'injecteur PoE.
4. Insérez le câble Ethernet du commutateur dans le port LAN In de l'injecteur PoE.
5. Connectez et branchez l'adaptateur secteur de l'injecteur PoE
6. Vérifiez que le voyant LED du PoE est vert fixe en fonctionnement normal.
Vérifiez que la lunette 3D est en ligne et communique avec TMAS.
Cet article explique comment les techniciens peuvent vérifier qu'une caméra 3D est en ligne et communique avec l'application pour smartphone SMS Storetraffic et/ou le serveur TMAS, avant de quitter les lieux.
Calibrer votre appareil
Une fois votre appareil installé et sa connexion à notre serveur confirmée, l'appareil doit être calibré afin de compter et d'envoyer les données à l'application SMS Storetraffic Smartphone et/ou à TMAS.
Veuillez cliquer sur le lien suivant pour connaître l'étape suivante :
Préparation du client au rendez-vous d'étalonnage
FAQ
Q : Quel type de câble dois-je utiliser (Cat5, Cat6 ou Cat7) ?
A : Les câbles standard à utiliser sont Cat 5e ou Cat 6
Q : SMS propose-t-il des services d'installation sur site ?
A: Plus maintenant.
Le passage d'un câble Cat6 et l'installation physique d'un compteur de trafic sont deux tâches très courantes pour tout technicien moyen de nos jours.
La plupart de nos clients connaissent déjà une entreprise qui les aide parfois en matière de réseau / informatique / installations / etc.
SMS propose un manuel d'installation et une étude de site à distance gratuite afin de fournir au technicien les instructions d'installation appropriées.
SMS gère la partie critique, l'étalonnage à distance
En s'adressant directement à un technicien, les clients économisent de nombreux intermédiaires (technicien / entreprise d'installation / SMS), ce qui leur permet de réaliser des économies sur la marge nécessaire à chaque niveau.
Q : Quel type d'éclairage est le mieux adapté au télescope 3D ?
A : Le niveau d'éclairage minimal possible est de 3 LUX, cependant, SMS recommande un éclairage minimal de 6 LUX.