Start counting with PEARL

Getting started

Table of Contents


    Delete

    Attention - Pixel Phone Users :

    Due to a current bug, please follow the explanations from this article when reaching step 3 of your configuration (adding the pearl device).

    Getting Started Video

    1. What's in the box and what else do I need?

    • 2 Sensors - Main & Secondary (1 Pair per box)
    • Sensor mounts  (already attached for Side mounting)
    • Instructions Card (Scan for tutorial video and free app from store)
    • SMS Tool (Used to activate/reset sensors)
    • 8 x AA Batteries (already installed in sensors, 4 in each sensor)
    • Screwdriver (Optional - Required only if need to configure in front facing)
    • Pencil and Tape measure (Used to measure and mark mounting position)
    • Mounting Hardware (Optional -  Required only if not using the 2-way sticky adhesive already on the sensor mounts)
    2. Download Smart App, Login and setup company

    Welcome to the SMS StoreTraffic App Company Creation Guide

    Setting up your company within the SMS StoreTraffic app is a crucial first step in harnessing the power of precise foot traffic analytics. Whether you're looking to optimize daily operations, enhance customer experiences, or streamline your staffing needs, our platform is designed to facilitate these goals with ease. This guide provides a straightforward, step-by-step process to help you create your company profile, enabling you to take full advantage of our robust analytics tools. Follow these instructions to set up your company quickly and start making data-driven decisions that propel your business forward.

    Requirements

    • Downloaded App
    • Created an Account
    • Company has not been previously setup

    Company Setup / Business Hours


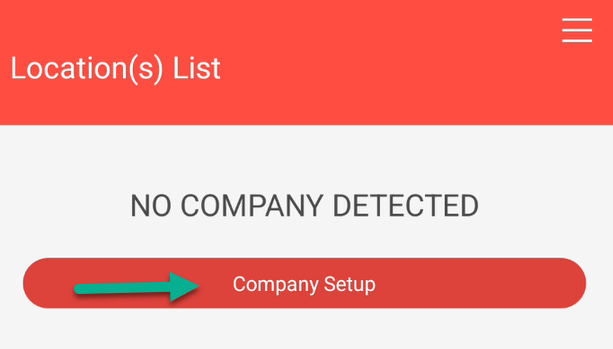
    1. Select Company Setup
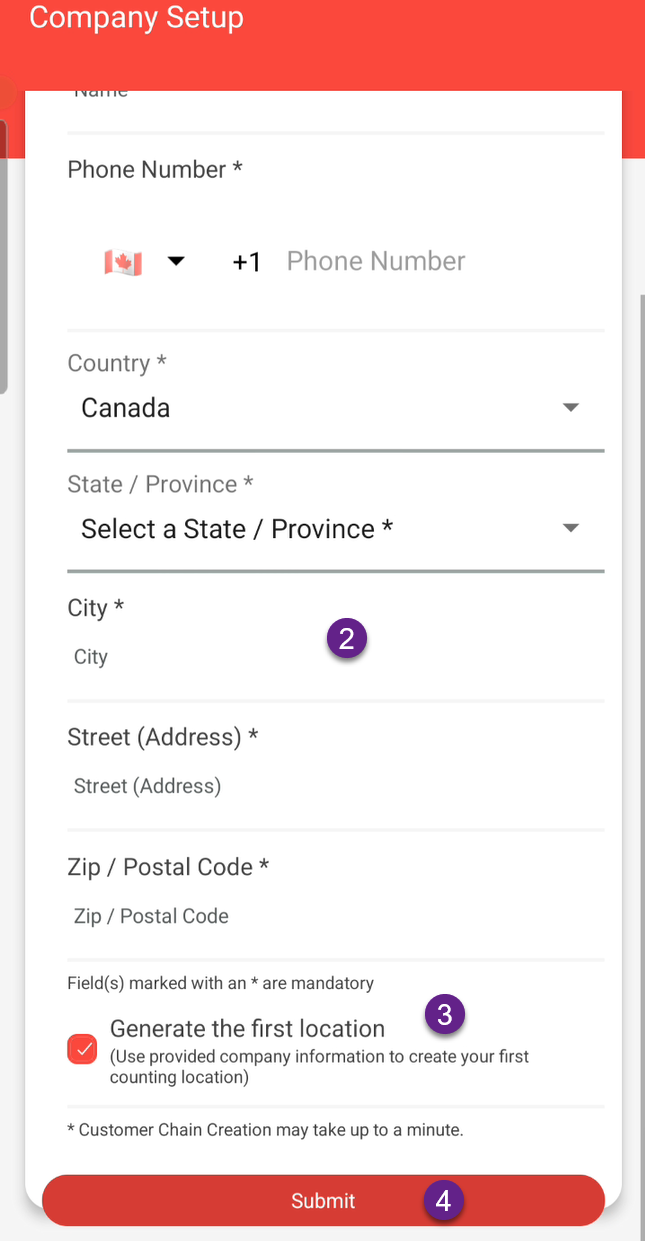
    2. Input the following information
      • Business category
      • Corp Name
      • E-mail
      • Phone number of business
      • Address information
    3. (Optional)Uncheck "Generate the First Location" if you have more than 1 location which is not in the same location as the head office. Otherwise if you only have a single location or the flagship location has the same address as the business, leave it checked.
    4. Press Submit
    5.  (Optional) If "Generate the First Location" was left unchecked, Click Add a location and repeat steps 2 and 4. for each additional location
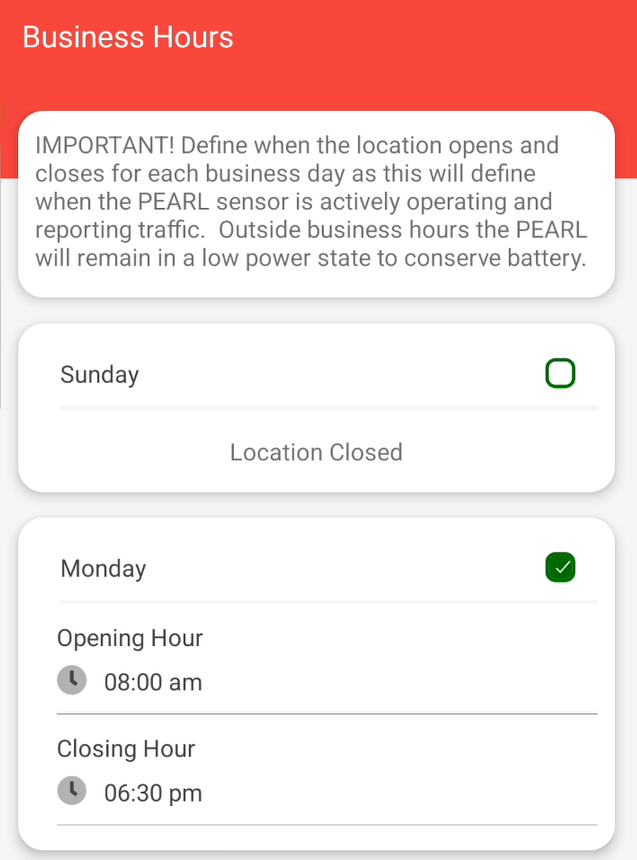
    6. Configure business hours for the location - Pearl Device Battery Saver!
      • Select or Input Opening and Closing time with the selection wheel or input time manually.
      • Uncheck day if location is closed.
    7.  Select Save Business Hours


    Company Setup F.A.Q.

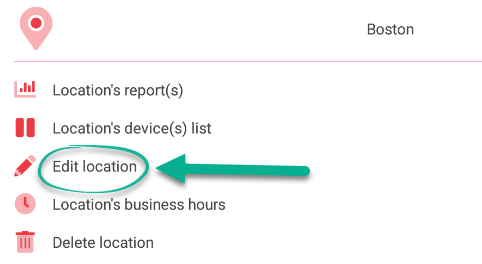
    Q: How do I edit my Company Information? A: Select Edit location from the Location options next to the location you would like to modify.
    Q: Do I need to make an account for every location? A: A single account / login can create multiple locations.  However if you do NOT have a TMAS subscription, the account is limited to simultaneous login on 2 devices at a time ONLY.  With a minimum TMAS Standard subscription, there is no limitation on the number of users for a single account.  Additional logins can be created through T.M.A.S. 
    Q: Do I need to make a location for every device? A: For reporting purposes a location should be defined as a group of devices as it will show the sum of traffic of all linked devices on the particular location.
    Q: Where can I download the Free App? A: 
    iOS
    Android

    Q: 

    I am not receiving account creation /password reset emails.

    A:
    A: Learn more here.


    3. Adding the Pearl Device

    Adding a device

    1. Launch the SMS Smart App.
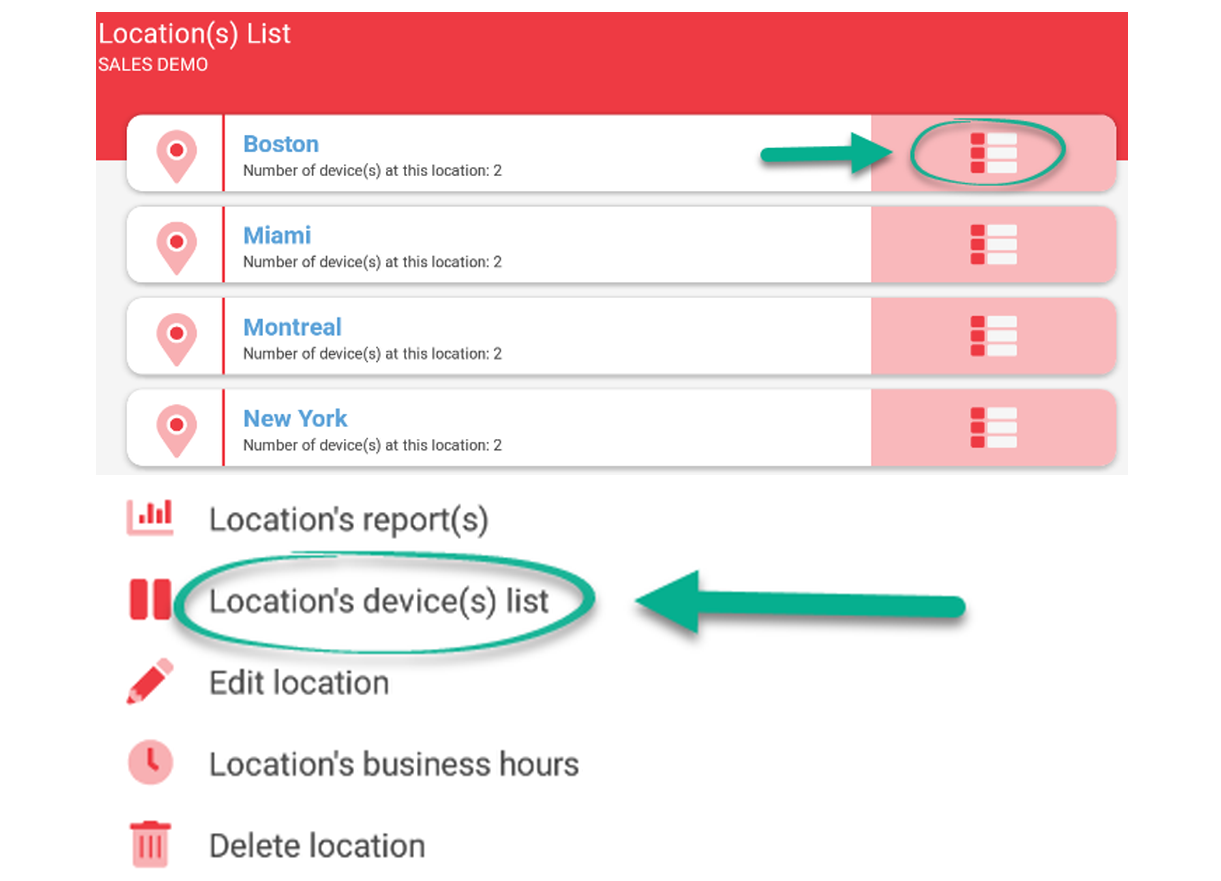
    2. Select a location from the Location(s) list.
    3. Select Location's device(s) list
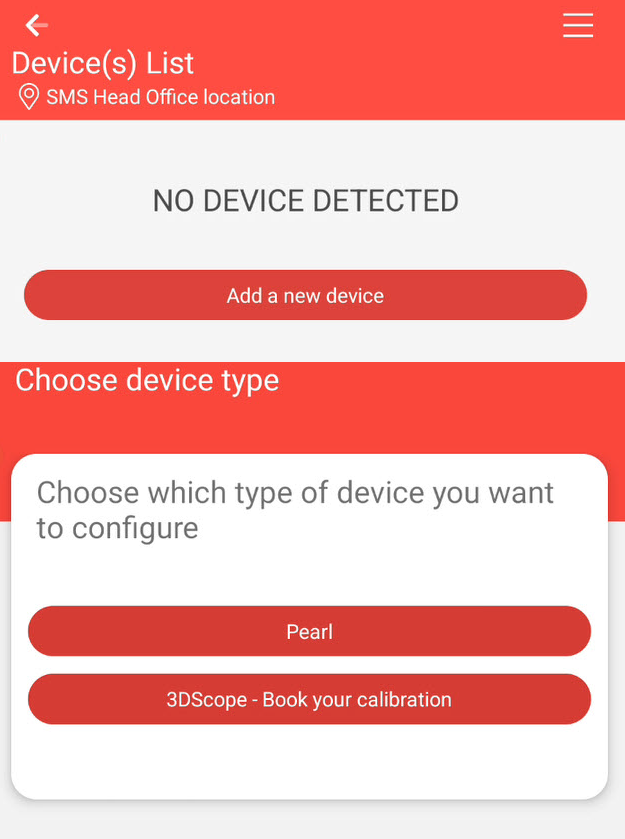
    4. Select add a new device from the Device(s) List
      • Only add a 2nd device to a location if you would like the devices traffic to be summed in the reports with the other devices presently in this location.  Otherwise you should create another location and add it there.
    5. Select Pearl for the device type
      • 3DScope are added during the calibration appointment, book it through the app. Using the 3DScope button.
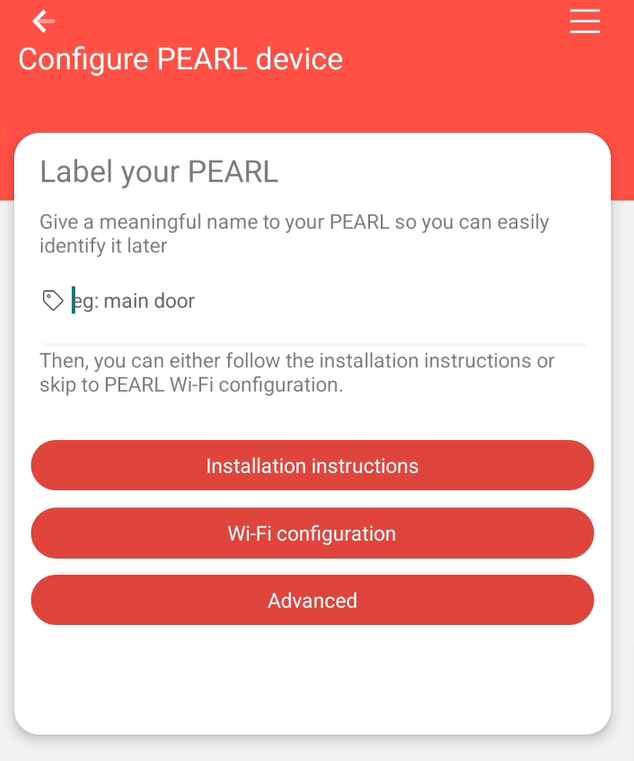
    6. Label the pearl typically based on the location or entrance that it will be counting at.
    7. Select a configuration option
      • Installation Instructions - Ideal for 1st time setup. Includes mounting instructions + WiFi setup
      • Wi-Fi configuration only (Device is already installed)
      • Advanced - Use to bypass DHCP and program a static IP for the PEARL counter.
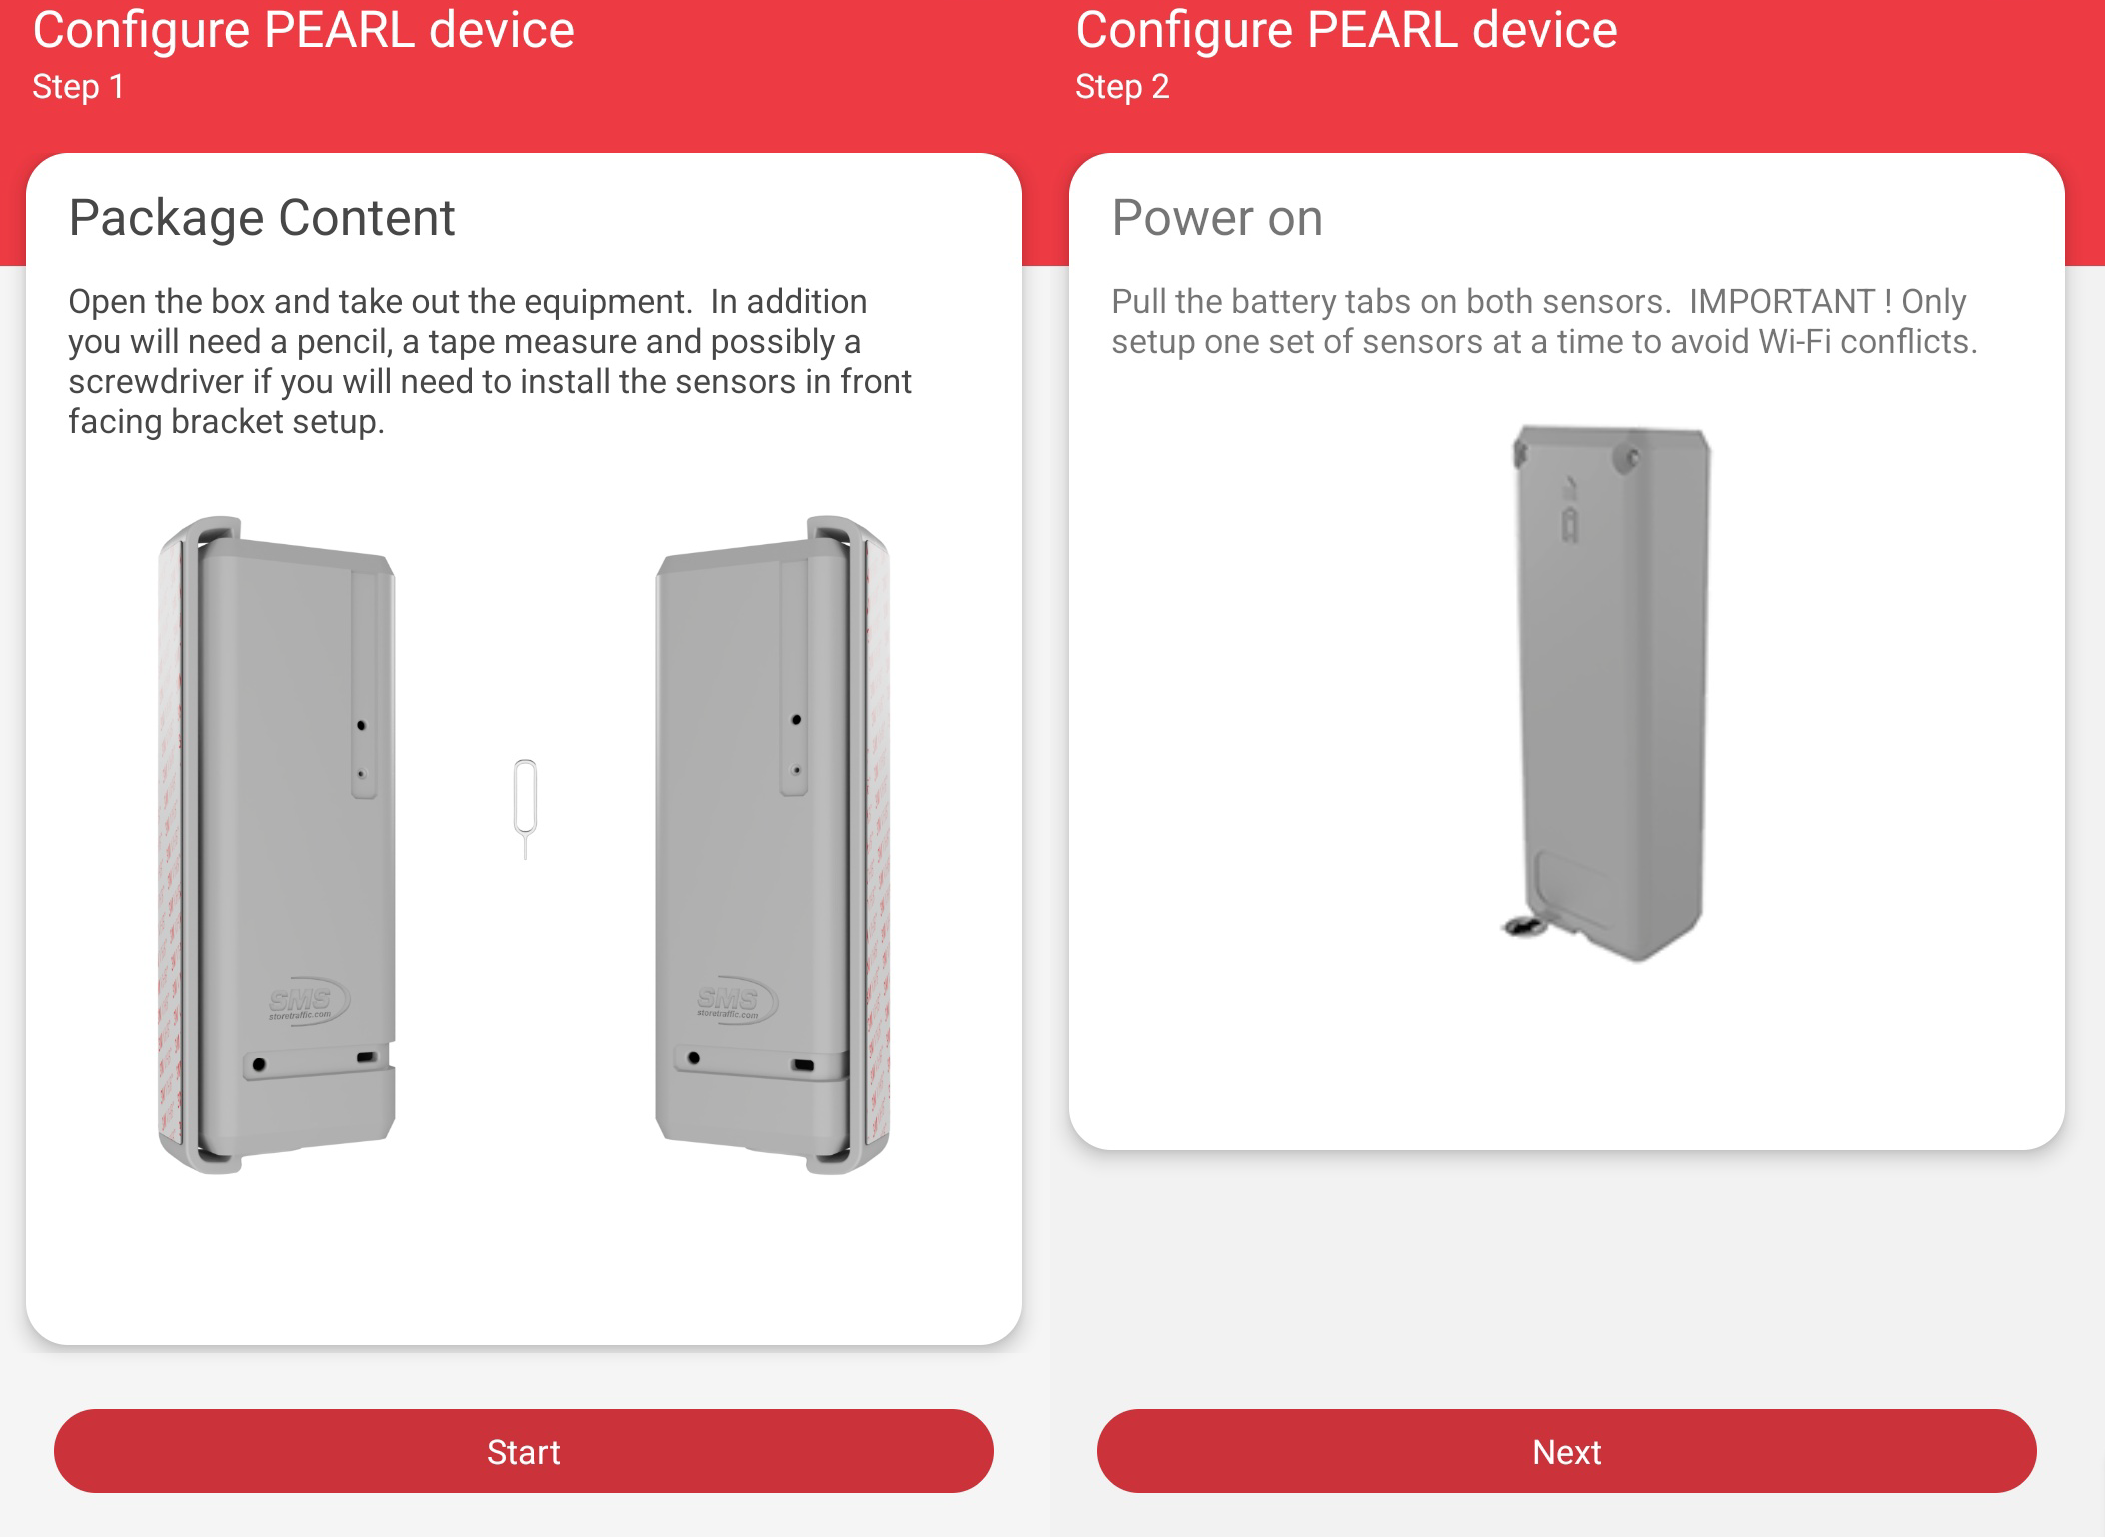
    8. Openthe box and take out the equipment. 
      • In addition you will need a pencil, a tape measure and possibly a screwdriver if you will need to install the sensors in front facing bracket setup.
    9. press START
    10. Pull the battery tabs on BOTH sensorsNote *Only setup 1 Pearl set at a time to avoid potential conflicts.
    11. Press Next
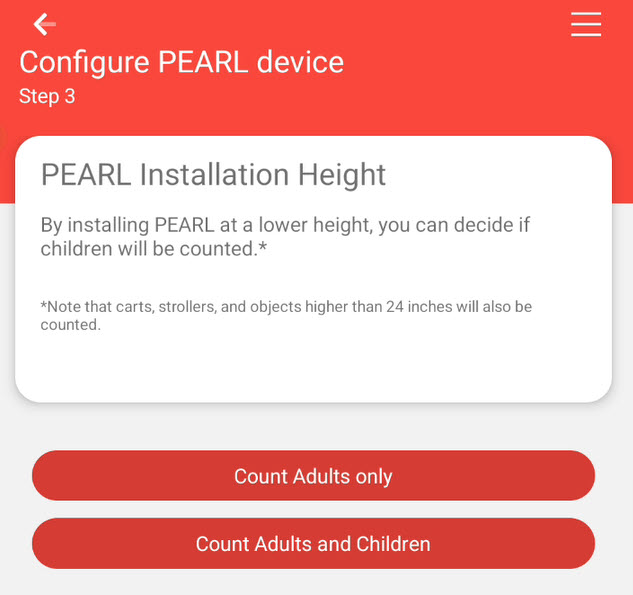
    12. Select an Installation height
      • Count Adults only - 54"
      • Count Adults and Children - 24" 
        Note: That mounting at 24" will also count carts, strollers and objects higher than 24" passing through.
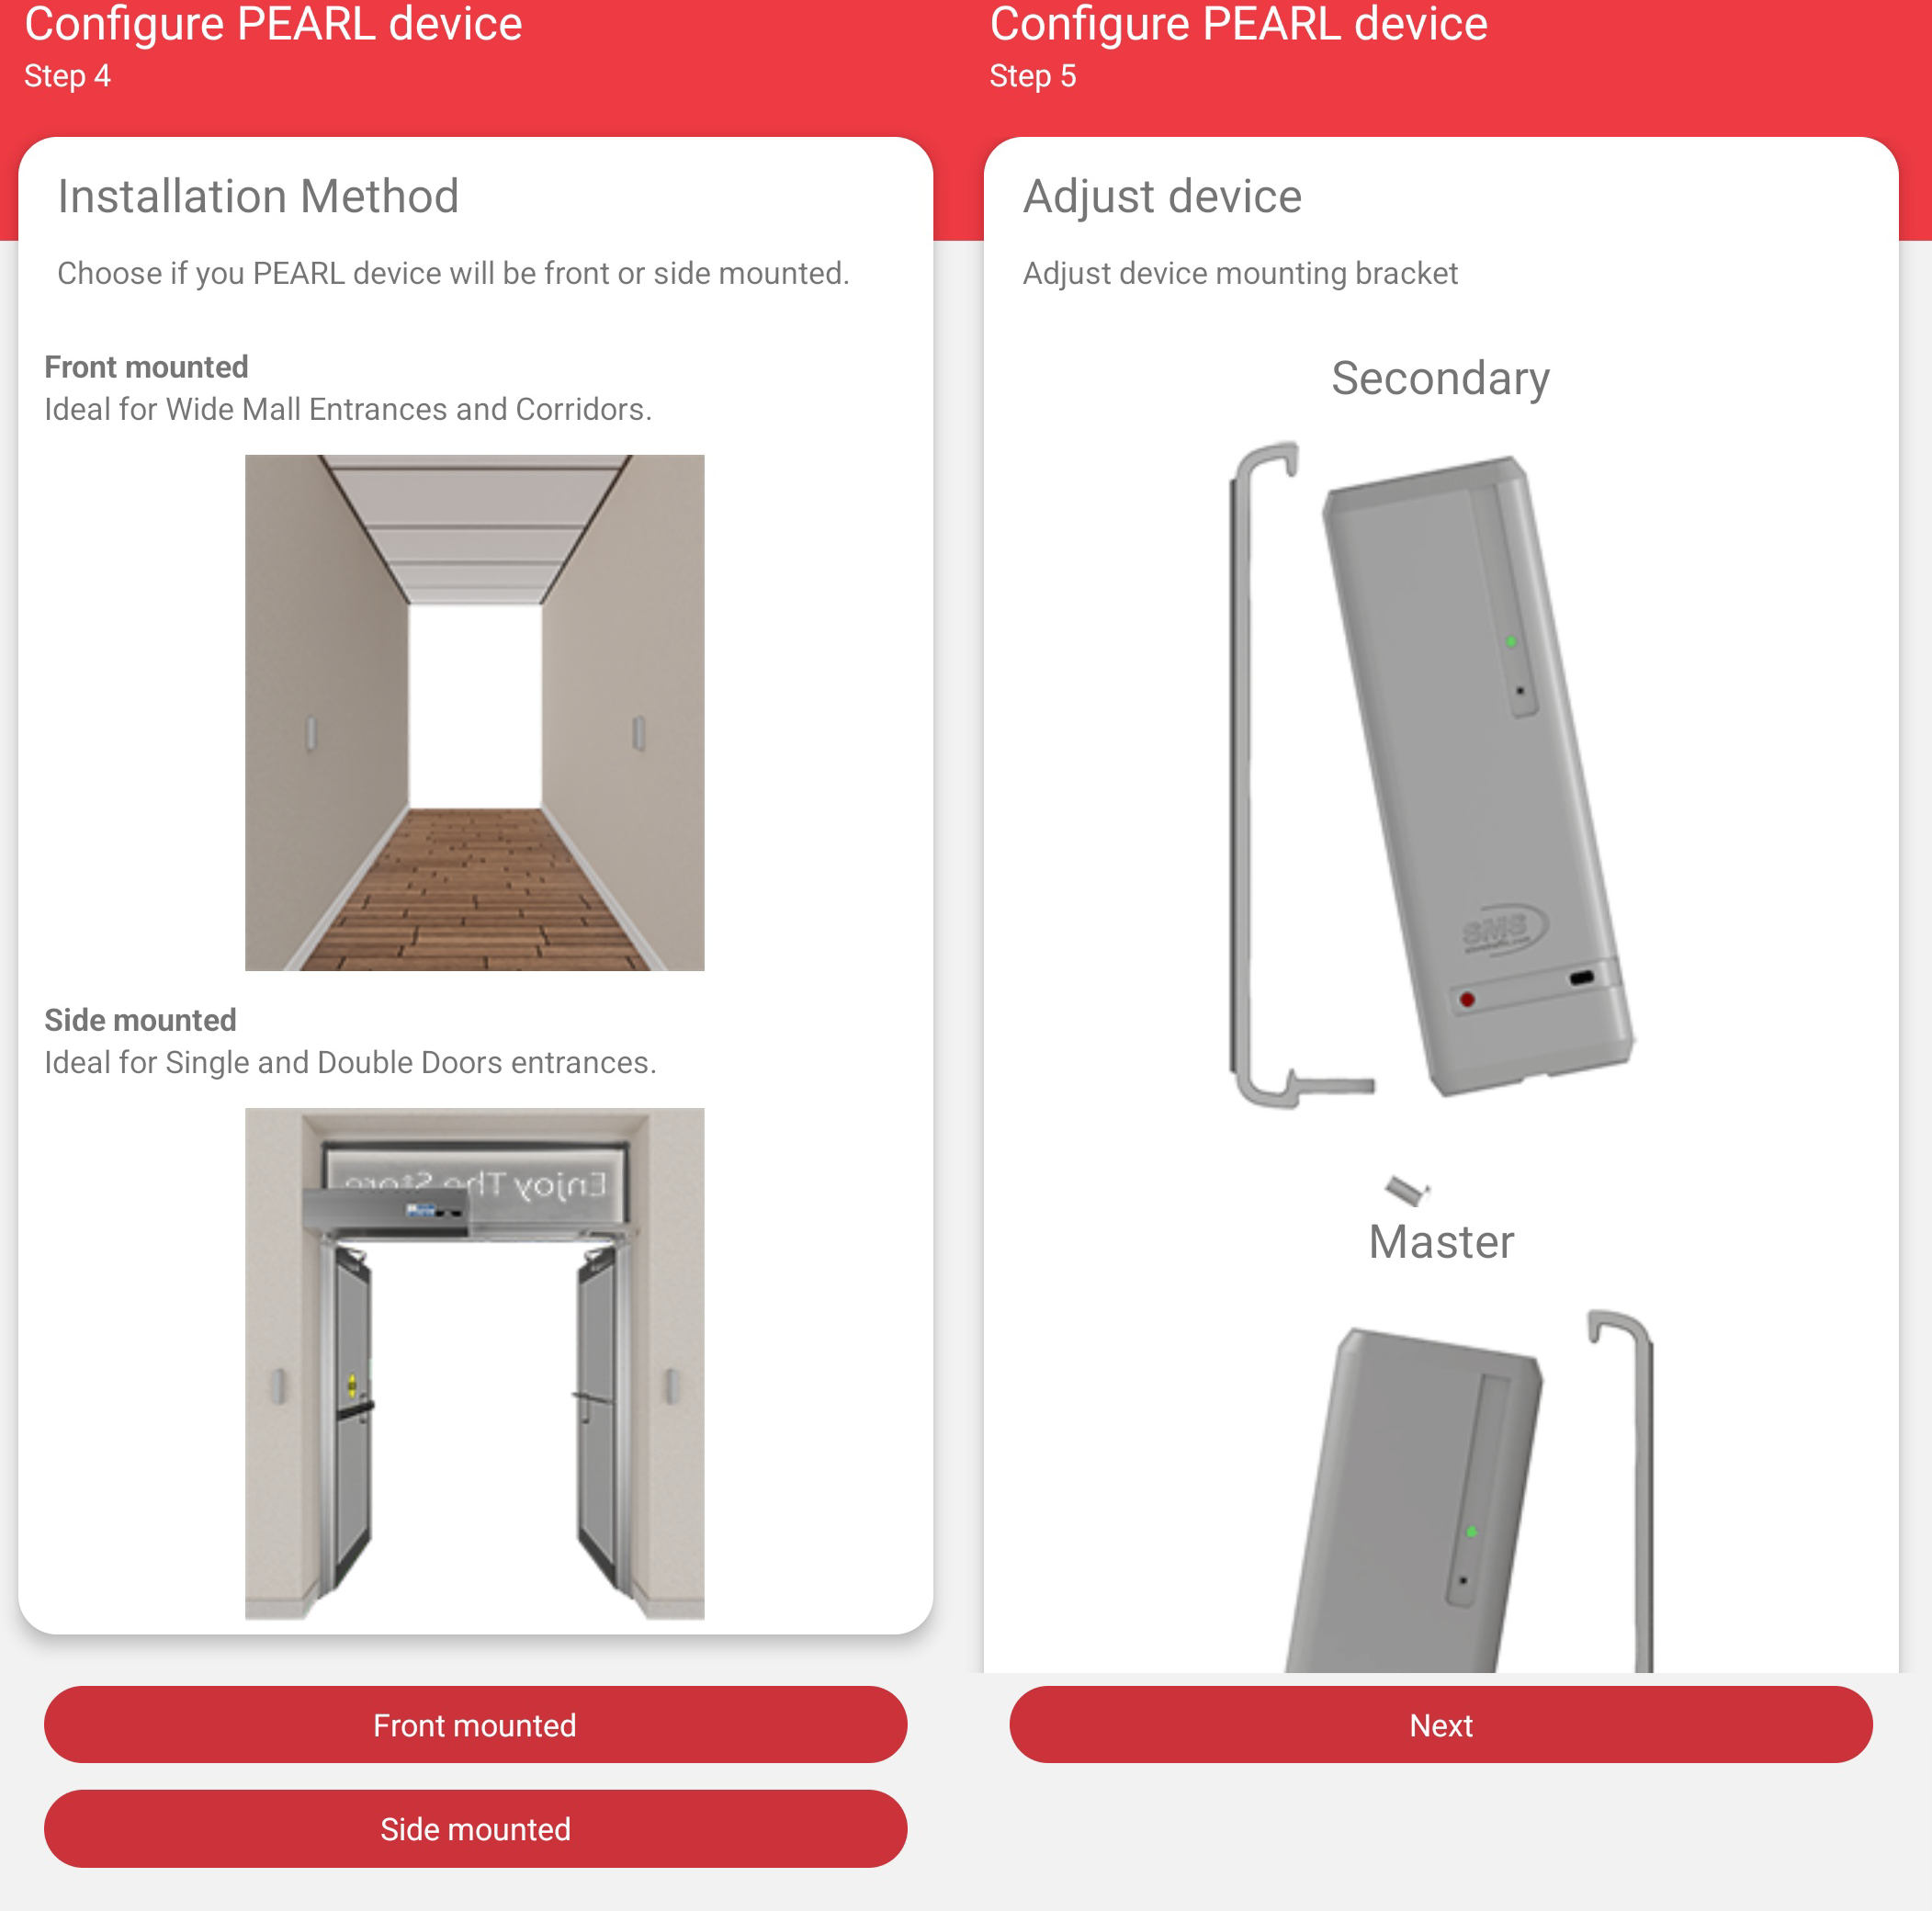
    13. Select an Installation Method
      • Front Mounted - Ideal for wide mall entrance and corridors
      • Side Mounted - Ideal for single or double door entrances
    14. Adjust device mounting bracket based on selection in last step.
    15. Press Next
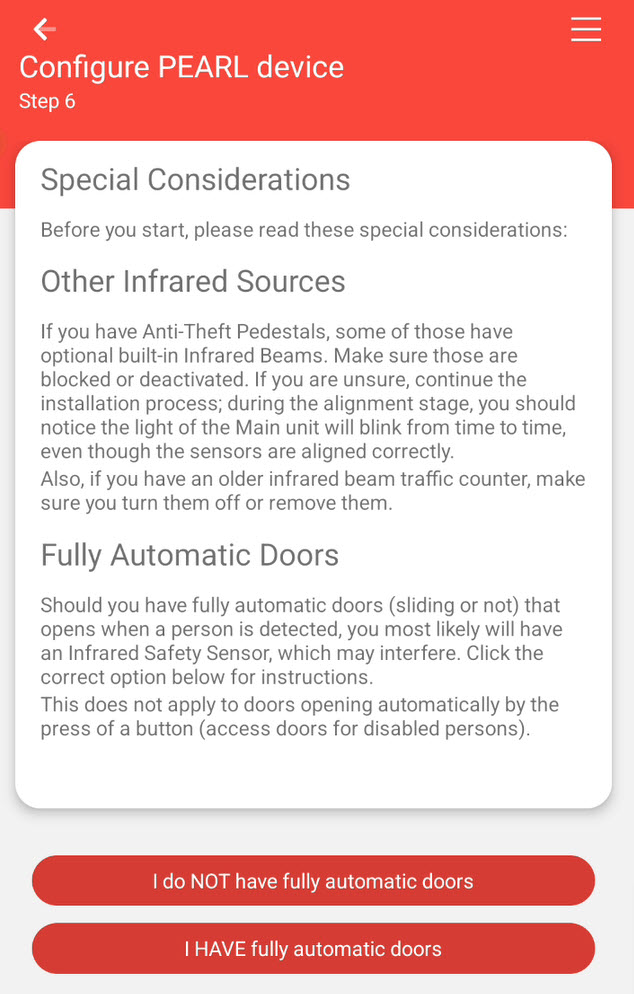
    16. Verify Special Considerations - Before you start, read the special considerations.
      • Other Infrared Sources - If you have Anti-Theft pedestals, some of those have optional built-in infrared beams. Make sure those are blocked or deactivated. If you are unsure, continue the installation process; during the alignment stage, you should notice the light of the Main unit will blink from time to time, even though the sensors are aligned correctly.
      • Fully Automatic Doors - Should you have fully automatic doors (sliding or not) that opens when a person is detected, you most likely will have an Infrared Safety Sensor, which may interfere.
      • This does not apply to doors opening automatically by the press of a button (access doors for disabled persons).
    17. If you I do NOT have fully automatic doors select that option, otherwise select I HAVE fully automatic doors.  
    18. Once accessed and followed return andselect Install complete! Next!
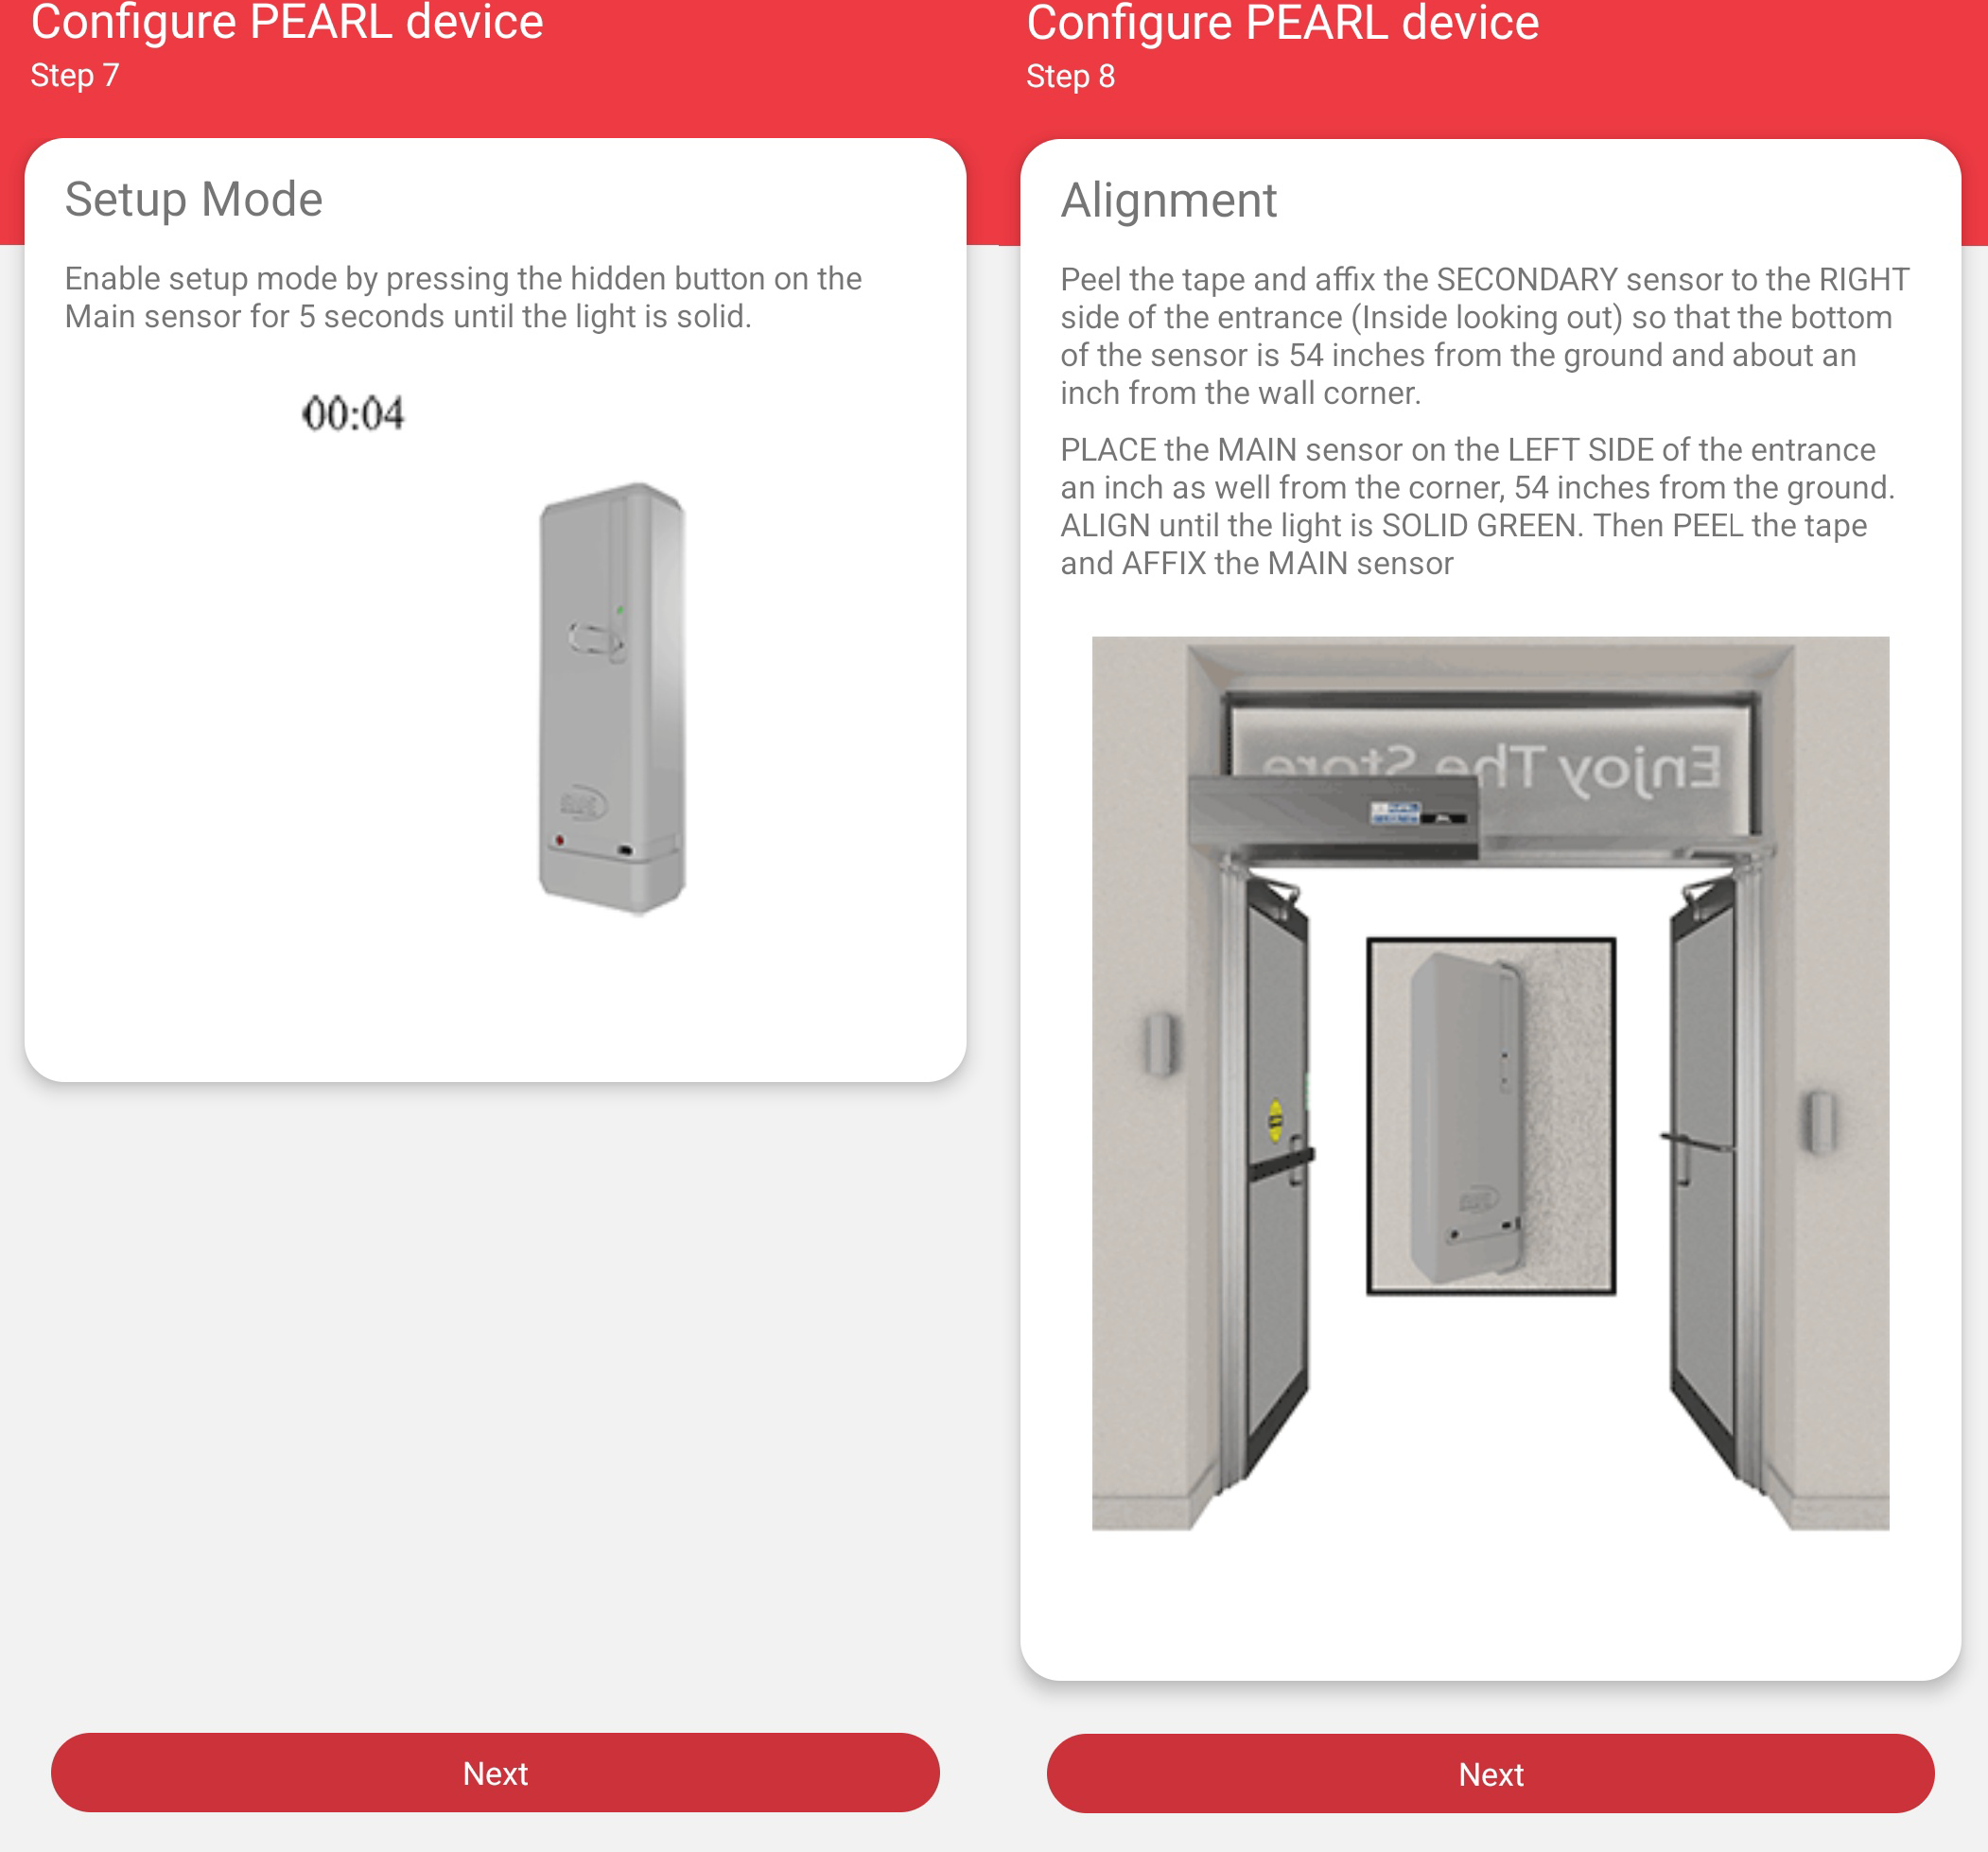
    19. Enable Setup Mode by pressing the hidden button on the Main Sensor for 5 seconds until the light is solid.
    20. Press Next
    21. Perform the installation alignment instructions based on the previous options you selected which includes mounting height of 54" (Adult Only) or 24" (Adult and Children).
    22. Press Next
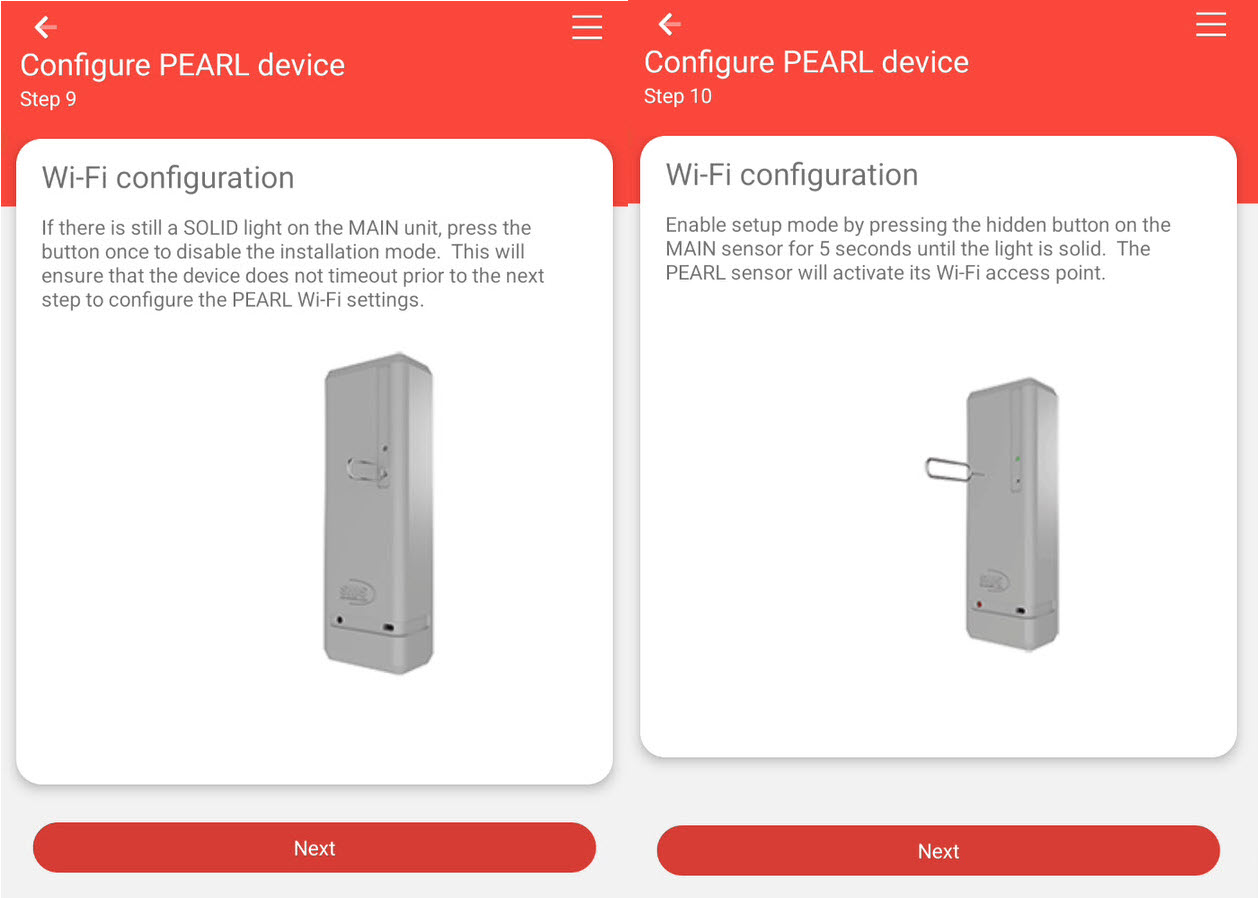
    23. Verify if there is still a SOLID light on the MAIN unit of the PEARL.
      • If there is, press the button once to disable the installation mode.  This will ensure that the device does not timeout 
    24. Press Next
    25. Verify if Setup mode is still activated and if so, press the hidden button to disable.  This will prevent an unnecessary timeout during the Wi-Fi configuration steps.
    26. Press Next
    27. Enable setup mode by pressing the hidden button on the MAIN sensor for 5 seconds until the light is solid.  This will cause the PEARL to activate its Wi-Fi access point (Storetraffic_Pearl). Note* This mode will time out after 10mins.
    28. Press Next
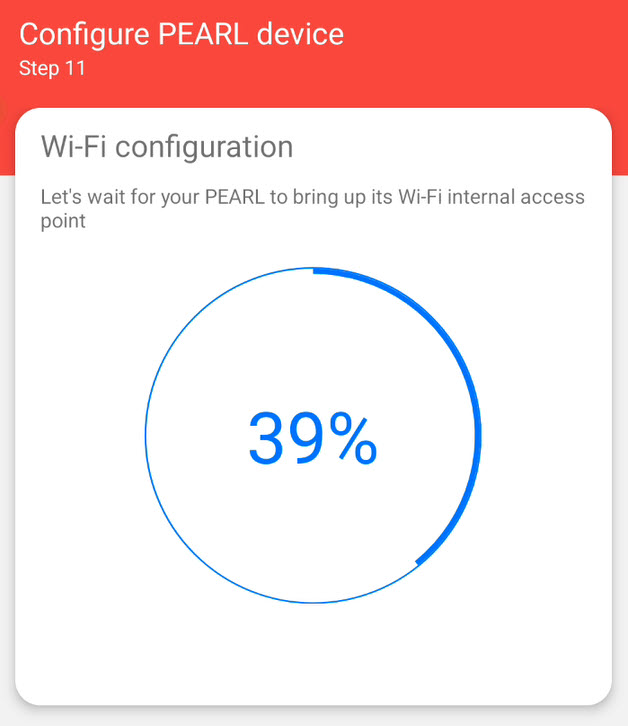
    29. Allow for Wi-Fi configuration timer will fill to 100%, then you will progress to the next step. 
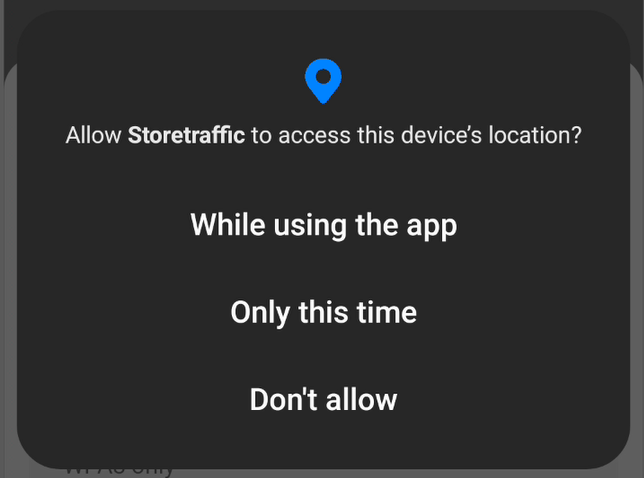
    30. Allow access to device location options if prompted.
    31. Take note of the Supported / Unsupported Wi-Fi Networks
      • Supported : 2.4Ghz and WPA / WPA2 / WEP
      • Not Supported : 5Ghz only, WPA3 only, WPA 2/3 Enterprise, and open Wi-Fi with Network login page.
    32. Drag down the Supported / Unsupported notes to continue
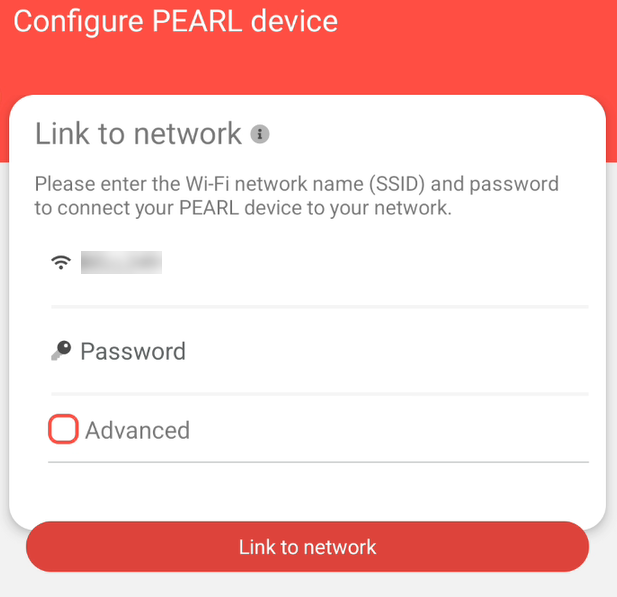
    33. Link the Pearl to the network by inputting the following;
      • SSID (Currently connected network on programming device will appear) erase and input another if needed.
      • PASSWORD - for Wi-Fi network needed to access the internet
      • (optional) Advanced - Set a static Network IP addresses for the PEARL if you would rather not use DHCP.
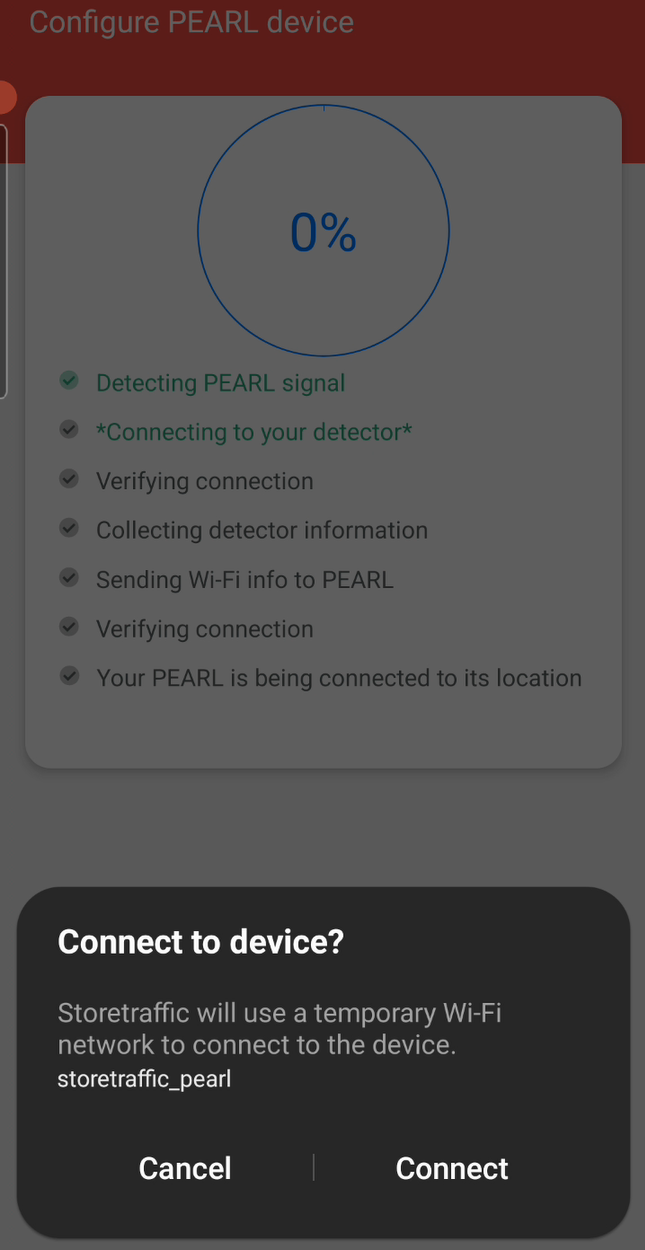
    34. Linking process with to Pearl. During this step you may be asked to connect/join the Storetraffic_pearl Network. You will need to accept. Once connected the APP will send the network into the PEARL.
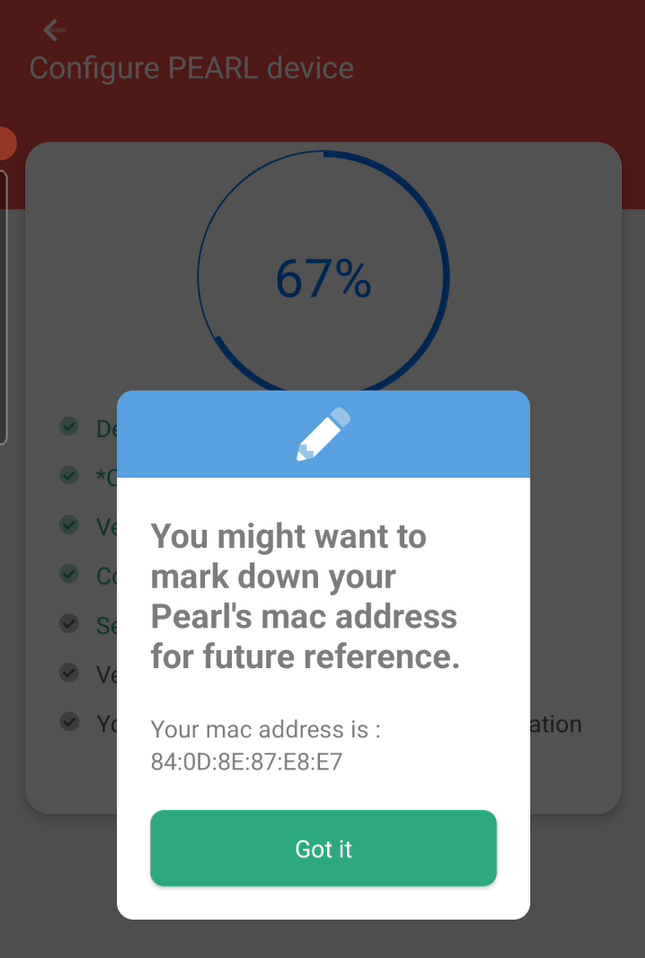
    35. Take note of the MAC address displayed in the event there is an issue and you need to provide it to someone.
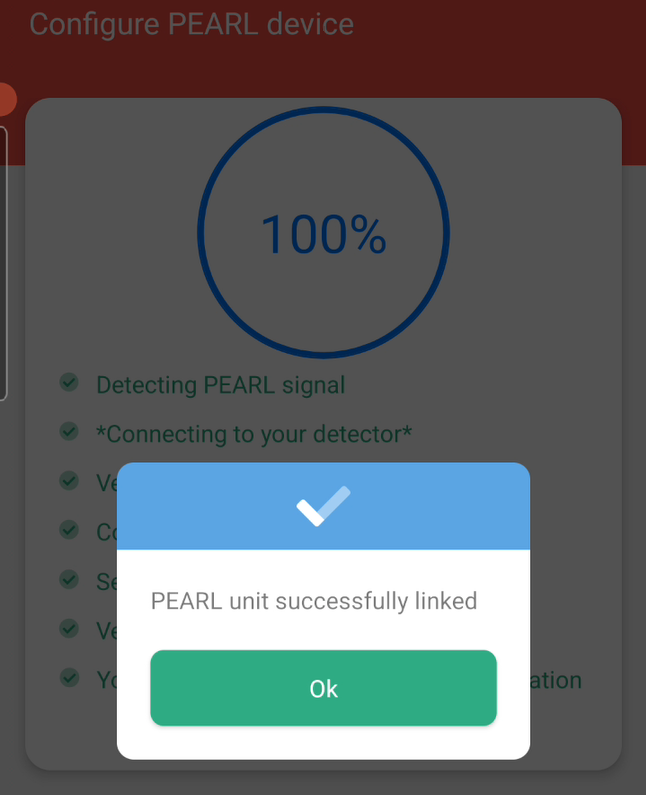
    36. PEARL unit successfully linked, Press OK.  Device will now be displayed in the Location's device list.


    FAQ

    Q: I have added my first device and need to add more. Does a new account need to be created for each subsequent device?
    A: No...add your new PEARL unit(s) to your existing account on the App or in T.M.A.S. directly.


    Pearl Installation F.A.Q.

    Q: At what height should the sensors be mounted at?

    A: The PEARL counter should be mounted at approximately 54" inches (137cm) for Adult ONLY counting.  
    If you wish to also include children in the count, then mount the counter at 24" inches.  
    Note : mounting at a lower height may also include counts from carts, strollers and objects higher than 24" passing through."

    ____

    Q: How wide an entrance does the PEARL counter cover?

    A: The PEARL counters can cover an entrance as wide as 15 Feet (approx. 4.5m), Should you require a wider coverage, consider our 3DScope counter.

    ____

    Q: Does the PEARL counter work through glass?

    A: The PEARL counter requires an unobstructed view in-between the sensors in order to count accurately. Glass can have different tint, thickness or reflective properties therefore making NOT the recommended counting technology.  Ask us about our 3DScope counter.

    ____

    Q: What can I do if the Wi-Fi signal at our entrance is not strong enough for the PEARL?

    A: You would need to possibly add a Wi-Fi extender. Click here to learn more about extenders and PEARLS

    ____

    Q: I have added my first device and need to add more. Does a new account need to be created for each subsequent device?
    A: No...add your new PEARL unit(s) to your existing account on the App or in T.M.A.S. directly.

    ____

    Q: I am getting stuck at 67% when doing my PEARL setup
    A: Please contact our support team at https://help.storetraffic.com/

    header-top-left-border Created with Sketch.
    header-top-right-border Created with Sketch.